ConfigureEmail
How to Configure Email Templates
All email notifications for every module are managed from this section. The Data Governance Tool enables you to configure emails for every possible event type across all modules. You can also schedule automated reminder emails as per your requirements and utilize pre-drafted templates. This centralized approach ensures that requests, information sharing, verification, validation, and client communications for all modules are efficiently handled via email notifications from one place.
- Log in to the Data Governance Tool.
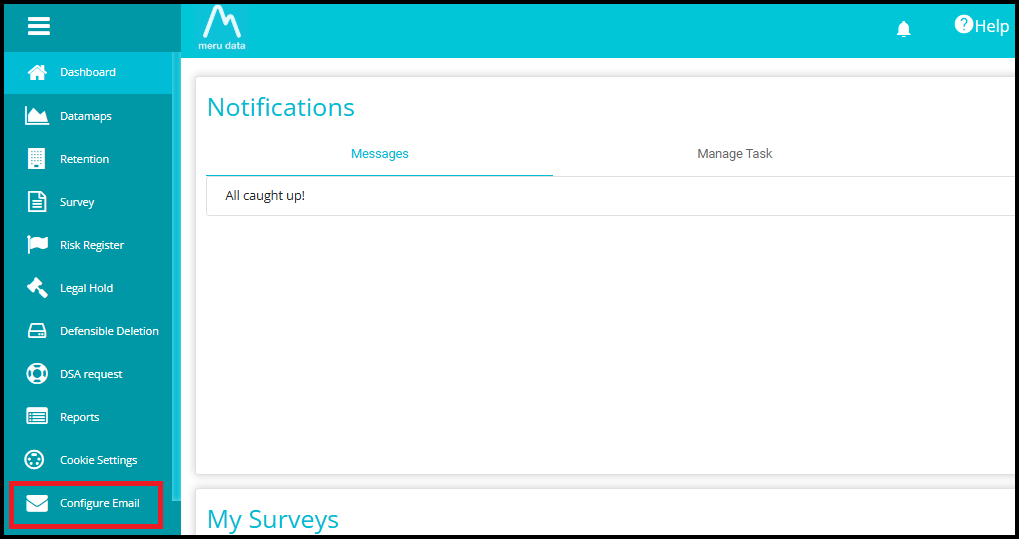
Once logged in, the Main Screen of Data Governance Tool will be displayed.
Click on 'Configure Email' from the menu.
- The Email Configuration Page will display already existing email templates, as well as the option to search, create new templates, filter templates, and export.
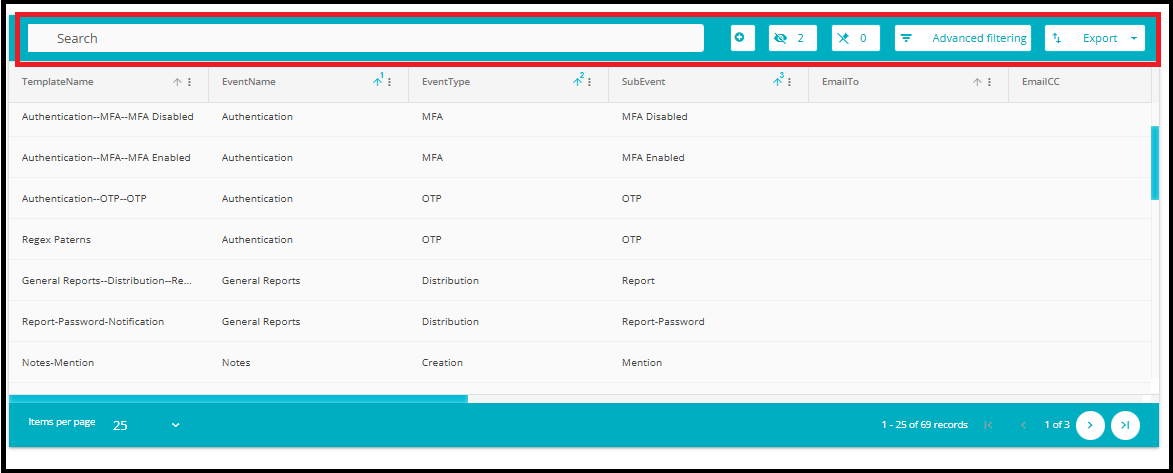
- To create a new template, click on the Add button located to the right of the 'Search Bar'.

- The Email configuration page displays multiple fields:
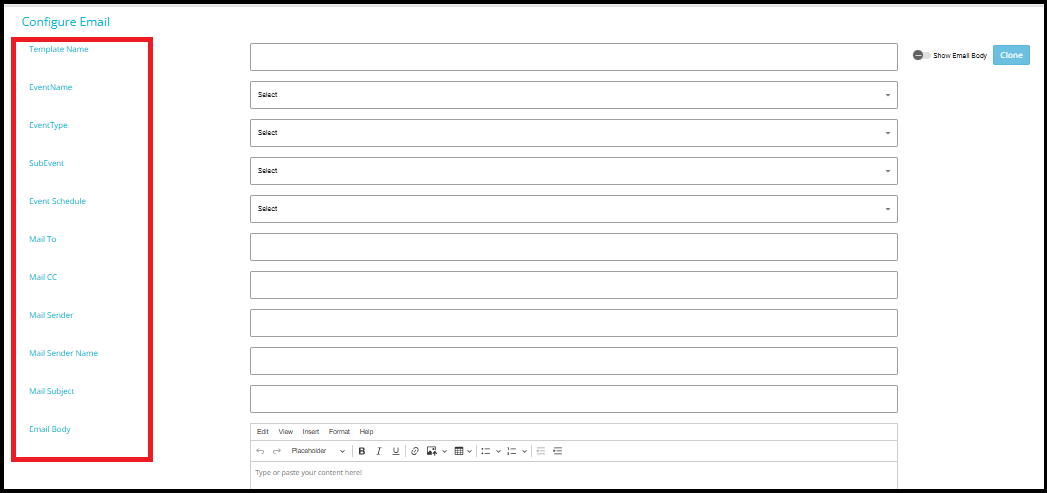
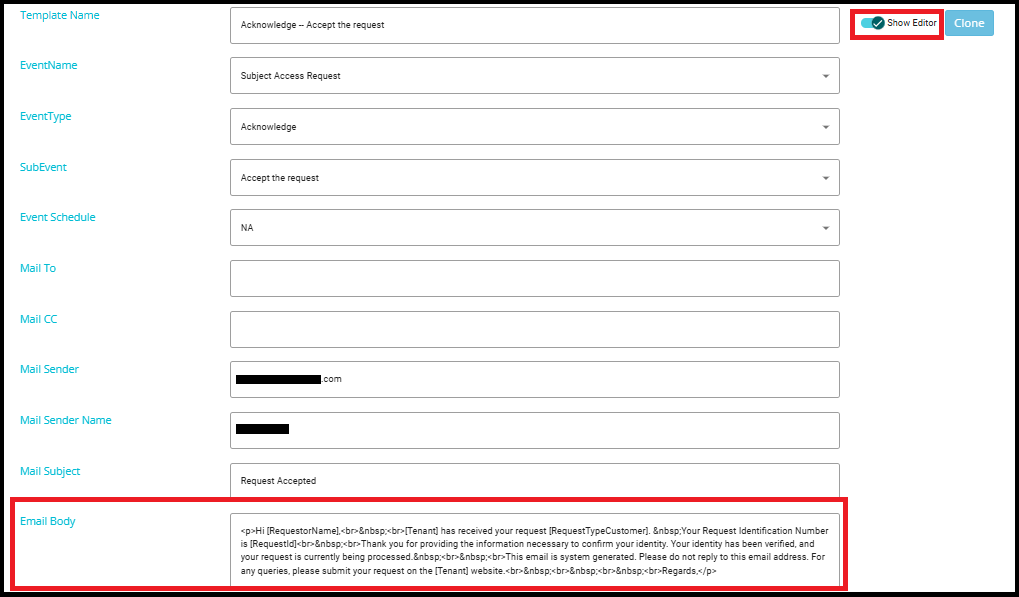
- Template Name: You can title the email template when creating/editing it.

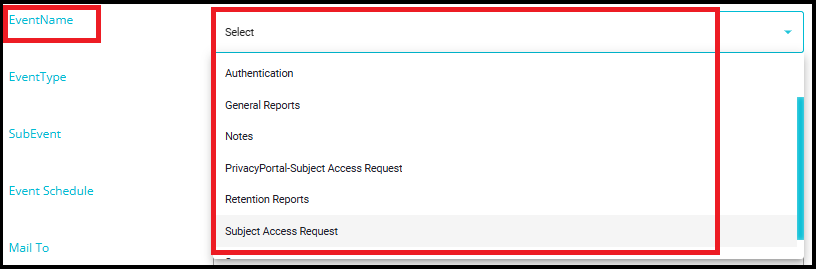
- Event Name: Refers to the type of event or activity for which the email template is used. Examples include Authentication, Subject Access Request (DSAR), Survey, etc.
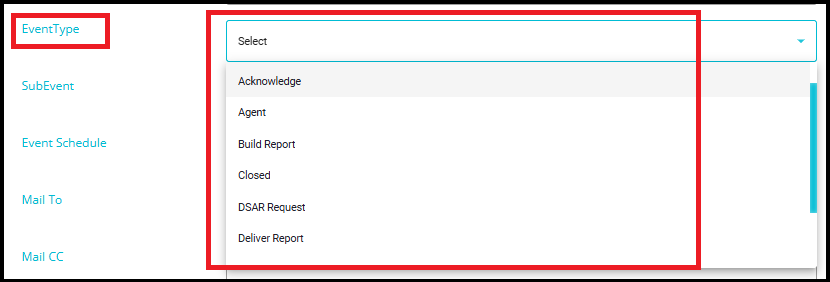
- Event Type: This represents the subcategory of the selected Event Name. After choosing an Event Name, you must select the appropriate Event Type from a predefined dropdown list. For example, if you choose "Subject Access Request" as the Event Name, the Event Type dropdown may include options such as Acknowledge, Agent, Build Report, Closed, etc.
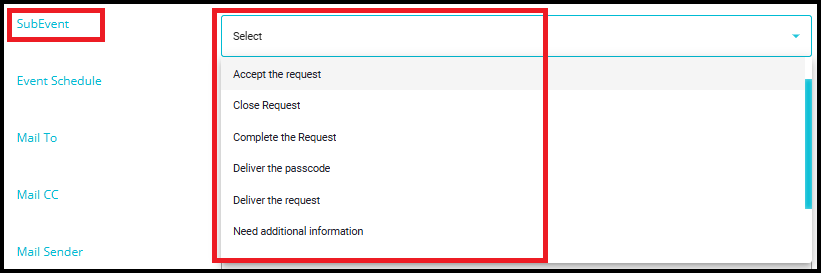
- Sub Event: This represents the subcategory of the selected Event Type. After choosing an Event Type, the Sub Event must be selected from a predefined dropdown list.
For example, if the Event Name is "Subject Access Request" and the Event Type is "Acknowledge", the Sub Event dropdown will display options such as Accept the request, Close Request, Complete the request, etc.
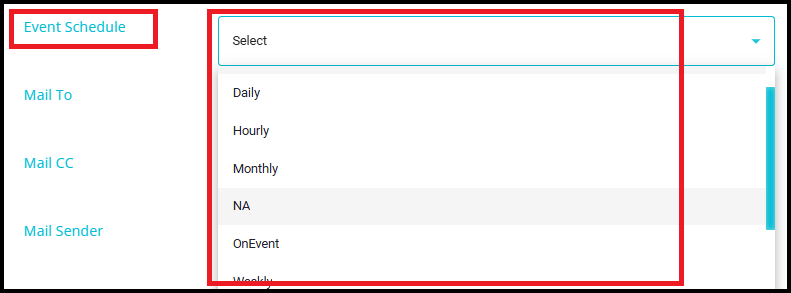
- Event Schedule: This field allows you to define how frequently the email will be sent. You can choose from predefined options such as Daily, Hourly, Monthly, Weekly, or NA. Select NA (No Action) if you want to keep the Event Schedule blank or invalid.
Note: The Event Schedule feature is primarily used for managing report schedules. Other modules, such as DSR and Survey, have their own built-in reminder logic and do not rely on this event's scheduling option.
Mail To: Here you can enter the email address(es) of the users to whom this email will be sent when the template is applied within a workflow. This field is optional and may be left blank if needed.
Mail CC: Here you can enter the email address(es) of users who should be included in the CC of the email when the template is applied within a workflow. This field is optional and may be left blank if needed.

Mail Sender: This field specifies the email address of the sender from which the email will be delivered. The value entered here will appear as the "From" address when the template is used within a workflow. Ensure that the sender's email address is valid and authorized for sending automated notifications.
Mail Sender Name: This field specifies the display name that will appear as the sender when the email is delivered. The Mail Sender Name is shown to recipients in their inbox, helping them recognize the source of communication. It can be a person's name, a department name, or the name of the organization.
Note: When sending emails related to DSR, the system determines the Mail Sender Name using the following order:
The system first checks if a sender's name is provided in the DSR configuration under the Domain settings.
If no sender name is found at the domain level, the system checks the Tenant configuration under the settings for a sender name.
If neither of the above is provided, the system uses the Mail Sender Name specified in the Configure Email section.
- Mail Subject: This field allows you to define the subject line of the email. The subject should clearly describe the purpose of the email and may include variables or placeholders. A well‑structured subject line helps recipients quickly understand the context of the message.

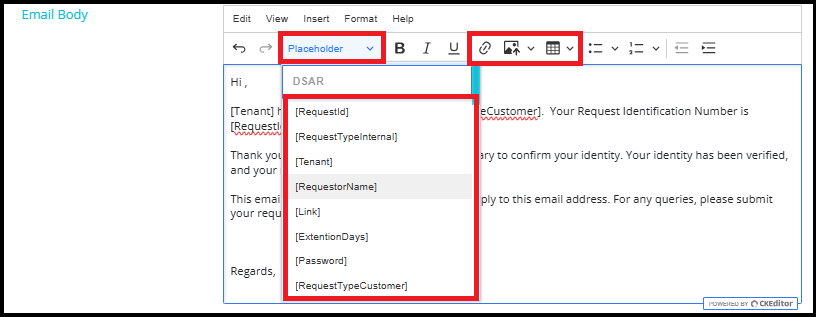
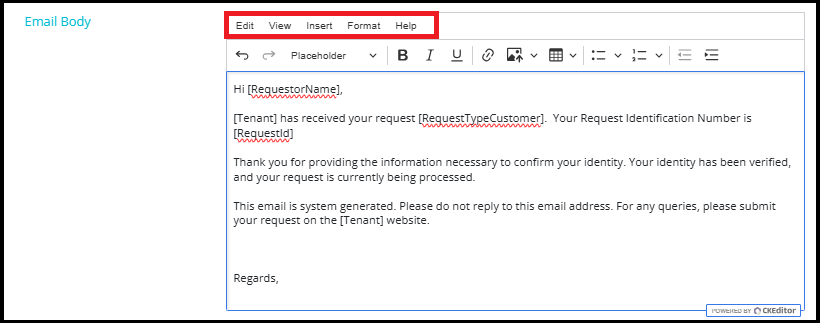
Email Body: This is the main content area of the email. You can compose the body using plain text or HTML, depending on the formatting requirements. The Email Body may include placeholders, dynamic fields, or structured layouts to personalize communication. Ensure that the content is clear, accurate, and relevant to the selected event and workflow.
When the toggle is OFF: You will be able to view and use the full CK Editor interface.


With CK Editor, you can:
Use placeholders for dynamic fields
Insert links, images, and tables
Format text professionally
Note: Placeholders specific to a module will only work for that particular module. For example, if placeholders from the DSR module are added to an email template and that template is used for the Survey module, some placeholders may not function as expected. Always ensure that the placeholders in your template match the module where the template will be used.
- Utilize editing, viewing, inserting, and formatting tools via the top menu
- When the toggle is ON: You will see the Email Body in plain HTML/text format.
- Is Active: This option determines whether the configured email template is currently active. If set to Yes, the template will be considered Active and can be used within workflows. If set to No, the template becomes Inactive and will not be triggered or applied in any workflow processes.

- Clone: The Clone option allows you to create an exact copy of the selected email template. When you click Clone, the system duplicates all the fields---including Event Name, Event Type, SubEvent, Mail Sender, Mail Subject, Email Body, and other configurations---and creates a new editable template based on the original.
This feature is useful when:
You want to create a new template that is similar to an existing one.
You need multiple versions of a template with small variations.
You want to avoid re‑entering the same information manually.
After cloning, you can simply modify the fields you need to change and save the new template.

- Once all the required information has been filed in, click the Save button at the bottom right corner of the page.
