CCM upload file & Reclassify
Overview
This document explains how to update cookie scan results using the Upload File and Reclassify functionalities. It covers uploading large volumes of cookie data using the Upload File option, manually adding cookies using the Add (+) button, and updating or deleting existing cookie information. The document also describes how reclassification creates a new scan result version and how users can roll back to a previous version when required.
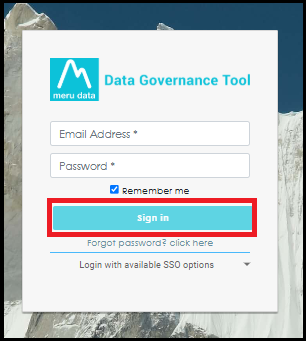
- Login to the Data Governance Tool by entering your credentials.
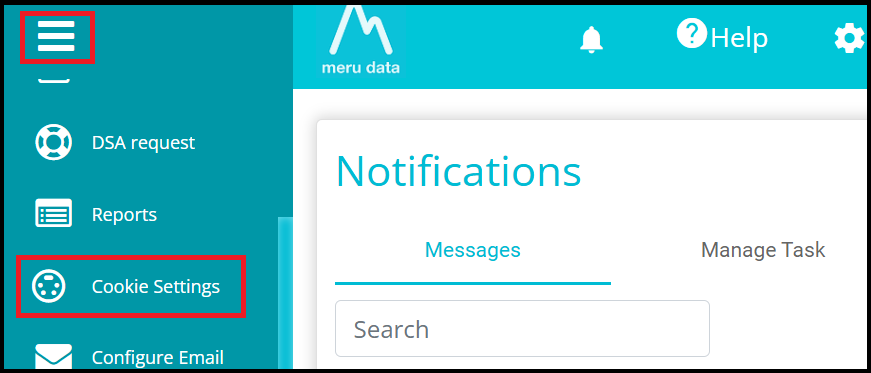
Click on the hamburger menu (three horizontal lines).
Navigate to Cookie Settings from the left-hand menu.
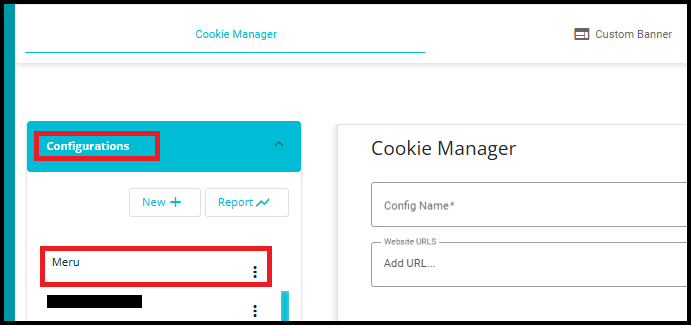
- In the Configurations section, click on any existing configuration.
- After selecting a configuration, click the GoTo Scan button.

- Alternatively, click the three-dot (More Actions) menu next to the configuration name and select Scan and Autoblock.
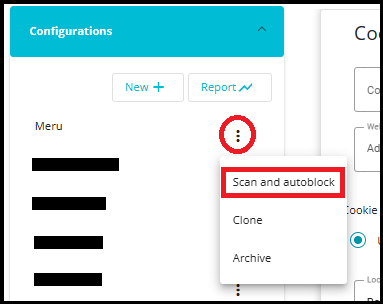
Whether you click GoTo Scan or select Scan and Autoblock from the More Actions (three-dot) menu, the system navigates you directly to the Cookie Scanning and Auto Blocking page associated with the selected configuration.
On the Cookie Scanning and Auto Blocking page, click the Results tab.
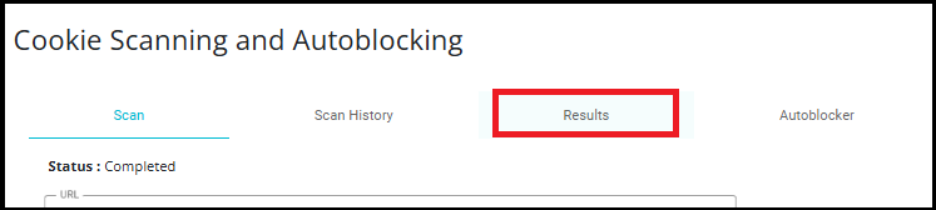
- Verify the currently selected version from the Version dropdown.
In this example, the selected version is Version_3, and the Version Type is displayed as Current.
Versions created directly from a cookie scan are displayed with the suffix "(Scan_Result)" (for example, Version_1 (Scan_Result)). Versions created through Upload File, UI Reclassification, or Rollback operations are displayed only with the version number (for example, Version_3, Version_4, etc.).

Export Existing Cookies for Bulk Updates
If multiple cookie categories, vendors, or cookie details need to be updated, users can export the existing data, modify the required records in Excel, and upload the same file instead of updating each cookie manually through the grid.
To update multiple existing cookies, export the current cookie data from the results grid, make the required changes in the exported file, and then upload the updated file using the Upload File feature.
click the Export button above the cookie results grid.
Select one of the following export options:
Export with URLs -- Exports cookie information along with the associated page URLs.
Export without URLs -- Exports only the cookie information without page URL details.

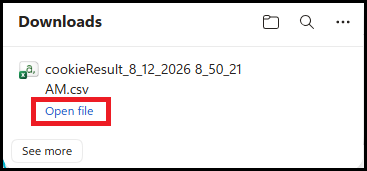
The system downloads the selected file in CSV/xlsx format.
Open the downloaded CSV/Xlsx file in Microsoft Excel or any compatible spreadsheet application.
Save the modified file.
Use the Upload File option to upload the updated file.
Click Reclassify to process the changes and create a new version of the scan results.
Upload File
The Upload File feature is recommended when multiple cookies need to be added or updated simultaneously.
Click the Upload File button.

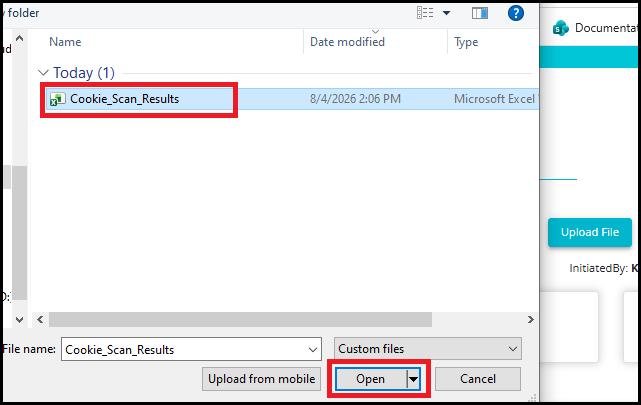
A file selection window opens. Browse the location of the Excel file on your system.
Select the required Excel file containing the cookie information.
Click Open (or press Enter) to upload the selected file.
The system validates the uploaded file before processing it.
If the file does not contain the mandatory columns CookieName and CategoryName, the upload is rejected and a snack bar message is displayed at the bottom of the screen.

If all mandatory columns are present, the file is uploaded successfully.
After the file is uploaded successfully, the selected file name is displayed next to the Upload File button.
A Reclassify button becomes available. Click the Reclassify button to process the uploaded cookie data and apply the changes to the scan results.

- Once the reclassification is completed successfully, a snack bar message is displayed at the bottom of the screen.

Note: The system allows the same cookie name to appear more than once only when the cookies belong to different domains. However, no more than two records with the same cookie name are permitted.
Note: Reclassification does not modify the existing version. Instead, the system creates a new version containing the uploaded changes, preserving previous versions for comparison, auditing, and rollback purposes.
Example:
Previous Version: Version_3
New Version: Version_4
The newly created version becomes the Current version and is automatically selected in the Version dropdown.
The following information is updated for the newly created version:
Version Created On -- Displays the date and time when the reclassification was completed, and the new version was created.
Initiated By -- Displays the user who uploaded the file and performed the reclassification.
Result Type -- Displays File Upload Result, indicating that this version was created as a result of uploading and reclassifying a file.
- The scan summary counts are recalculated and updated based on the uploaded cookie data, including:
Cookies -- Total number of cookies in the uploaded result.
Page URLs -- Total number of page URLs associated with the uploaded data.
Vendors -- Total number of vendors identified from the uploaded cookies and privacy findings.

Note: Uploading files, adding new cookies, editing cookie details, updating cookie categories, deleting cookies, and performing reclassification are allowed only on the Current version. Legacy versions are read-only and cannot be modified directly. To make changes to a legacy version, first roll back to that version, which creates a new Current version that can then be modified.
Rollback to a Previous Version
- If an older (Legacy) scan result version needs to be restored as the latest version, use the Rollback to this version option.
Note: Rollback does not make the selected legacy version current directly. Instead, the system creates a new version that is an exact copy of the selected version and marks the newly created version as the Current version. This preserves the complete version history for auditing and comparison purposes.
- Select the required legacy version from the Version dropdown. Click Rollback to this version button.
Example: Assume there are currently four scan result versions, and Version_3 needs to be restored as the latest version. So, select Version_3 from the dropdown list.
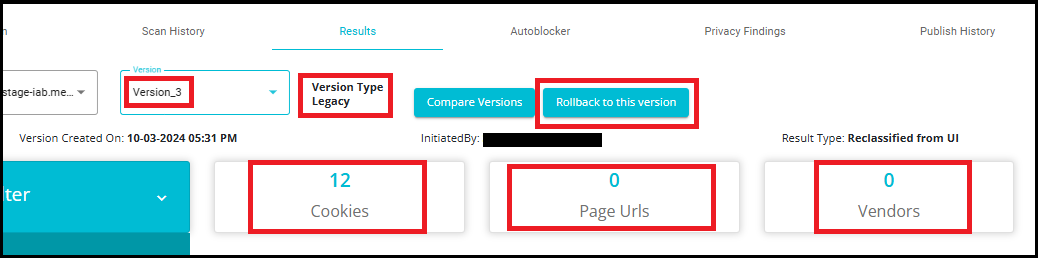
The system creates a new version containing the same data as the selected legacy version.
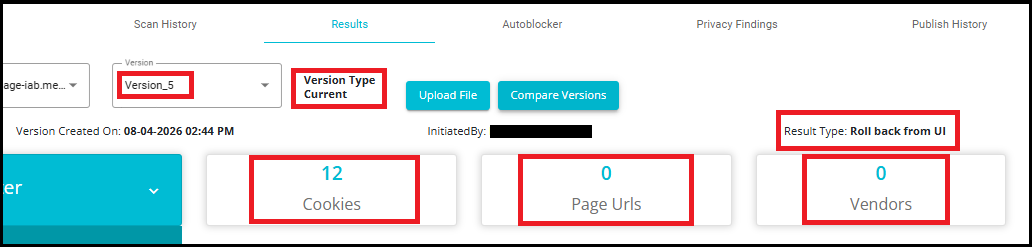
The newly created version becomes the Current version and is automatically selected in the Version dropdown.
The following information is updated for the new version:
Version Created On -- Displays the date and time when the rollback was performed.
Initiated By -- Displays the user who performed the rollback.
Result Type -- Displays Roll back from UI, indicating that the version was created through a rollback operation.
The cookie, page URL, and vendor count of the new version will match the selected legacy version because the new version is a clone of that version.
Single cookies and their details can be added directly from the scan results grid using the Add (+) button.
Click the Add (+) button available above the cookie results grid.
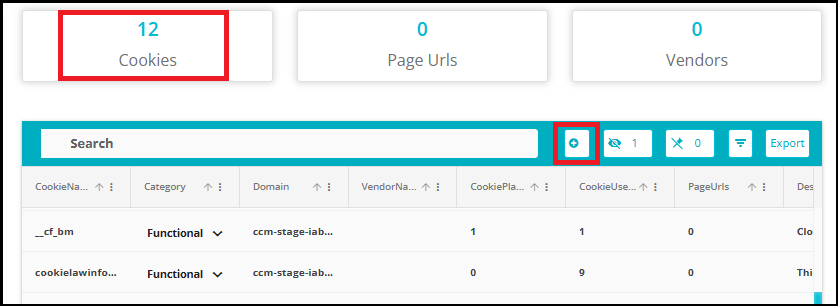
A new empty row is added to the grid, allowing you to enter the cookie details manually.
As soon as the new row is added, the Cookie count is incremented to reflect the newly added record.
Example: Previous Cookie Count: 12 Updated Cookie Count: 13
- Once a cookie is added, edited, or deleted, a Reclassify button appears on the Results page along with a message indicating that the scan result needs to be updated.
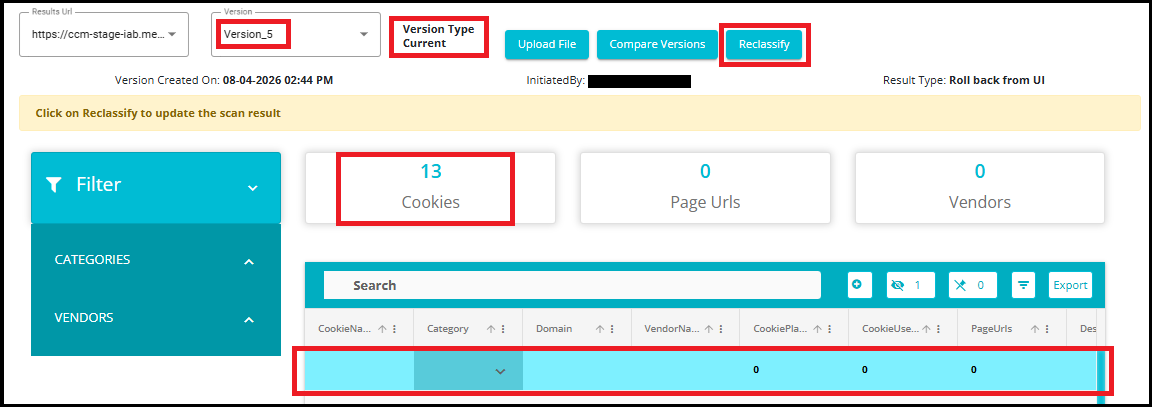
Enter the required cookie details in the newly added row.
If either Cookie Name or Category is not provided, the system does not process the changes and displays a snack bar message at the bottom of the screen.

- Click Reclassify to apply the manual changes to the scan result.
Note: Any manual modification performed on the scan result page, including adding a new cookie, editing an existing cookie, or deleting a cookie, requires reclassification before the changes are reflected in a new scan result version.
- Once the update is completed successfully, a snack bar message is displayed at the bottom of the screen.

- After successful reclassification, a new scan result version is created automatically.
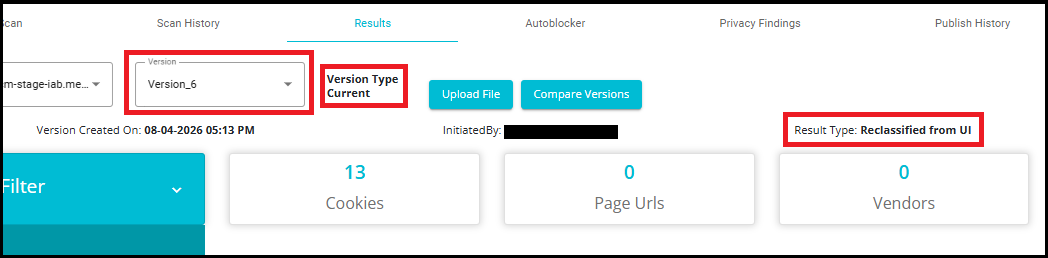
Example: Previous Version: Version_5 New Version: Version_6
- The newly created version becomes the Current version and is automatically selected in the Version dropdown.
The following information is updated for the newly created version:
Version Created On -- Displays the date and time when the reclassification was completed, and the new version was created.
Initiated By -- Displays the user who performed the update.
Result Type -- Displays Reclassified from UI, indicating that the version was created as a result of manual changes made through the user interface.