Forced Consent Information Banner
Overview
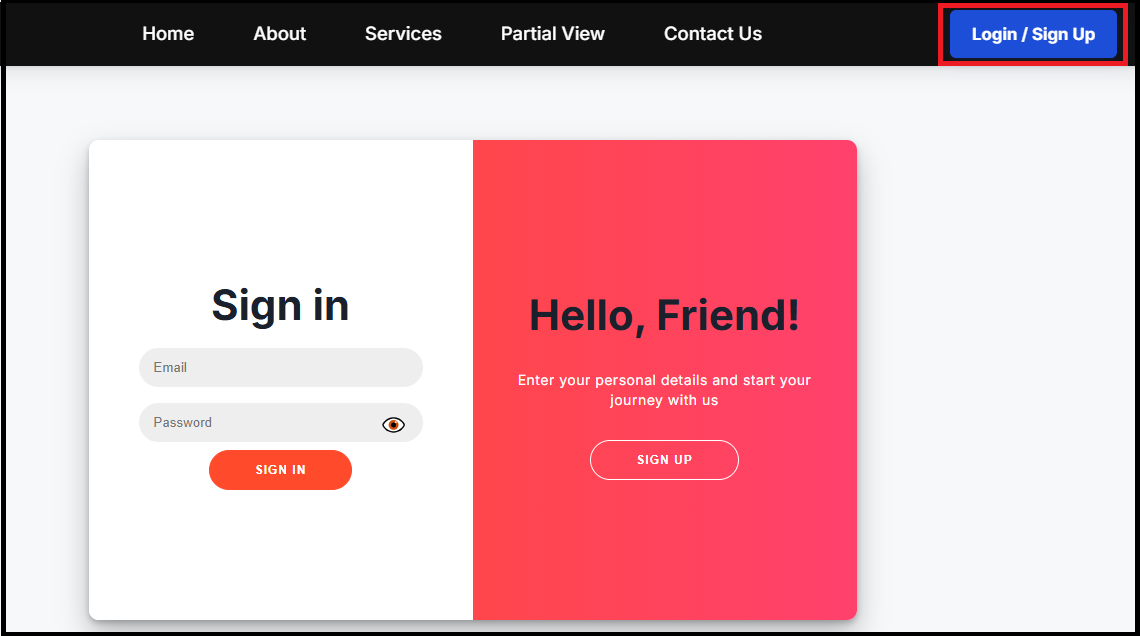
Introduced a mandatory (forced) Terms & Conditions (T&C) consent banner that blocks access to the website/web app until the user accepts the latest T&C version. Consent is captured and stored against the user's email ID, persists across devices and browsers, and is checked at each login. If the user has already consented to the latest T&C version, the banner will not reappear.
1. User logs in using required credentials.
2. System checks if a consent record exists for the user's email for the latest T&C version.
If the user has not provided consent for the latest Terms & Conditions, a blocking banner is displayed, and all page interactions are disabled until acceptance.
When the user clicks, I Accept, the system automatically submits an internal consent request using the credentials provided at login and records the consent against the user's account.

- If a consent record exists for the user's email and the latest Terms & Conditions version, the banner will not be displayed, and the user can access all features normally.
3. Existing User Login from Another Device
When an existing user signs in from any other device, the system verifies the consent status using the user's email ID.
If consent for the latest Terms & Conditions version exists, the banner is skipped, and the user gains full access without interruption.
Step-by-step configuration guide for the Forced Consent Information Banner
Step 1: Navigate to Custom Banner Page
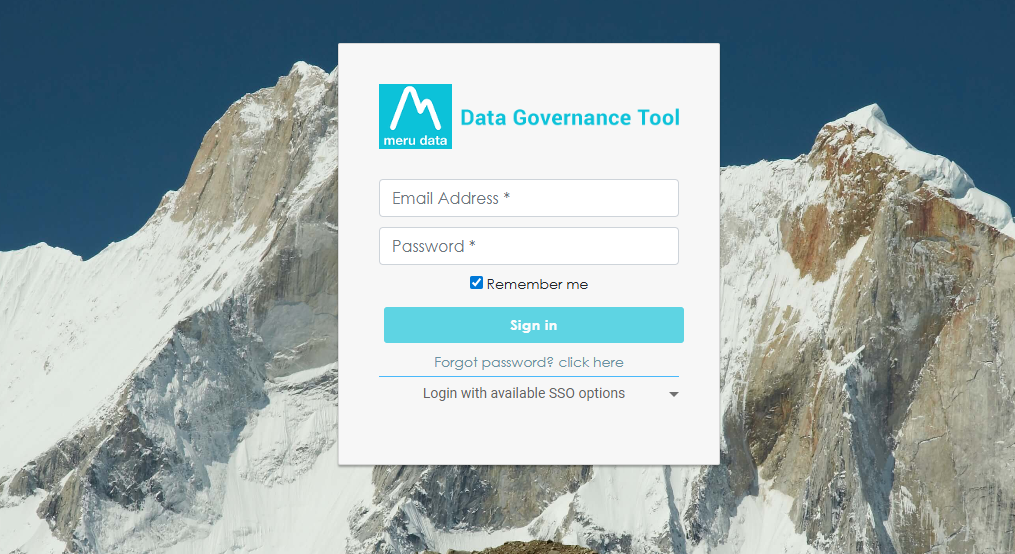
- Login to the Data Governance Tool by entering your credentials.
Click on the hamburger menu (three horizontal lines).
Navigate to Cookie Settings from the left-hand menu.
In the Websites section, click on New Custom Banner.

- After clicking New Custom Banner, you will be directed to the configuration page where you can set up the banner details.
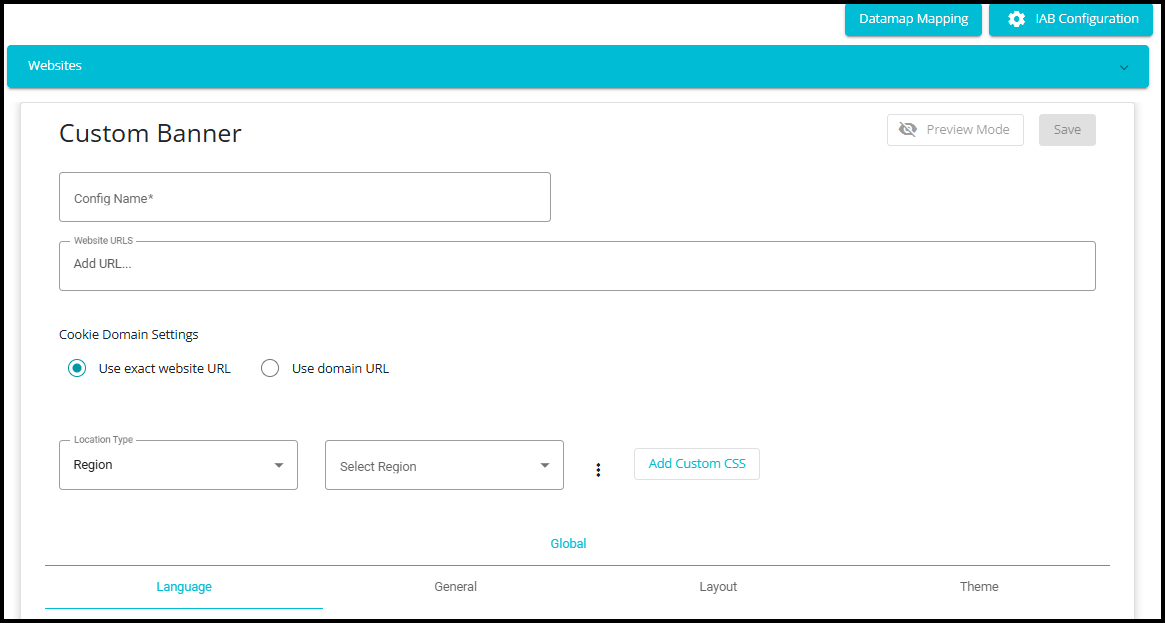
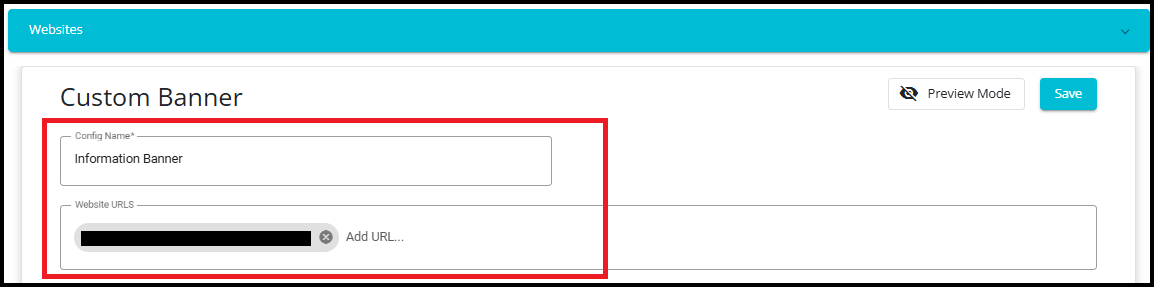
Step 2: Provide Config Name and Website URL
Config Name: Enter a unique name for your banner configuration.
Website URLs: Add the URL(s) where the banner should appear.
Choose Use exact website URL or Use domain URL(Optional)
Use exact website URL: This means the banner will only appear on the specific URL you enter (e.g., https://example.com/page1). It is precise and does not apply to other pages or subdomains.
Use domain URL: This applies the banner to the entire domain (e.g., example.com), including all subdomains and pages under that domain. It's useful if you want consistent behavior across the whole site.
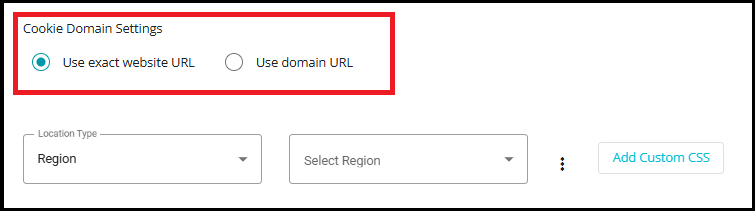
Step 3: Select Region
- Select Location Type.
Region: Allows you to target specific regions within a country (e.g., EU region, APAC region).
Country: Applies the banner settings to an entire country.
State: Targets specific states within a country for more granular control.
This setting helps customize banner display based on geographic location for compliance with regional laws (like GDPR or CCPA).

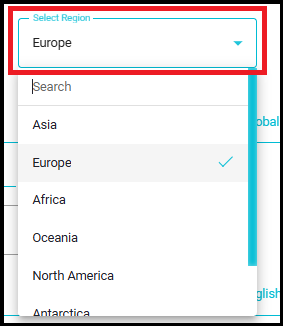
- Select Region from the dropdown.
Step 4: Apply Region-Specific Configuration
By default, the banner configuration applies to Global.
If you want to make it specific to a region (e.g., Europe):
Click on the three dots next to the Select Region dropdown.
Choose Add new location.
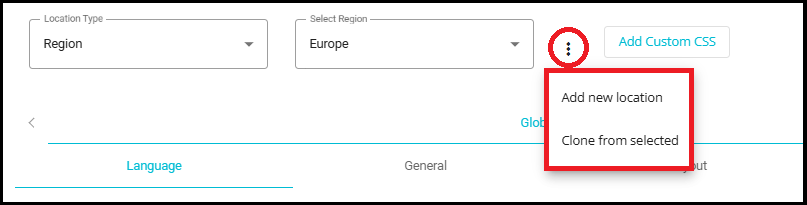
- After this, a new tab (e.g., Europe) will appear alongside Global.
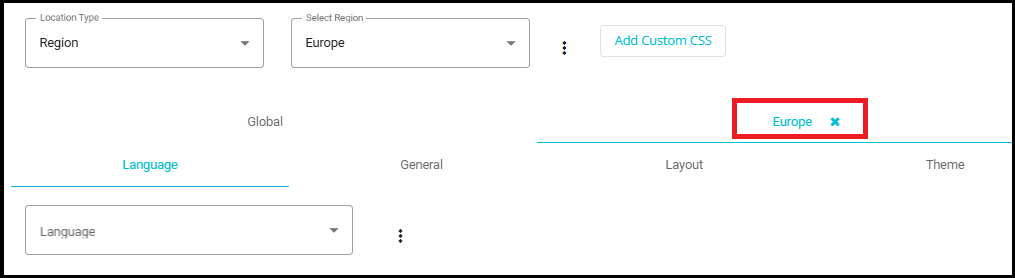
- Any configurations you set under this new tab will apply only to that region, not globally.
This feature allows you to customize banner behavior for compliance with regional laws like GDPR in Europe while keeping global settings separate.
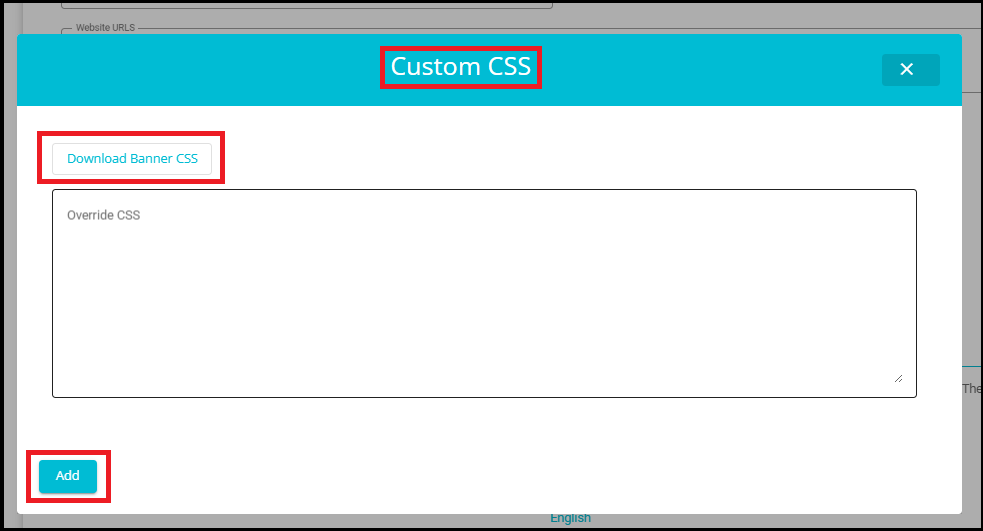
Step 5: Add Custom CSS
- Click on the Add Custom CSS button.

A pop-up window titled Custom CSS will appear.
In this window:
You can override CSS by entering your custom styles in the text box.
Optionally, click Download Banner CSS to get the default CSS for reference.
After adding your custom CSS, click Add to apply the changes.
This feature allows you to fully customize the look and feel of the consent banner to match your website's branding.
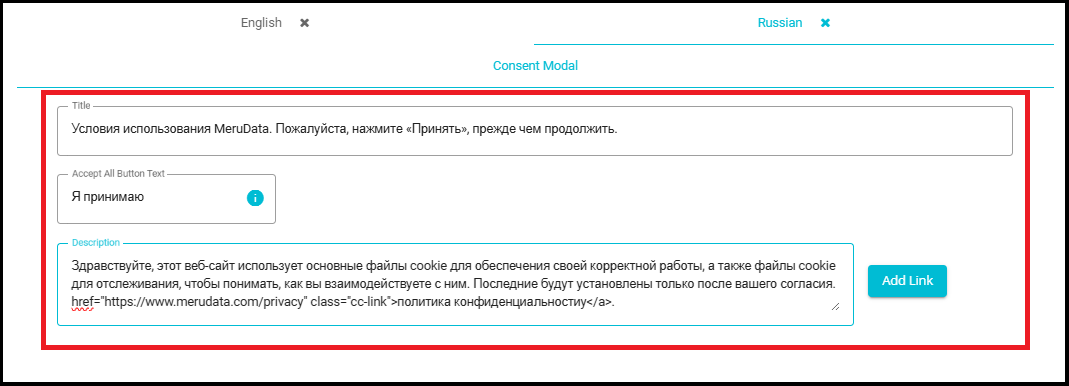
Step 6: Configure Language Settings
Navigate to the Language tab under your selected scope (Global or a specific region like Europe).
From the Language dropdown, select the language you want to add (e.g., Russian).
Click on the three dots next to the dropdown and choose Add new language.
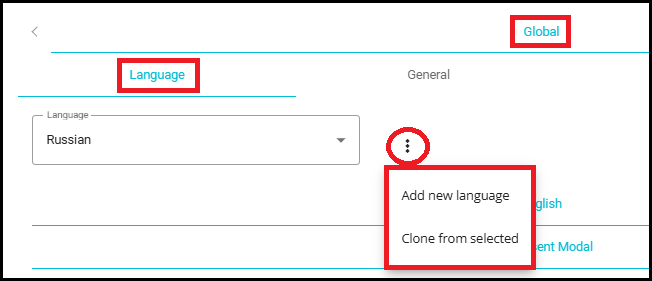
- A new tab for the selected language (e.g., Russian) will appear alongside English (default).
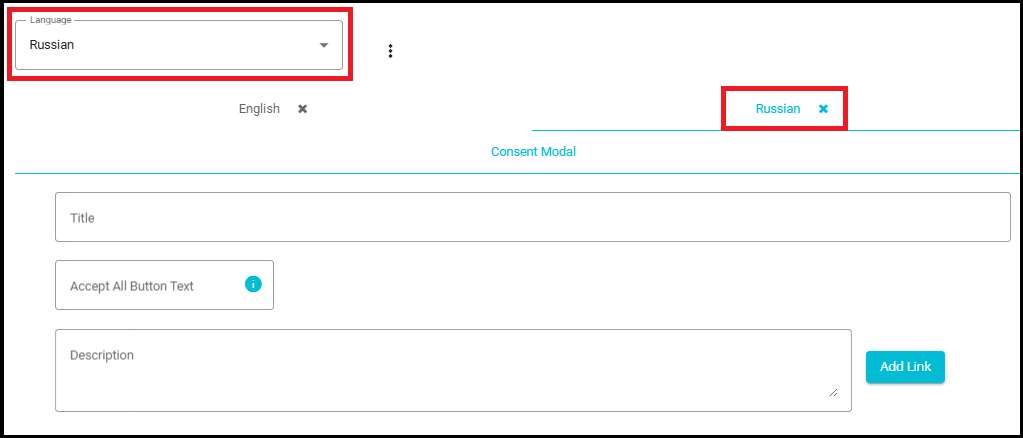
For the newly added language:
- Enter Title, Accept All Button Text, and Description manually.
Note: The system does not automatically translate content. If you select Russian, you must use a translator and input the translated text yourself.
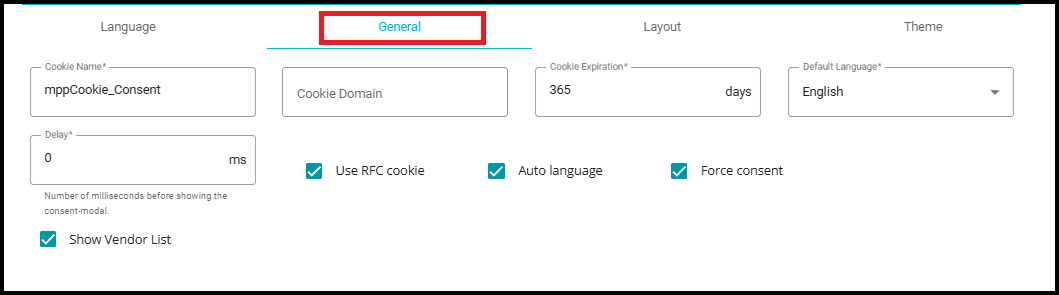
Step 7: Configure General Settings
This section controls the core behavior of the consent banner.
Note: The settings marked with (NA)—such as Cookie Name, Cookie Domain, Cookie Expiration, Delay, Use RFC Cookie, and Show Vendor List—are not applicable for the Information Banner. These features are relevant only to cookie‑based consent banners and do not apply to the Forced Consent Information Banner, which does not rely on cookies for storing consent.
Cookie Name(NA)
Defines the name of the cookie that stores the user's consent status.
Example: mppCookie_Consent.
Cookie Domain(NA)
- Specifies the domain where the cookie will be valid.
Cookie Expiration(NA)
Sets how long the consent cookie remains valid.
Example: 365 days means the consent lasts for one year.
Delay(NA)
Time in milliseconds before showing the consent modal after page load.
Example: 0 ms shows it immediately.
Default Language
- Select the default language for the banner text (e.g., English).
Use RFC Cookie(NA)
- Ensures the cookie follows RFC standards for naming and formatting.
Auto Language
- Automatically detects and applies the user's browser language if available.
Force Consent
- Blocks access to the website until the user accepts the Terms & Conditions.
Show Vendor List(NA)
- Displays a list of vendors using cookies for transparency and compliance.
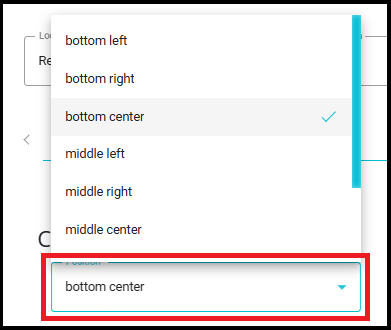
Step 8: Layout Configuration
This section allows you to customize the appearance and position of the consent banner on your website.

Position
Determines where the consent modal will appear on the screen.
Example: bottom center (other options include top Right, bottom left, etc.).
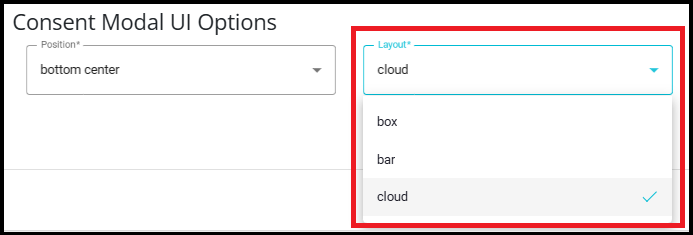
Layout
Defines the style of the consent modal.
Options include:
Cloud -- Rounded, floating style.
Box -- Standard rectangular box.
Bar -- Horizontal bar across the screen.
Transition
Controls the animation effect when the banner appears.
Options include:
Slide -- Banner slides into view.
Zoom -- Banner zooms into view.
Note: Transition works only when a delay is configured in Step.

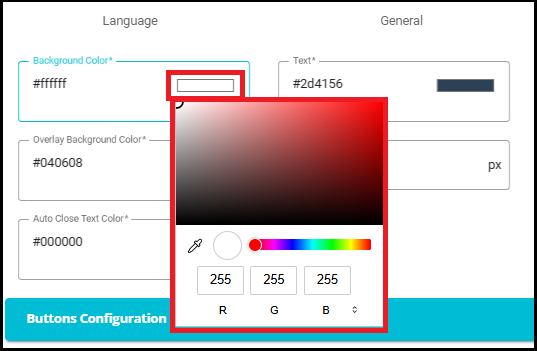
Step 9: Configure Theme
This section allows you to customize the visual appearance of the consent banner to match your website's branding.

Click on the color box next to each option.
A color picker will appear.
You can:
Select a color visually.
Enter RGB values.
Input a HEX code for precise color.
Additional Configurations
Expand sections like:
Buttons Configuration
Toggle Configuration
Cookie Category Configuration
Scroll Bar Configuration
These allow further customization of button styles, toggles, and scroll bars.
Note: For the Information Banner, only Theme and Button Configurations are applicable. The remaining options—Toggle Configuration, Cookie Category Configuration, and Scroll Bar Configuration—do not apply to the Information Banner.
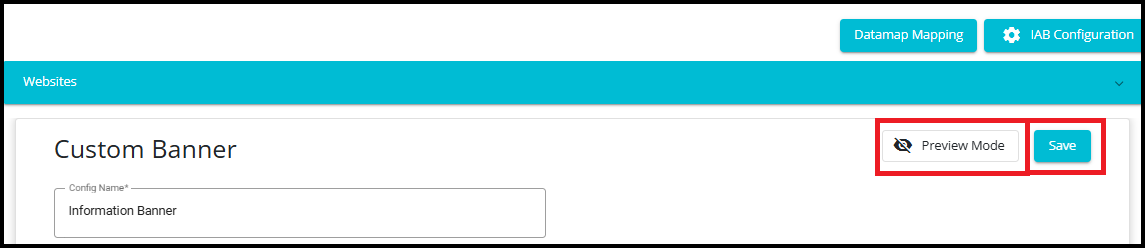
Step 10: Save Your Configuration
After completing all configurations, click on the Save button located at the top-right corner of the page.
This will store your custom banner settings and make them active for the specified website(s) and region(s).
Optionally, you can use Preview Mode before saving to check how the banner will appear to users.