DSAR- Flow Configuration
DSAR - Flow Configuration
A user can place Data Subject Access Requests to an organization for accessing, modifying or deletion of their data. Currently, any user can make any of these request types - opt-out, unsubscribe, delete, copy, summary of data, and correct their data.
The Administrator gets a notification when -
User makes a service request
A request gets verified
Additional information is submitted by the requester if needed.
Each request is processed based on the Flow mapped to it. Each request can be processed differently, based on various aspects like the region, user inputs in different fields on the request form, and more. Once a user places the request, it is seen on the DSA Request dashboard, under the Active Requests section. You can refer to this guide to know how a request is processed in each stage - DSAR - User Guide .docx .
Creating a Flow
Each stage of the flow can be configured in different ways based on how you want the request to be processed.
To configure the request flow,
- Log into Data Governance tool.
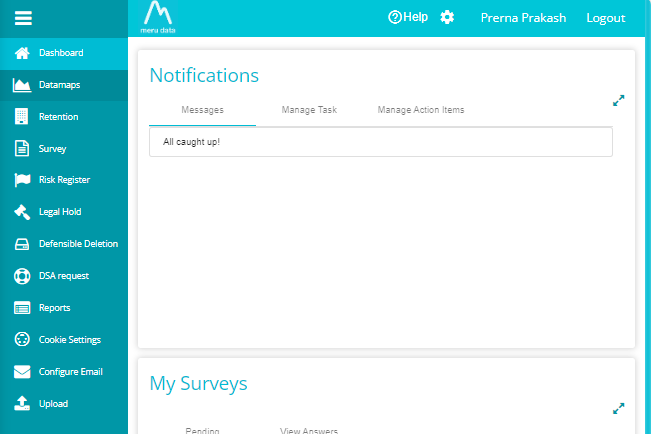
- From the Main Screen of Data Governance Tool, click on DSA Request, present on the hamburger menu on the left of the screen.
- Switch the toggle to View Configuration.

• Go to the 'Flow' tab.
• Open the 'Flow' drop-down menu.
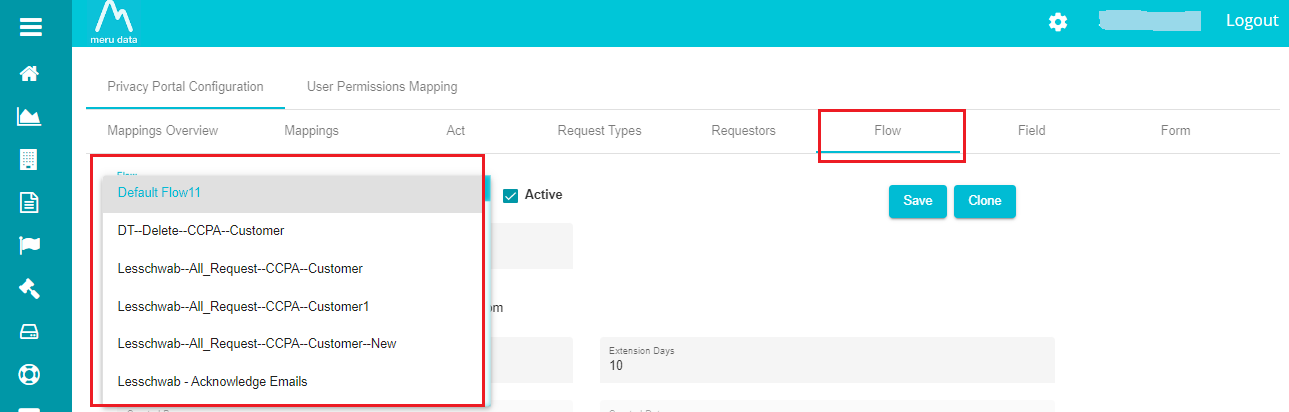
The drop-down menu displays all the pre-defined request forms. Select the form for which the flow is to be configured.
• Select the required form from the drop-down menu.
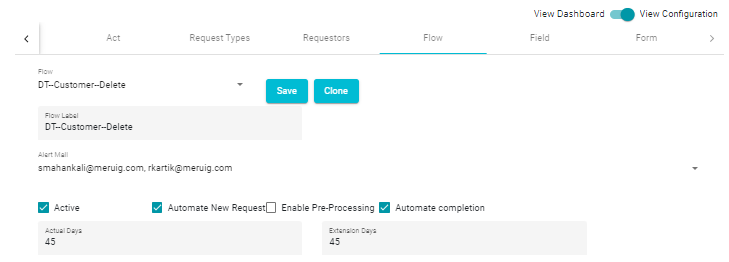
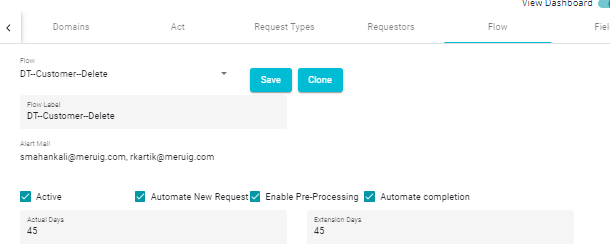
After this selection, you can see the 'Flow Label' automatically displayed on the screen.

Note: Flow tab on the DSAR configuration provides different customizations to process the request. Each option comes with unique functionalities that decide the flow of your request.
Alert Email:
This option is to send alerts to the selected users. Every alert related to a particular flow will be sent to the users through emails.
• Click on the 'Alert Email' drop-down menu.
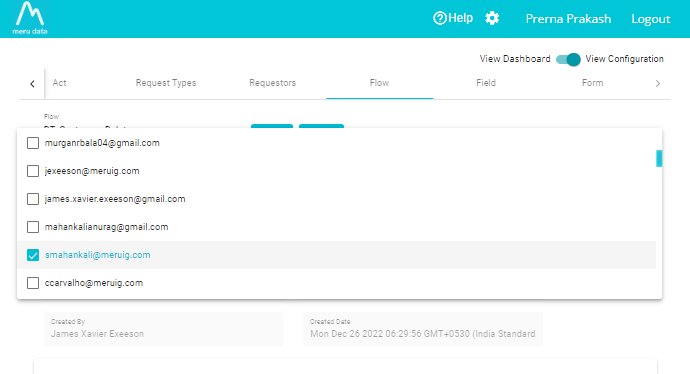
Here, you can find all the existing users of the application. Multiple users can be selected for sending the alerts.
• Select all the required users.
Automate Completion:
This option automates the completion of a DSA request after its successful processing. As in, the copy and summary of data requests are automatically marked complete after the 'Deliver' stage and the remaining requests are marked after the 'In Process' stage.
Disabling this option would require you to manually mark the request as complete. Such requests would be in the In Process or in the Deliver stage until they are manually moved to Complete stage.
- Check the 'Automate completion' option if you want the request to be auto completed.
Pre-processing:
This is an optional customization, and you can configure the pre-process stage to any request's flow if you need some additional process to be performed for the current request before processing the actual requirement. In this case, a new flow is created and mapped to the existing flow as the pre-process stage.
- Check the 'Enable Pre-processing' option.
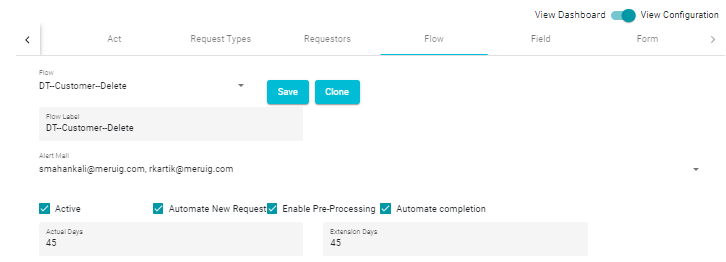
Note: Checking this option displays another stage, Pre-Processing on the screen. This option can be used to pre-process another request while the existing request is being processed.
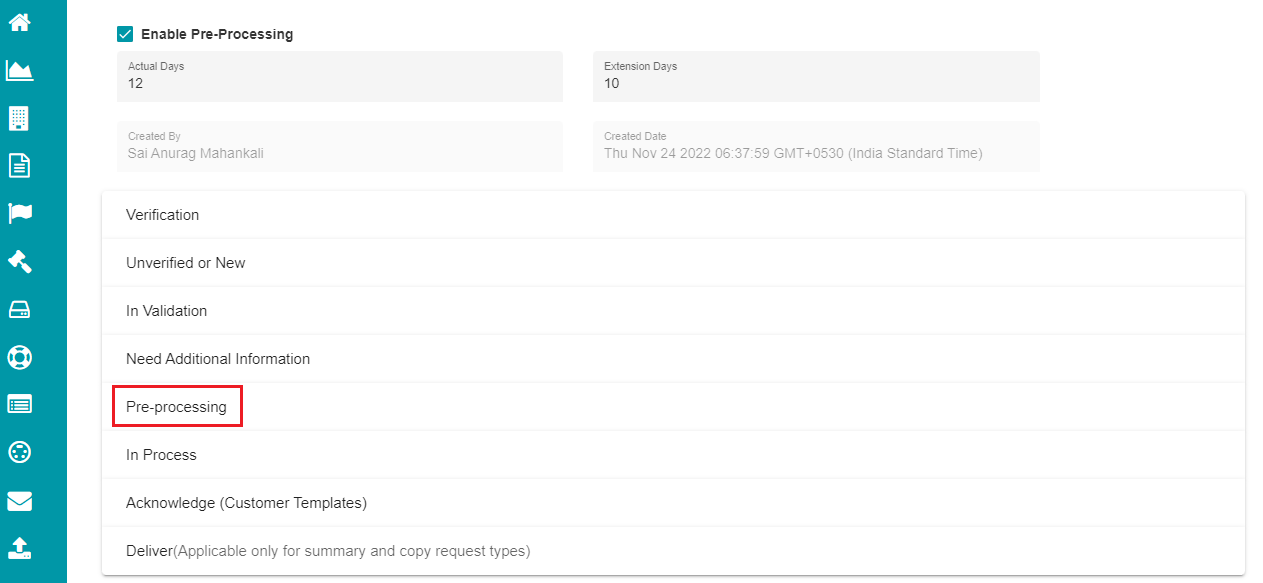
Click on the 'Pre-processing' option.
Click on 'Select Flow' option to open the drop-down menu.
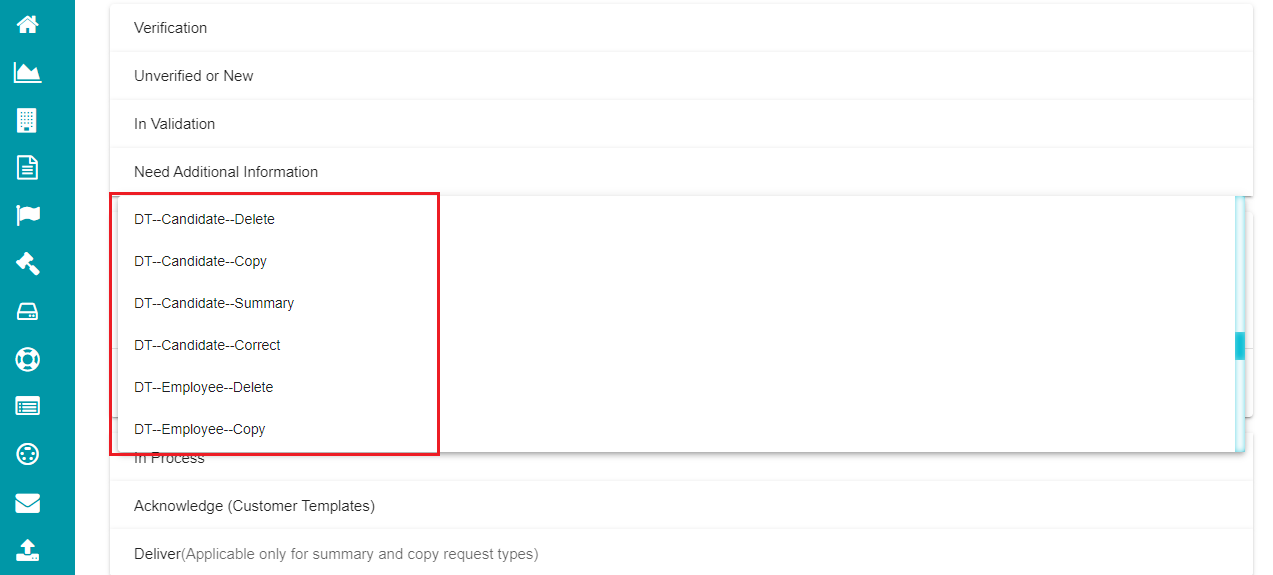
Select the required flow from the menu.
Click on the Next button to update the changes.
The user can now see a pre-process option under the 'Process Request' stage in the DSA Request screen. Now, all the action items configured for the selected flow's process phase will appear as the pre-process action items for the current request.

- Click on 'Create Action Items' option.
These action items run the same as the normal action items, with all the features like them. You don't have to wait for the normal action items to complete before these are processed. You can process, respond, and do everything just like the normal action items.
Due Dates:
You can configure the due dates for a specific request type on the Flow tab. Usually, the standard ETA for any request is 45 days.
Actual Days - time required to process a DSA request.
Extension Days - additional time required to process the request, in case of a delay.
• Click on the 'Actual Days' tab.
• Type the number of days at requirement.
Note: Instead of typing the number, you can use the up-down arrow icon to increase or decrease the number of Actual Days for a specific request.
- Enter the number of days for request extension in the 'Extended Days' dialog box.
These basic configurations are common for any request flow, and the actual processing commences from the following stages.
Data Subject Access Request Flow runs through eight stages - verification, unverified or new, in validation, need additional information, pre-processing (optional), in process, acknowledge, and deliver. (Copy and Summary of Data requests have an additional Deliver stage where the user data is emailed to them)
- Verification:
Whenever a customer/user places the request, a verification email is sent to them. The 'Verification' configuration can be used to define everything required to send these emails. The entire stage can be automated without manual processing.
To automate the verification,
- Go to the 'Verification' stage.

Note: By default, 'No' is selected for the Automate option.
- Select the 'Yes' option present next to the Automate Phase? on the screen.
The following are automated in the Verification stage of the flow when selecting Yes -
a) Reminder emails are automatically sent as per the configured frequency of sending them.
b) Requests are marked as closed automatically if they aren't verified within the configured due date.
c) Request status change criteria is also checked, and the request status is changed accordingly.
You can continue to configure the following options either way.
Verification Template: This is the email template that is sent to the customers after they place a service request.
Request Verified Admin Notification: this email template is configured to send an alert email to the admin after the user request is verified.
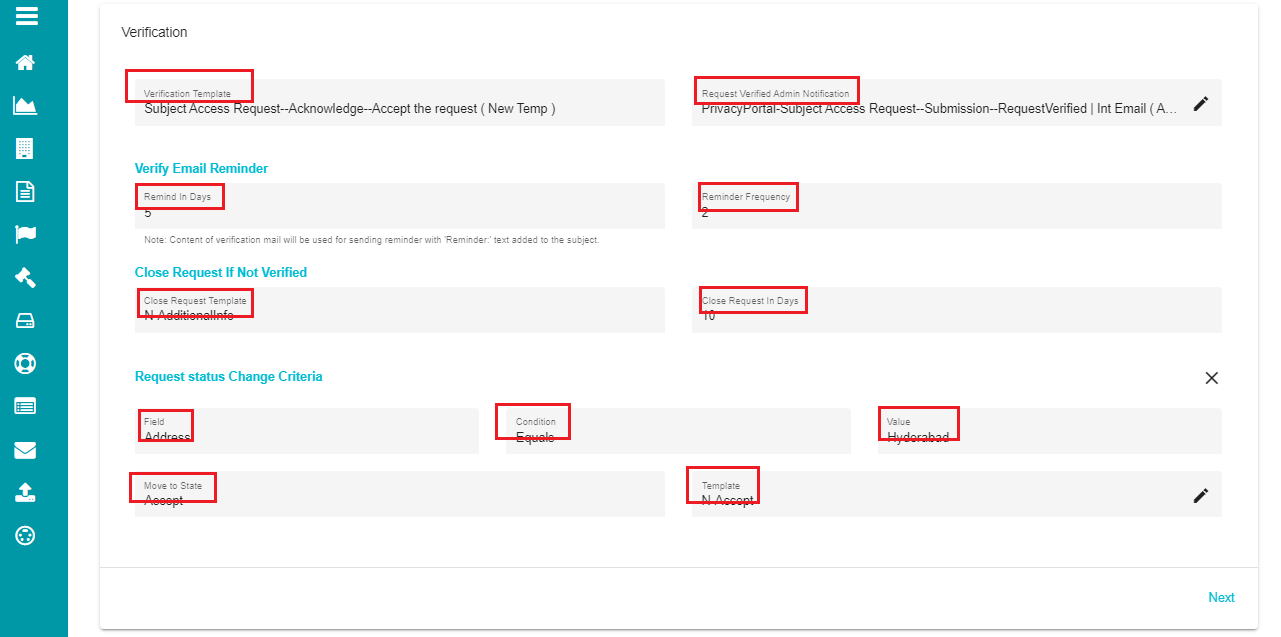
Verify Email Reminder - in case the request is not verified, this option can be used to send a reminder email to the customers.
Remind in Days: used to specify the number of days after which the reminder email should be rolled out.
Reminder Frequency: used to specify the number of times the reminder email should be sent to the customer/user for verification.
Close Request If Not Verified - if the request is not verified within the duration, this option can be used to close the request.
Close Request Template: Here, you can configure an email template that is sent to the customers for closing the request.
Close Request in Days: it specifies the number of days after which the submitted request is closed for action.
Request Status Change Criteria - the status of a request can be changed based on the input values provided by the user for selected fields.
Field: use this drop-down menu to select the field to be used as the criterion to change the request status (you can select a particular field on the request form).
Condition: choose the condition (equals/ not equals) to match the field with the defined value.
Value: define the value/input that you want to match with the user's input.
Move to State: use this drop-down menu to choose the stage to which the request status must be moved to, based on the applied condition.
Template: email template to inform the user about the status change.
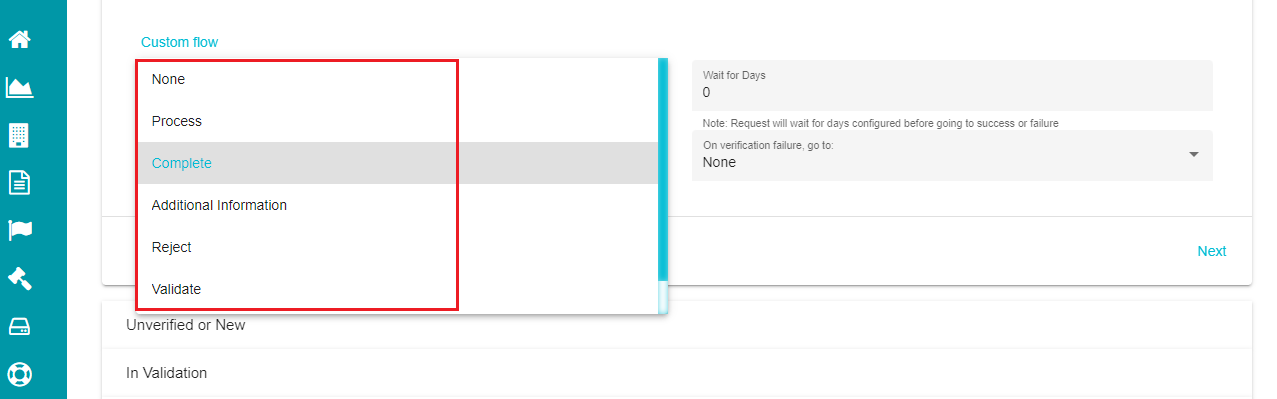
Custom Flow - traditionally, a verified request moves to the processing stage. However, some requests can be marked complete or moved to other stages after verifying them. This option in the Verification stage can be used for that purpose. Checking this option displays the following fields.
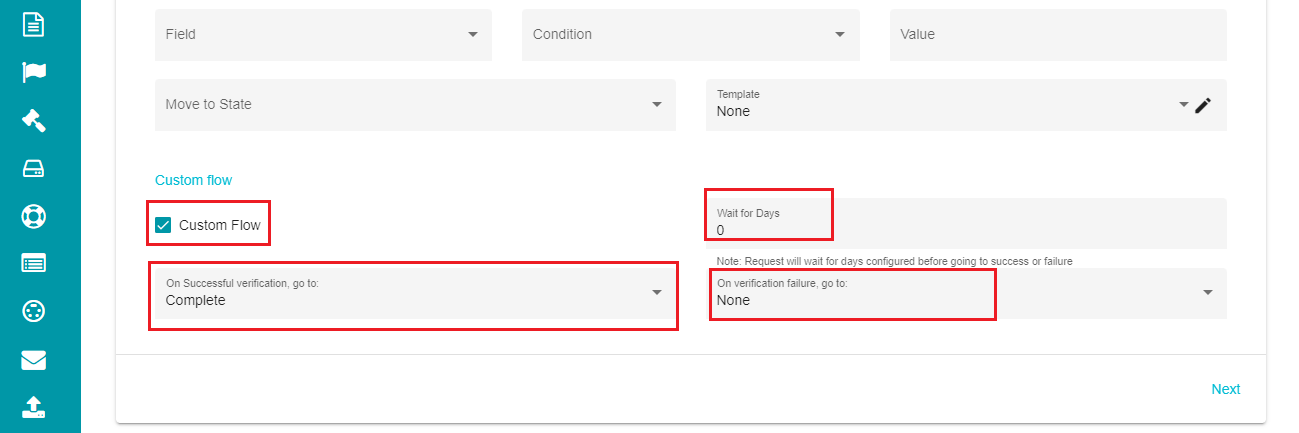
On successful verification, go to: drop-down menu to select the next stage of the request after successful verification.
Wait for Days: waiting time for the request before moving to the next stage based on its verification.
On verification failure, go to: drop-down menu to select the next stage of the request if the verification is unsuccessful.
The 'Flow' tab defines the validation of a request and the action items essential to process the request.
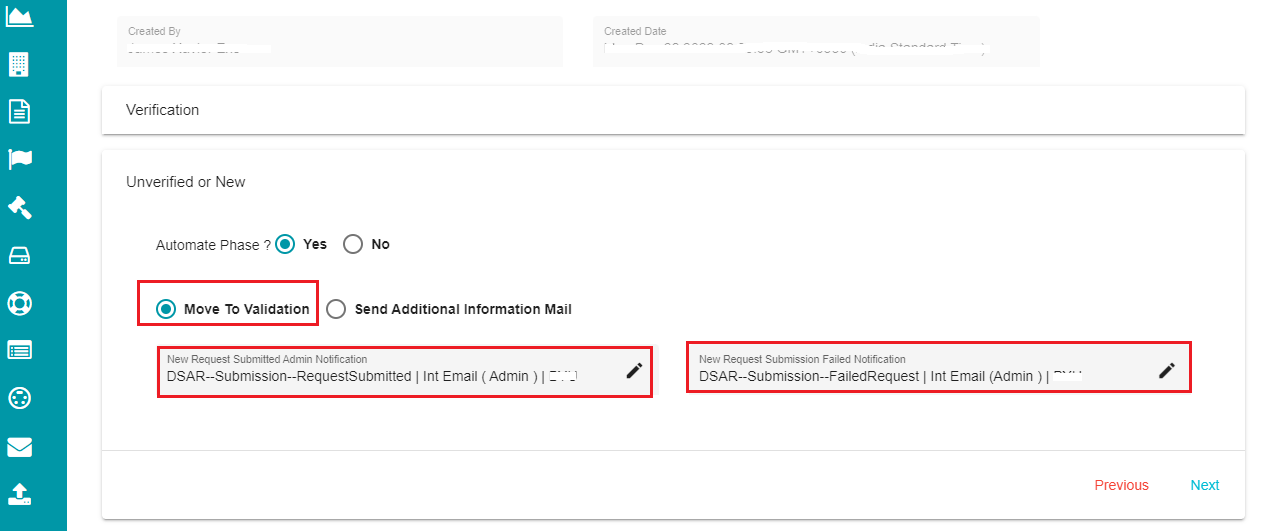
- Unverified or New:
To access this section, use the Next option on click on the Unverified or New on the Flow screen. Here, the request is moved to the validation stage, or the user is sent a mail asking for additional information if needed.
If the request is moved to validation,
- Select the 'Move to Validation' option.
Define the following:
New Request Submitted Admin Notification: email format sent to the requester informing that their request is verified and is being validated.
New Request Submission Failed Notification: email template sent to the requester informing that their request submission has failed.
If additional information is required for processing the request,
- Select the 'Send Additional Information Mail' option.
Define the following:
- Additional information Template: email template sent to the user asking for the information required to process the request.
If you want to add a specific information,
Click on '+Add Condition'.
Open the 'Field' drop-down menu.
Select the required field from the menu.
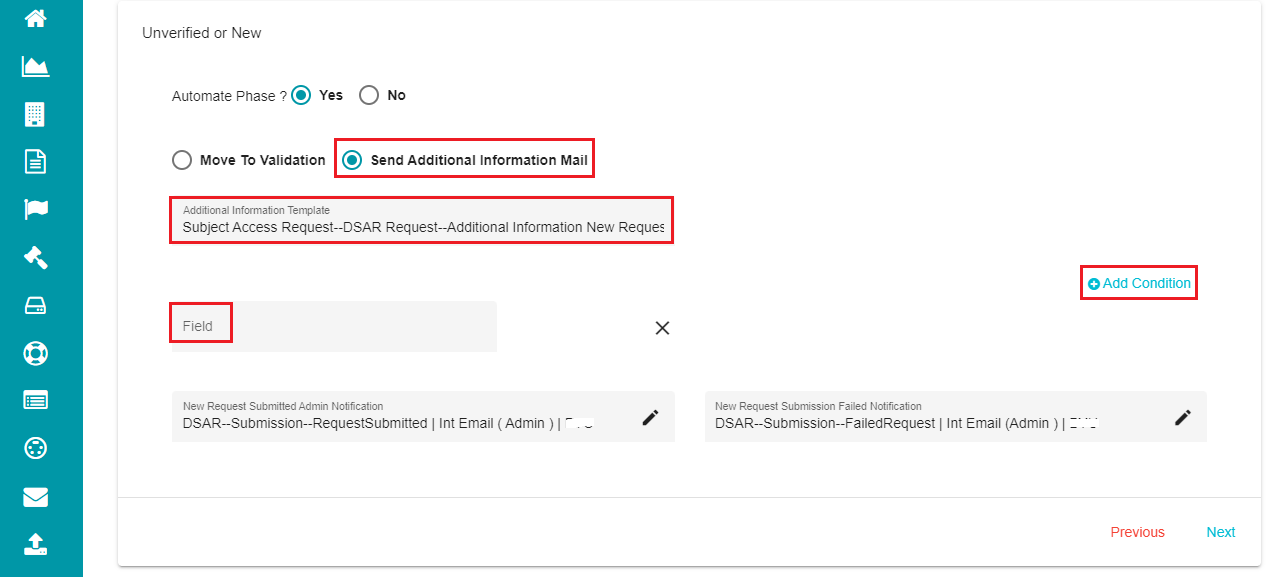
Note: Field is a drop-down menu showing all the input fields of the selected form. When adding a condition, it is first checked if the user defined this input field. If yes, the request moves to validation stage. If not, an additional information email is sent to the user asking for information related to this specific field.
For example, if Primary email is selected as the condition and that field doesn't have any information, an email is sent to the user asking to specify their primary email for request processing.
This stage can also be automated, like the previous stage. To automate this stage,
- Mark the Automate Phase? option as Yes.
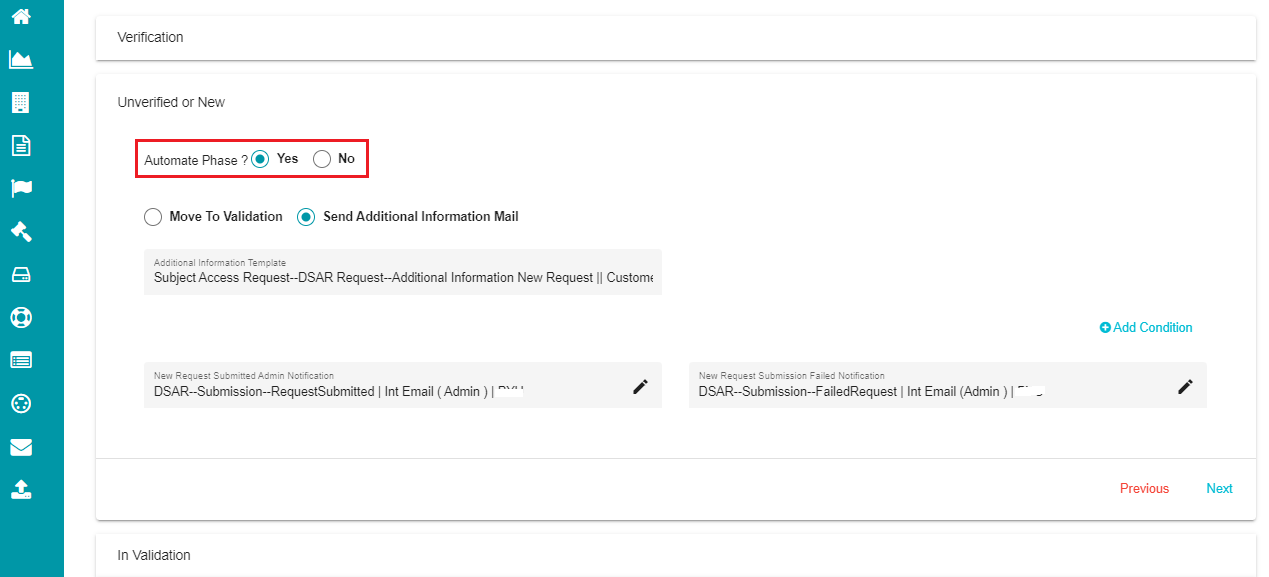
When automating this stage of the flow, the request is either moved to the Validation stage directly or the user is sent an email for Additional Information if required, based on the flow's configuration.
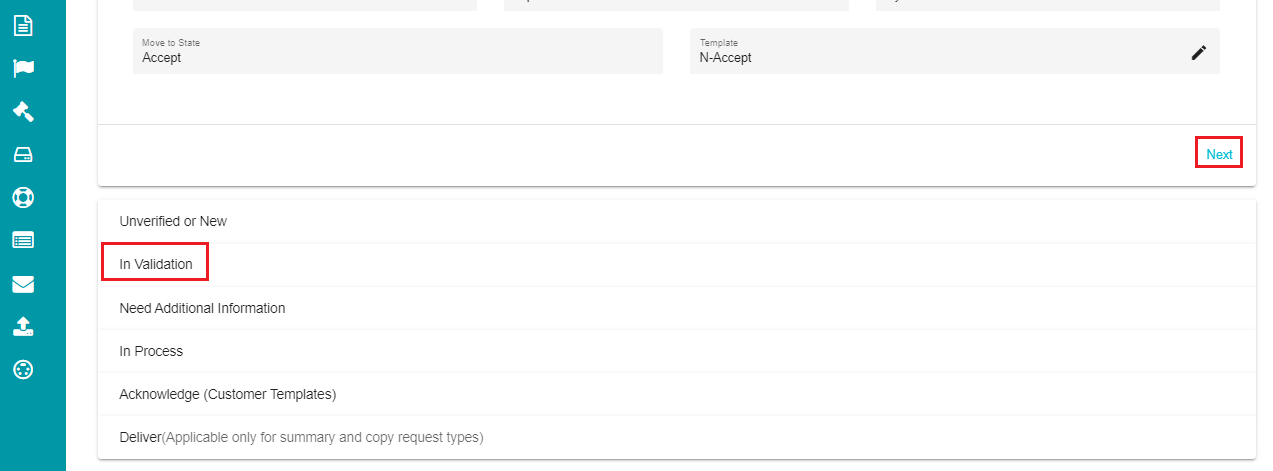
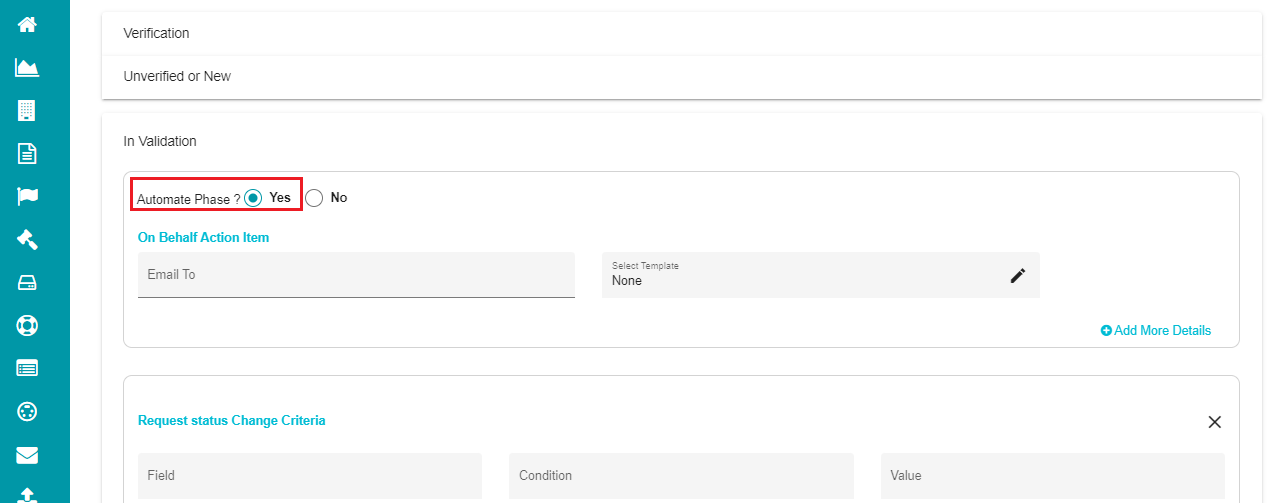
- In Validation:
This is the stage where the request is validated and moved to processing on successful validation. A single form can have multiple action items, and can be configured on the 'Flow' tab.
• Click the 'Next' button on the 'Flow' Tab to reach the 'In Validation' configuration page.
Another way to reach this page is by clicking the 'In Validation' option on the Flow Screen.
To automate the Validation stage,
Click on the In Validation option on the Flow screen.
Select Yes for the "Automate Phase?" option.
The following tasks are automated in this stage -
a) Creating the On Behalf Action Item.
b) Action item creation strategy - the system creates the action items for the request all at once or one after the other based on the flow configuration.
c) Action item match strategy - checks if all the action items are match found or if any of them is match found based on the configuration, to move to the next stage.
d) Sends an email accepting the request or asking for additional information based on the match strategy.
e) Sends reminder emails based on the configured reminder frequency.
You can continue to configure these steps irrespective of automating the Validation stage.
On Behalf Action Item - this scenario arises when an agent submits a request on behalf of the user. An authorization and valid ID proof should be submitted by the user when granting the rights to an agent to make DSA requests on behalf of them. Such requests are handled separately and manually.
In case of an opt-out request, the 'On behalf Action Item' is created first and processed. The 'In Validation' action items are created only after the On Behalf Action Item is verified. If unverified, such requests are either closed or sent to the 'Need Additional Information' stage, asking the user and agent for additional information.
When creating an on-behalf action item, the request is checked for authorization and the request is processed after that. Every communication related to such request is sent to both the user and the agent.
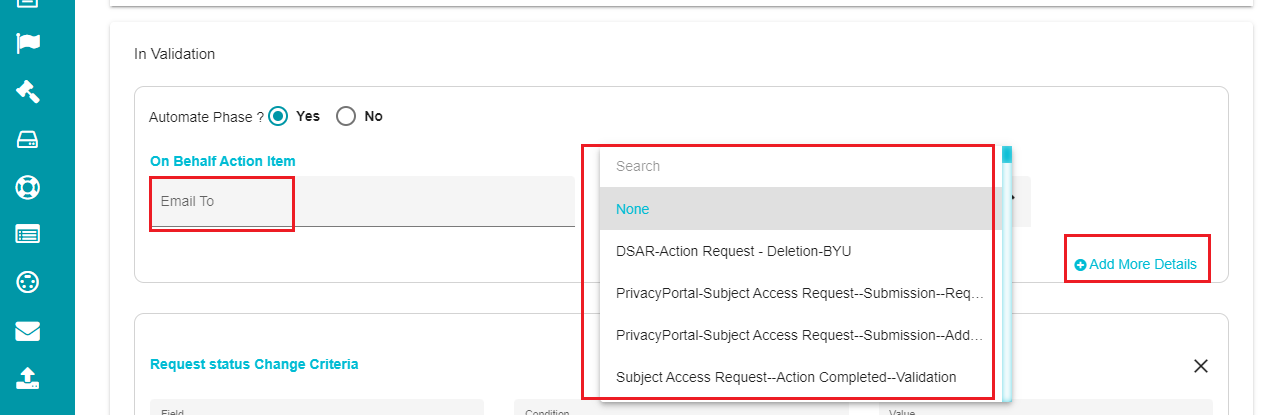
Enter the email addresses in the Email To box.
Select a template from the 'Select Template' drop-down menu.
Use the '+Add More Details' option if you need information related to a specific field.
Request Status Change Criteria - the status of a request can be changed based on the input values provided by the user for selected fields.
Field: use this drop-down menu to select the field to be used as the criterion to change the request status (you can select a particular field on the request form).
Condition: choose the condition (equals/ not equals) to match the field with the defined value.
Value: define the value/input that you want to match with the user's input.
Move to State: use this drop-down menu to choose the stage to which the request status must be moved to, based on the applied condition.
Template: email template to inform the user about the status change.
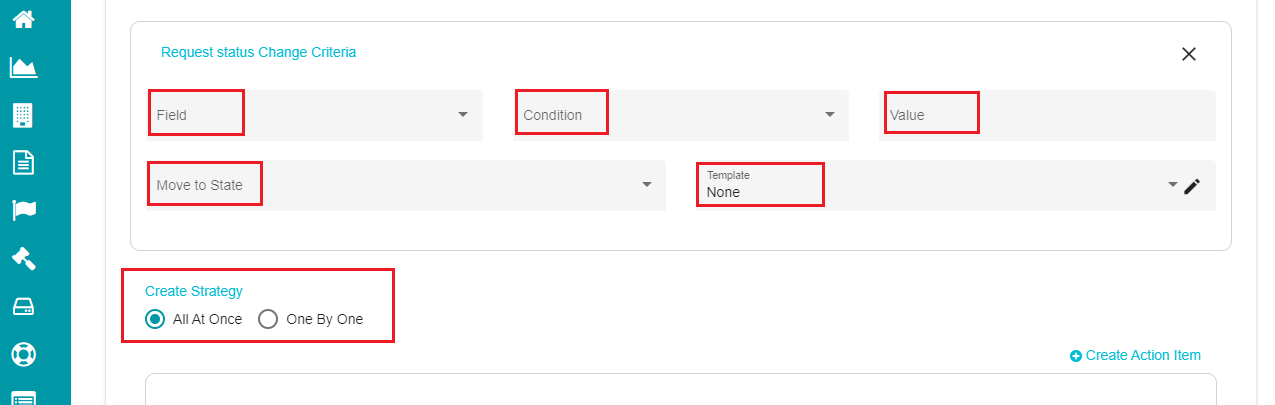
Create Strategy - in case of multiple action items for a request flow, this option can be used to choose how the system action items are created in the Validation stage.
All at once: create all the action items at once.
One By One: creates the action items one after the other.
To create system action items in the Validation stage,
- Click on

The screen shows a form with different fields to be configured for creating the Action Item.
- Click on the 'Email To' drop-down menu.
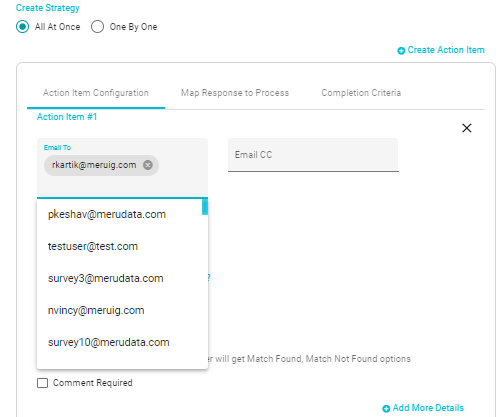
Select the users to send the alerts from this menu.
Use the 'Email CC' option to email any users in CC.
You can configure a specific template to send emails to the users based on the response to and from the action items.
• Click on the 'Select Template' drop-down menu.
• Select the required email template from the menu.

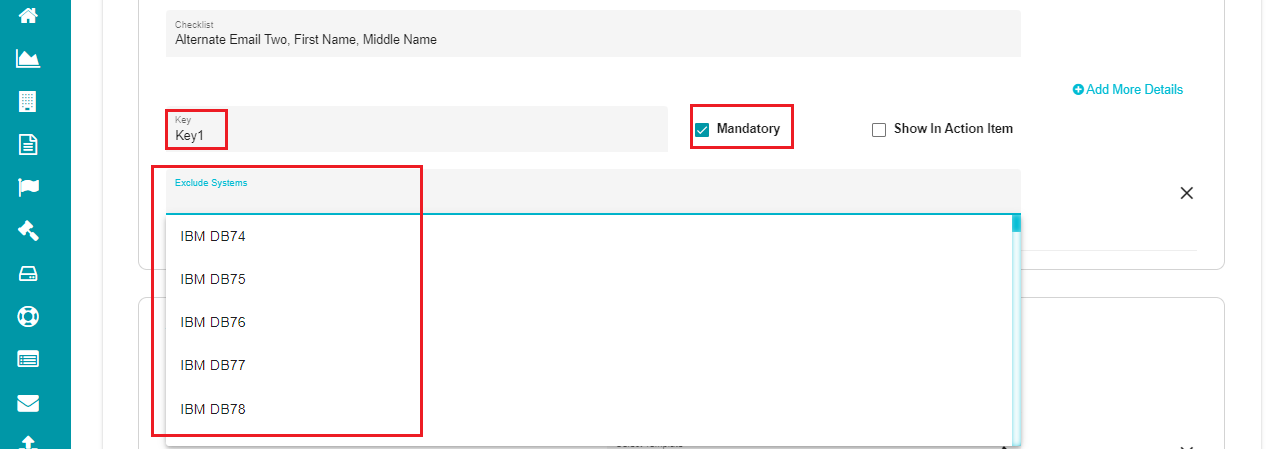
• Above in the On Behalf Action Item section, click the 'Key' option and specify your input in the box.
Note: Key option is used to configure the team to which the request must be directed.
• Check the 'Mandatory' option if a specific key requires to be mandated.
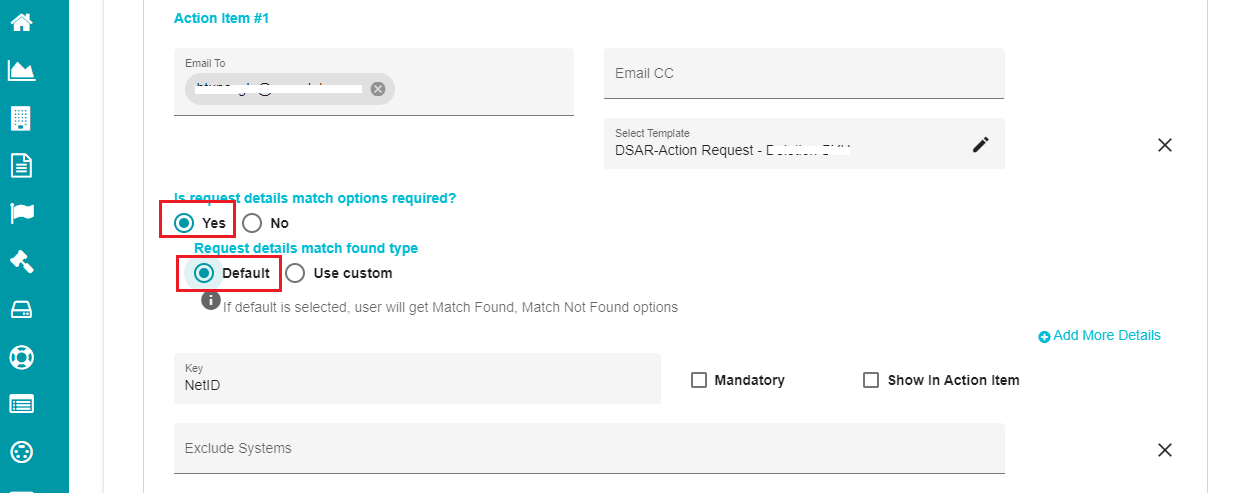
The DSAR Request flow usually checks for the match and validates the user in the 'In Validation' stage. Initially, the Match Found' and 'Match Not Found' fields were static and always appeared on the screen. As per the new changes, the user can now customize these fields in different ways through the DSAR - Flow Configuration screen.
If you want these fields to be displayed,
- Select the 'Yes' option.
Note: The screen shows two options Default and Use Custom for displaying the fields.
When selecting Default, the users can see the fields as Match Found and Match Not Found, as the default display names.
However, if you want to customize these fields with different display names, use can select the 'Use Custom' option and configure the names in the 'Request details match options' dialog box.
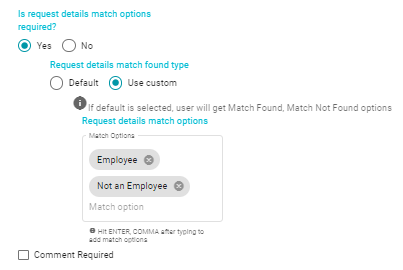
You can now see these display names for the fields instead of the Match Found and Match Not Found display names.
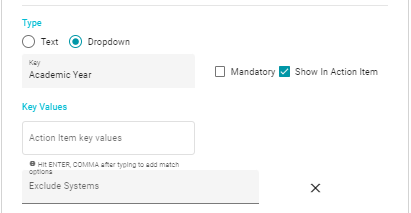
- Here, on selecting the Dropdown option, there will appear an additional option to multi-select which allows you to select multiple Values in the Map Response to Process and Completion Criteria.
In the 'In Validation' stage, every action item shows a tab 'Map Response to Process'.
Note: By default, this option is marked as No for every action item.
- Click on Yes if you want to map the responses to a system in the process stage.
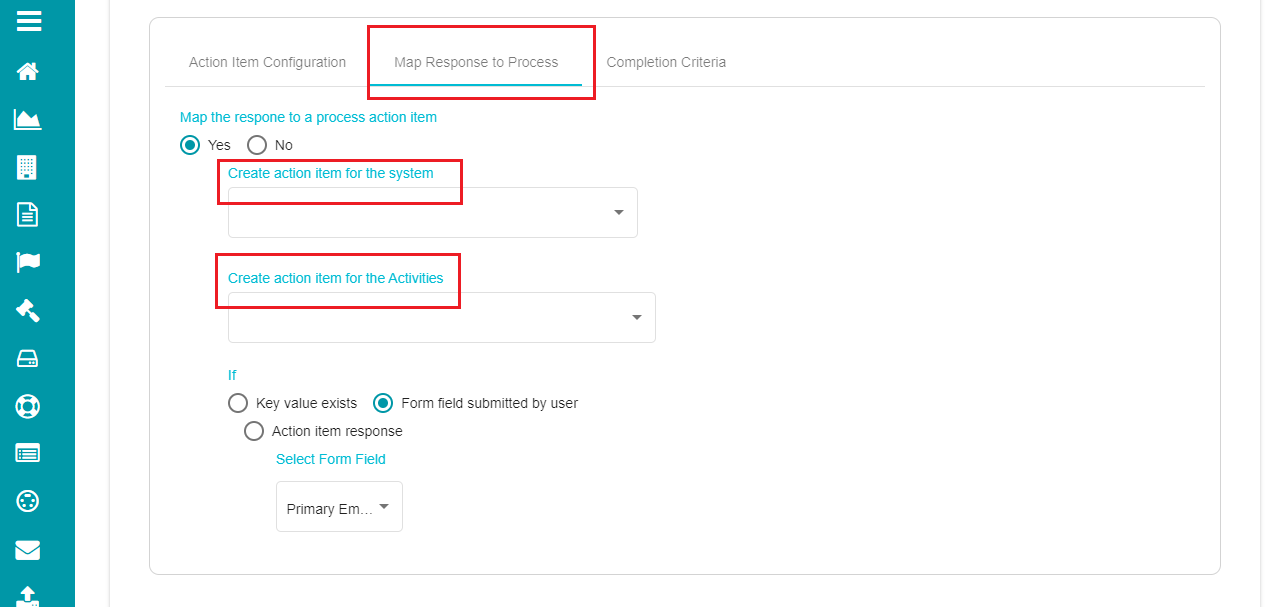
Here, you can map the response to a process action item in two ways - by creating an action item for the system, and by creating an action item from the Activities. You can directly define the responses in the first case.
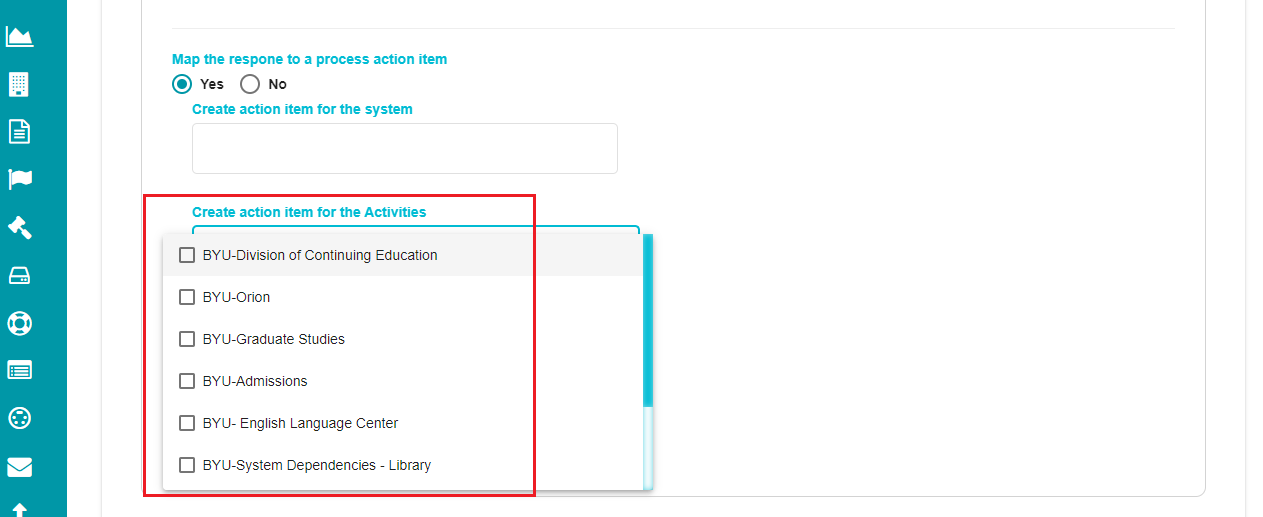
To map the response by creating an action item from the Activities,
Click on the 'Create action item for the Activities' dialog box to open the drop-down menu.
Select the required Activity from the menu.
You can see three options on the screen - Key value exists, form field submitted by user, and action item response.
Clicking on Key value exists provides a drop-down menu showing all the keys configured for the action item.
Select the appropriate option from the drop-down menu.
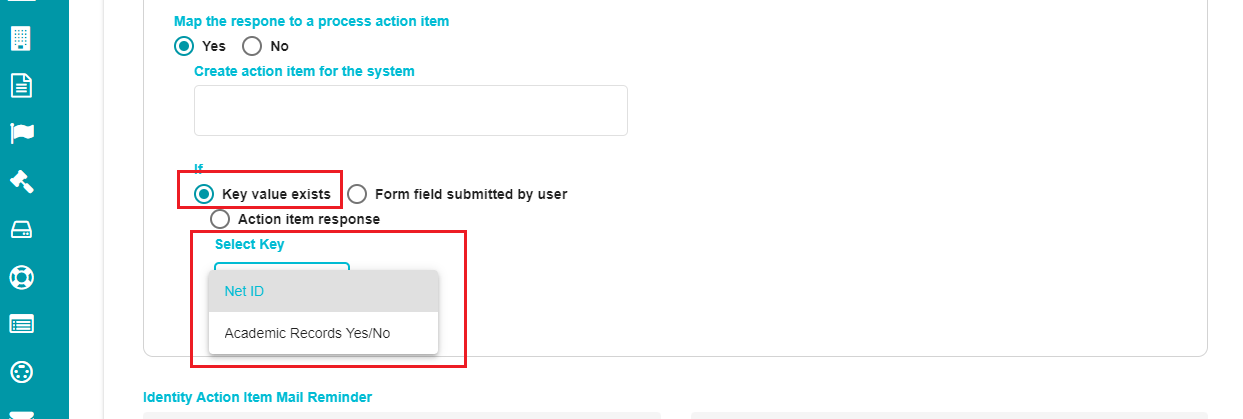
Note: In this case, the system will only be created if the selected key is answered by the person validating the action item. If there is no input for the selected key, a process action item for system dependencies cannot be created.
Clicking on the Form field submitted by the user provides another drop-down menu showing different fields of a form.
Select the required field from the menu.
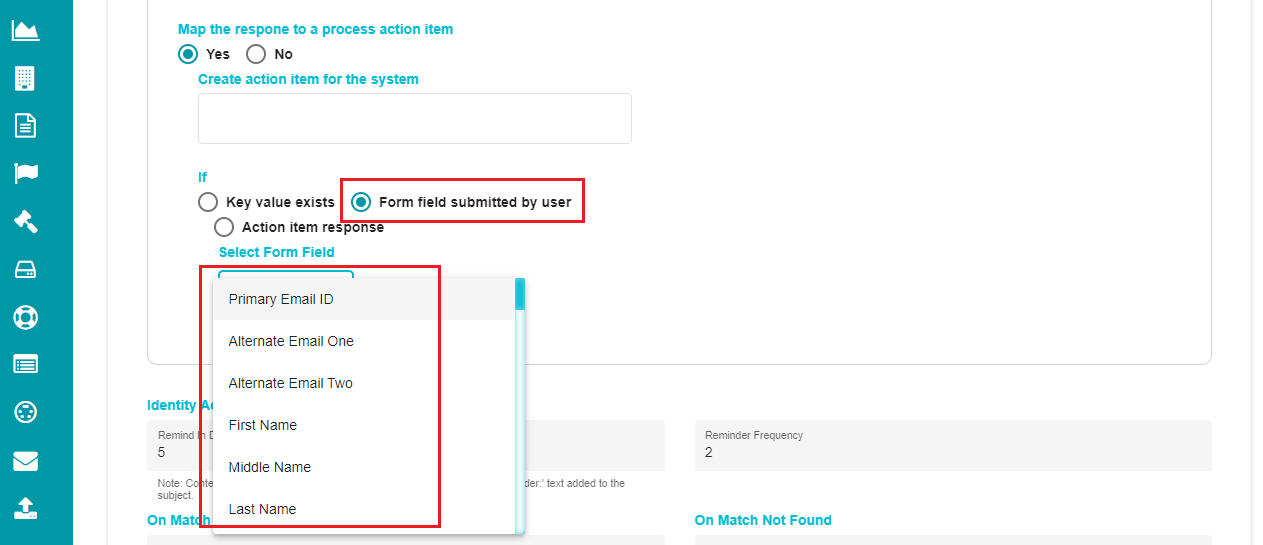
Note: In this case, the system will only be created if the selected field has an input from the user submitting the request. If there is no input for the selected field, a process action item for system dependencies cannot be created.
- Selecting Action Item Response has only one field - Match Found/Match Not Found.
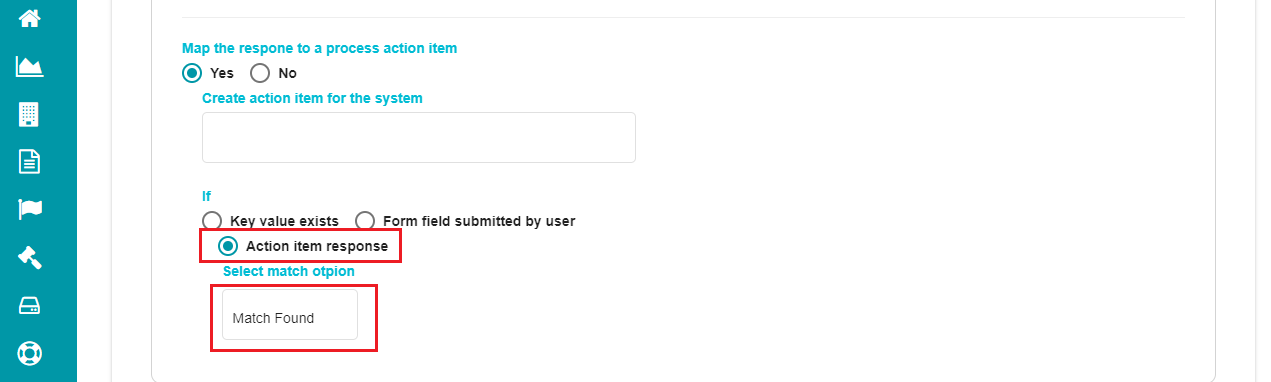
Note: In this case, you can see the response as Match Found/ Match Not Found or anything that you've customized for the Match Found option previously. The system dependency will be created only when the action item gets the selected response.
- Navigate to the 'Completion Criteria' tab if you want to add criteria for completing action items.
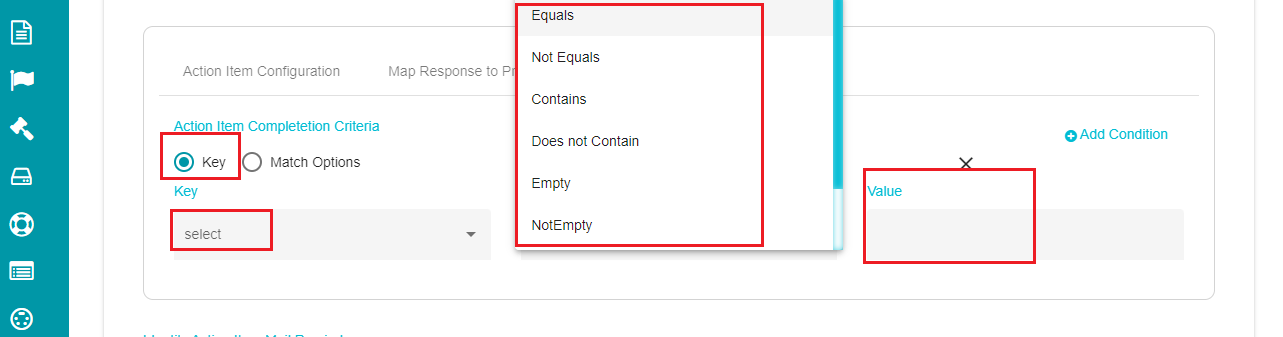
It gives two options - Key and Match Options.
Match options - drop-down menu showing different conditions for a possible match. Action item would be marked complete if the match option matches with the selected condition.

Key - in this case, the action item is complete if the selected key has a response by the person validating the action item. If there is no input for the selected key, the action item remains active.
Select a key from the 'Key' drop-down menu.
Select the required 'Condition' for the key from the drop-down menu.
Define the 'Value' to be compared with the input.
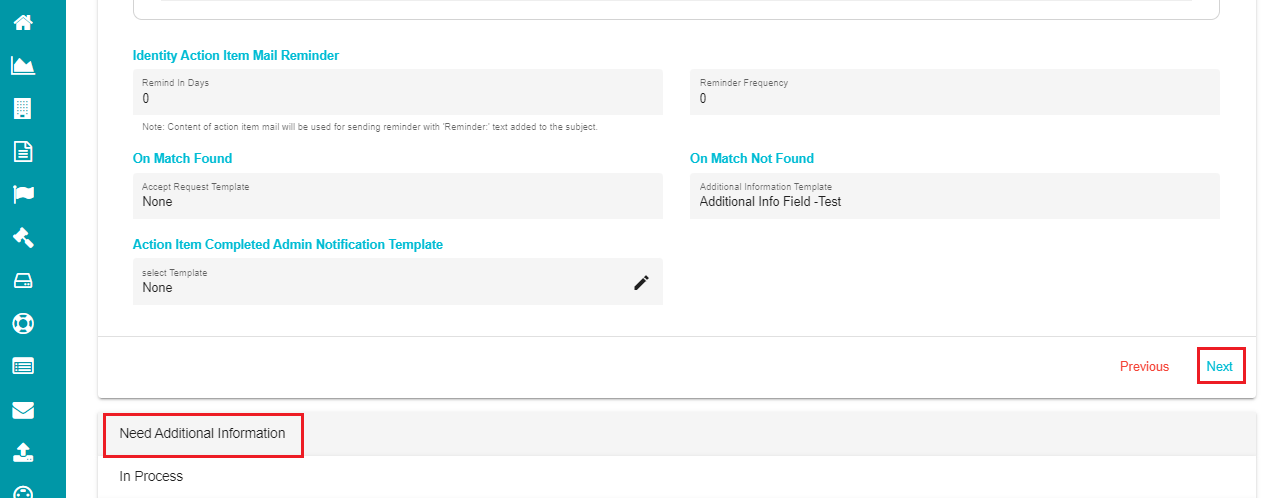
Identify Action Item Mail Reminder - after sending the Action Item to the users, this field is used configure reminder mails in case of no/delayed response.
Remind in Days: you can specify the number of days after which the reminder email should be sent to the users.
Reminder Frequency: used to specify the number of times the reminder email should be sent to the users.
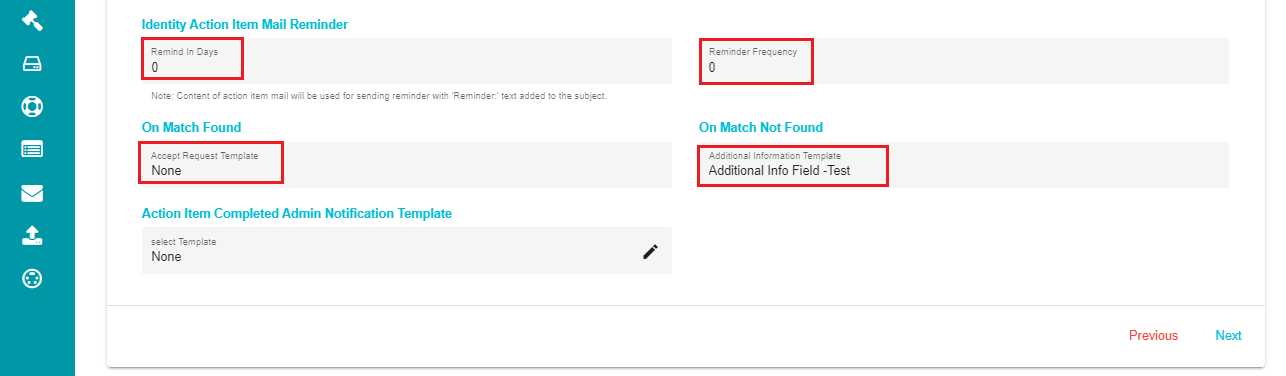
On Match Found - it specifies the response sent to the users when the match is found for the Action Items.
Click on the 'Accept Request Template.'
Enter the necessary input to configure the template.
On Match Not Found - it specifies the response sent to the users when there is no match for the Action Items. In this case, you can ask for additional information by configuring a template.
Click on the 'Additional Information Template.'
Enter the necessary input to configure the template.
Action Item Completed Admin Notification Template - this drop-down menu is used to configure the template for sending notifications through the process.
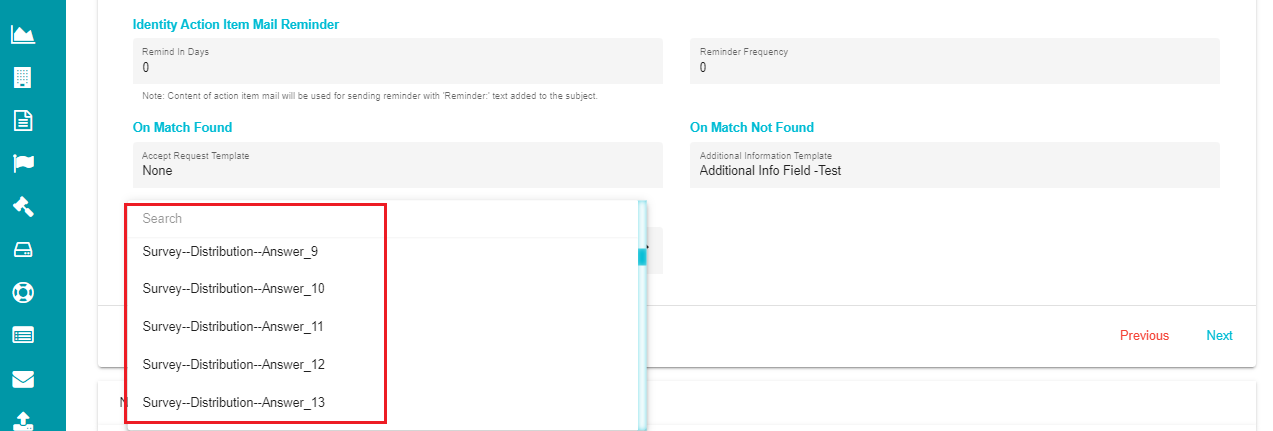
Click on the 'Select Template' drop-down menu.
Select the required template from the menu.
Note: Alert notifications are sent to the admins whenever there is a response based on the action items.
Action Items Required to complete Validation - used to select the action items necessary to complete the request validation.
Select: drop-down menu showing all the action items related to the request. It is a multi-select option, so you can choose any or all the action items.
Any: binary value appears as you select the action items.
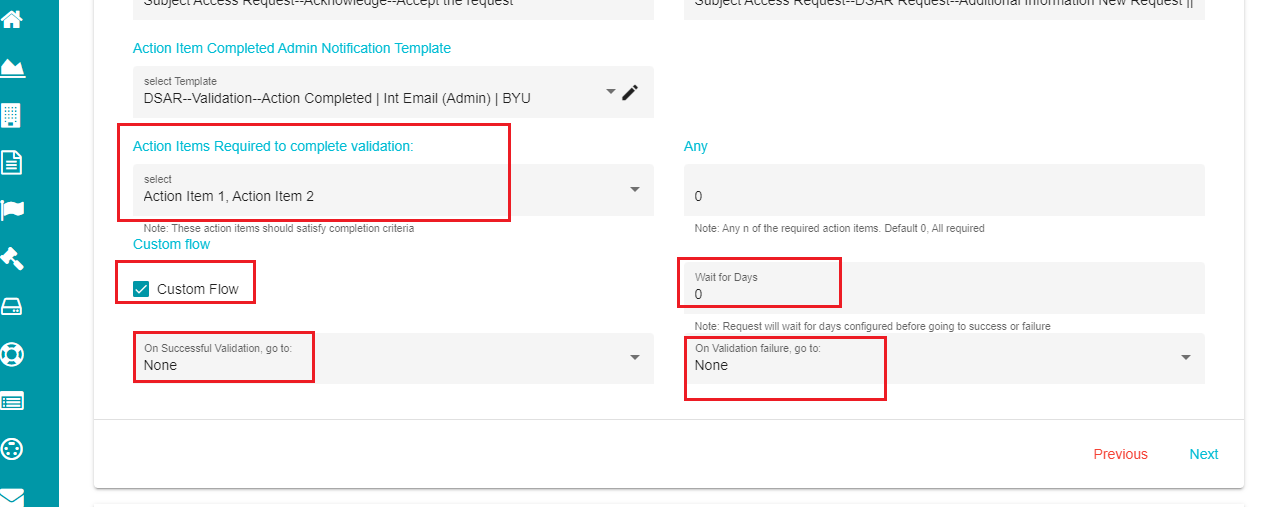
You can configure 'Custom Flow' option in this stage too. Checking this option pops up three conditions to decide the flow.
On successful validation go to: drop-down menu to select the next stage of the request if the validation is complete.
Wait for Days: waiting time for the request before moving to the next stage based on its validation.
On validation failure, go to: drop-down menu to select the next stage of the request if the validation is unsuccessful.
You can now move to the next stage of the request flow.
- Need Additional Information:
Whenever additional information is required to process the user's request, the 'Flow' tab provides different options to configure this stage.
- Click on the 'Next' button on the screen to navigate to the 'Need Additional Information' tab.
Note: You can also reach this configuration by clicking on the 'Need Additional Information' button.
If you want to automate the 'Need Additional Information stage,
- Mark the Automate Phase? as Yes.
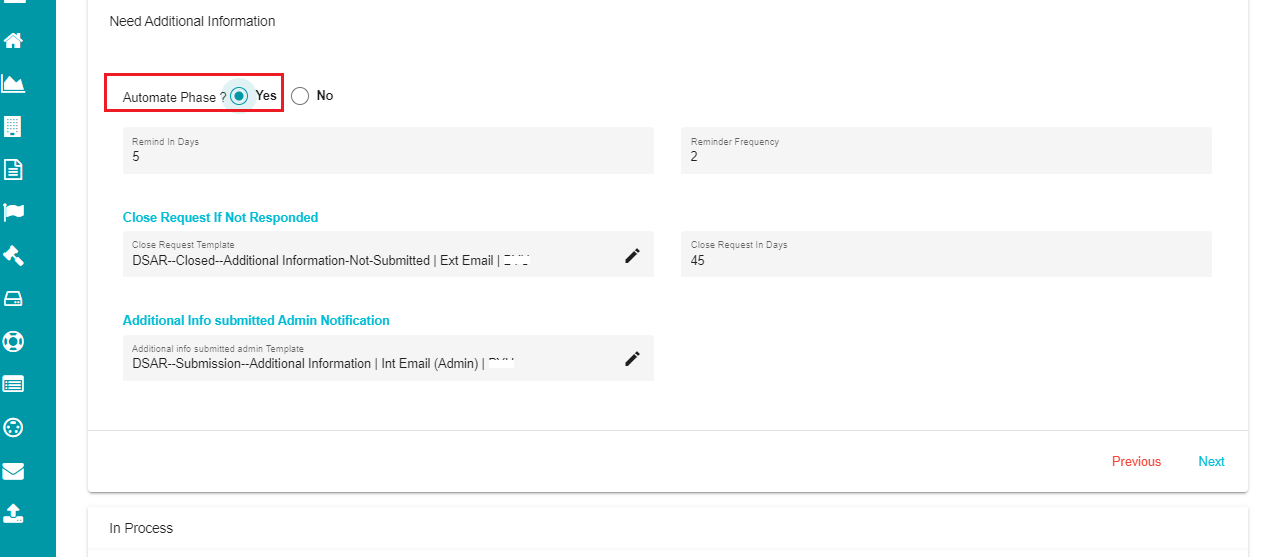
The automations in this stage are -
a) The system sends reminder emails asking for additional information based on the configured reminder frequency.
b) The requests are marked as closed if the additional information isn't received within the due date as configured in the flow.
Note: Pre-process stage can also be automated in a request flow. However, the process phase of the flow mapped to the pre-process stage should also be automated if you want to complete the stage. If that flow isn't automated, the system waits until the pre-process stage is completed manually and then continues with the remaining stages.
You can continue to define the following configurations, irrespective of automating this stage.
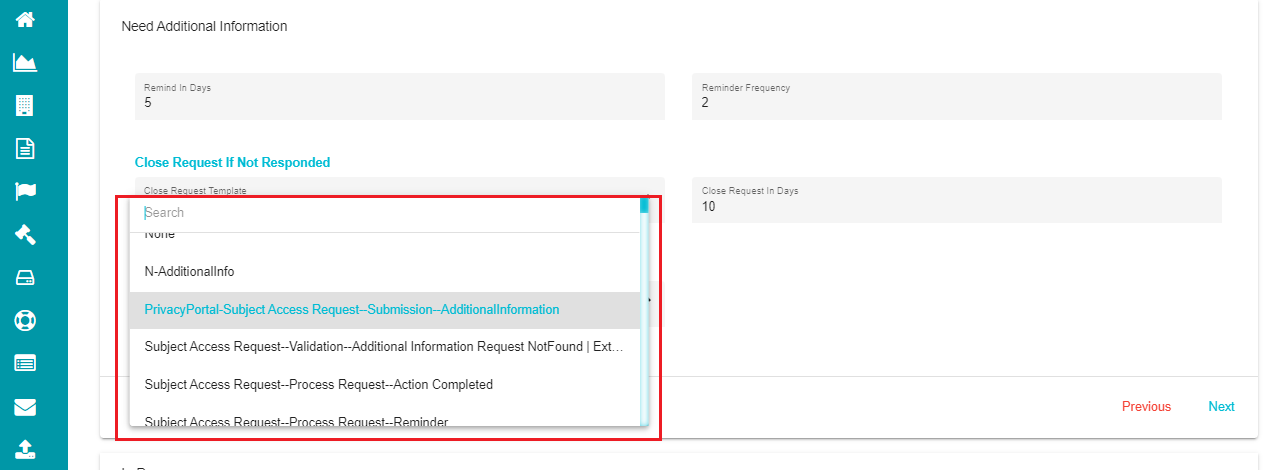
Remind in Days: you can specify the number of days after which the reminder email should be sent to the users.
Reminder Frequency: used to specify the number of times the reminder email should be sent to the users.
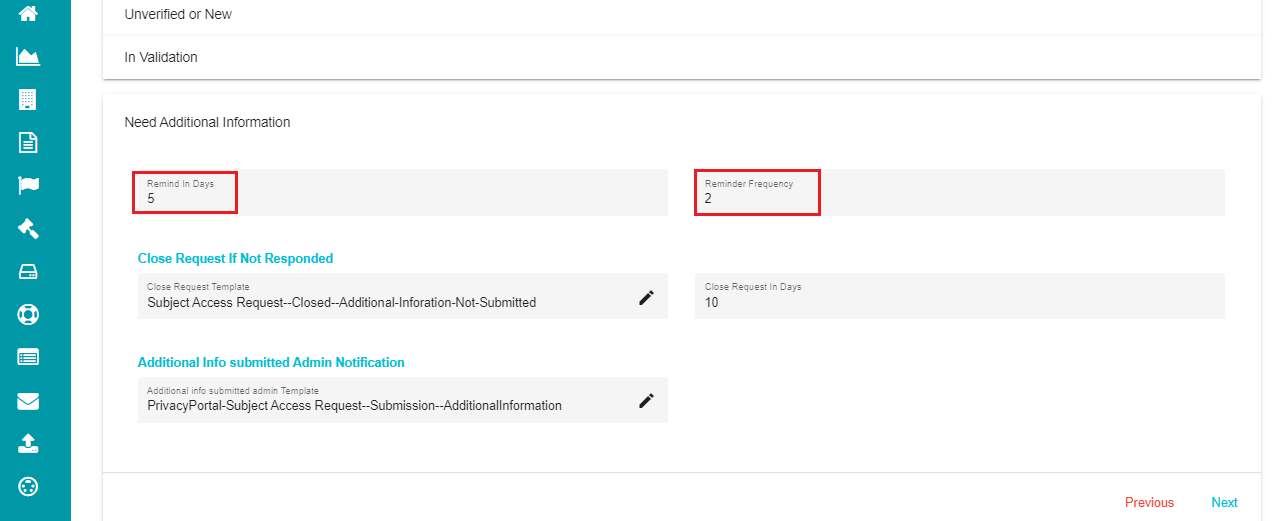
Close Request If Not Responded - in case of no response from the users for additional information, this option can be used to close the request and inform the users.
Click on the 'Close Request Template' drop-down menu.
Select the required template from the menu.
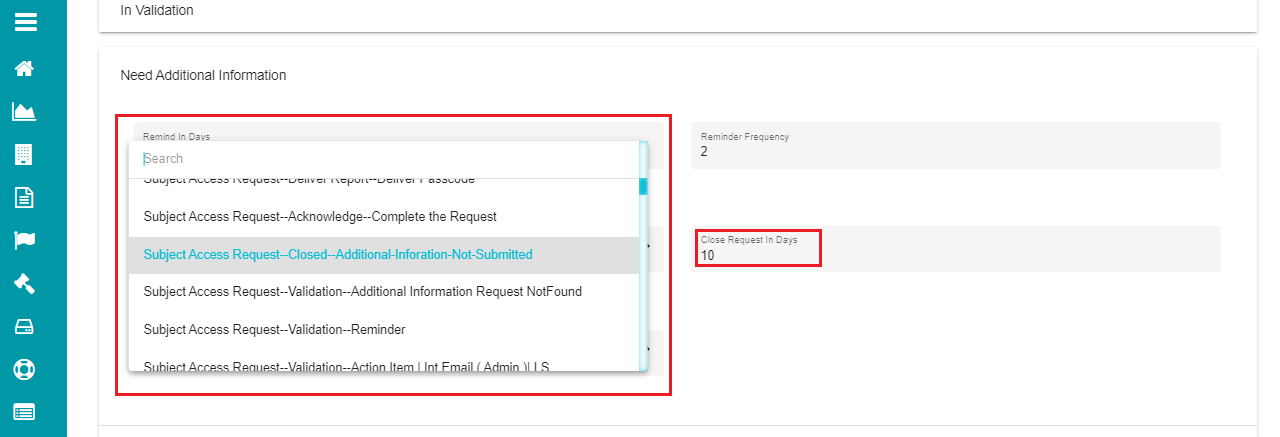
Click the 'Close Request in Days' option.
Specify the number of days to close the request.
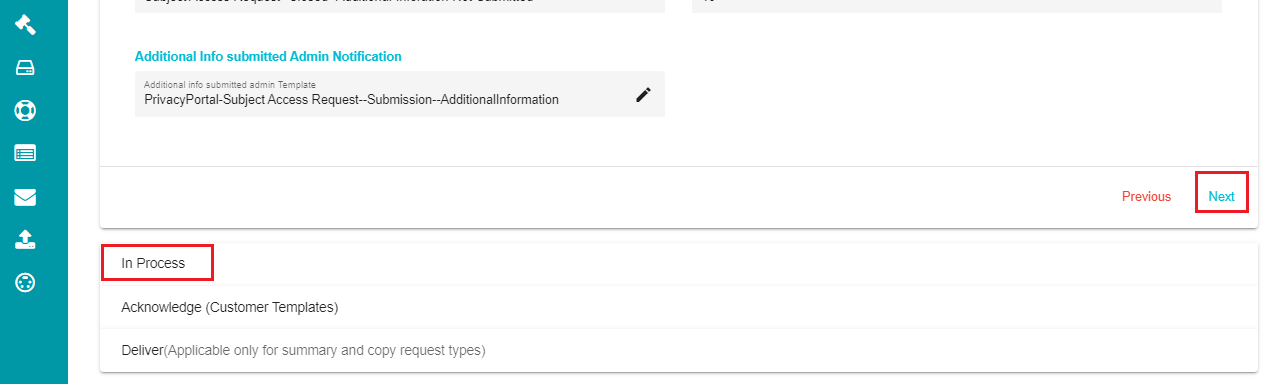
Additional Info Submitted Admin Notification - this drop-down menu is used to configure the template for sending notifications through the process.
Click on the 'Select Template' drop-down menu.
Select the required template from the menu.
Note: Alert notifications are sent to the admins whenever there is an update related to additional information requirements.
- In Process:
In this stage, data maps are configured to specific systems to process the requests. You can configure new systems here or can modify existing systems.
- Click on 'Next' to navigate to the 'In Process' tab.
Note: You can also reach this tab by clicking on the 'In Process' option.
To automate the Process phase,
- Mark the Automate Phase? option as Yes.
This automation allows the system to perform the following tasks -
a) Creating the action items required for the In Process stage based on the Flow configuration.
b) Sending reminder emails based on the configured reminder frequency.
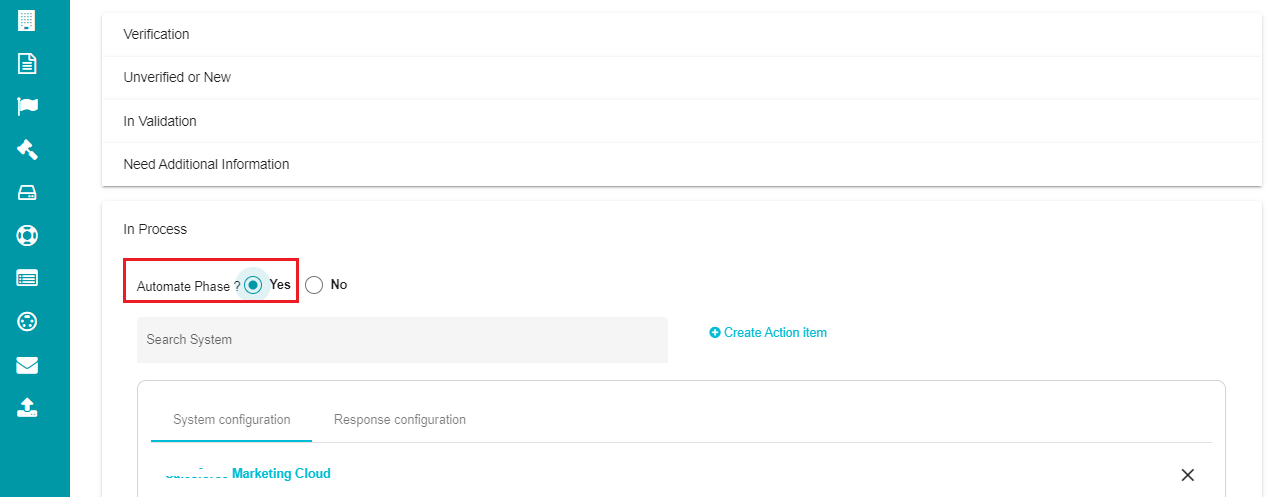
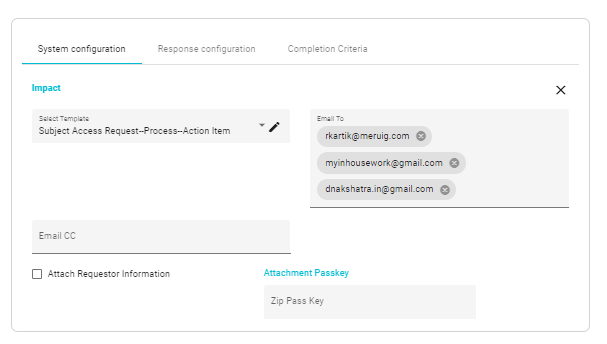
a) System Configuration:
To create a new action item for a system,
- Click on Search And Create Action Item and choose the action item of your choice from the drop-down menu. Upon choosing your option, this automatically creates a new action item for you. Scroll down to customize it.

Open the 'Email To' drop-down menu.
Select the Email IDs of the point of contact.
NOTE: In some cases, you will be allowed to create another Action Item only upon completion response of a dependent Reference Action Item under the same Process stage. You will also see the response of the referenced action item in it.
Email CC option can be used to include anyone in CC when sending the email.
- Select the mail ID in the 'Email CC' drop-down menu.
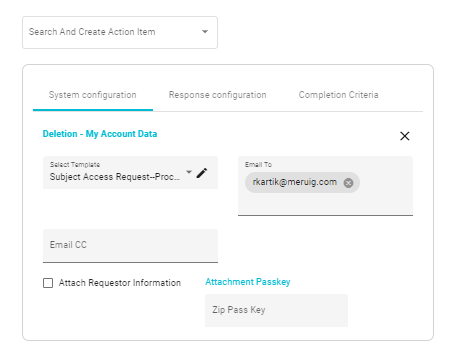
- Attach Requestor Information - this option, when checked, includes the requestor's information within the email.
Attachment Passkey - enter the passkey required to access the attachment sent to the user.
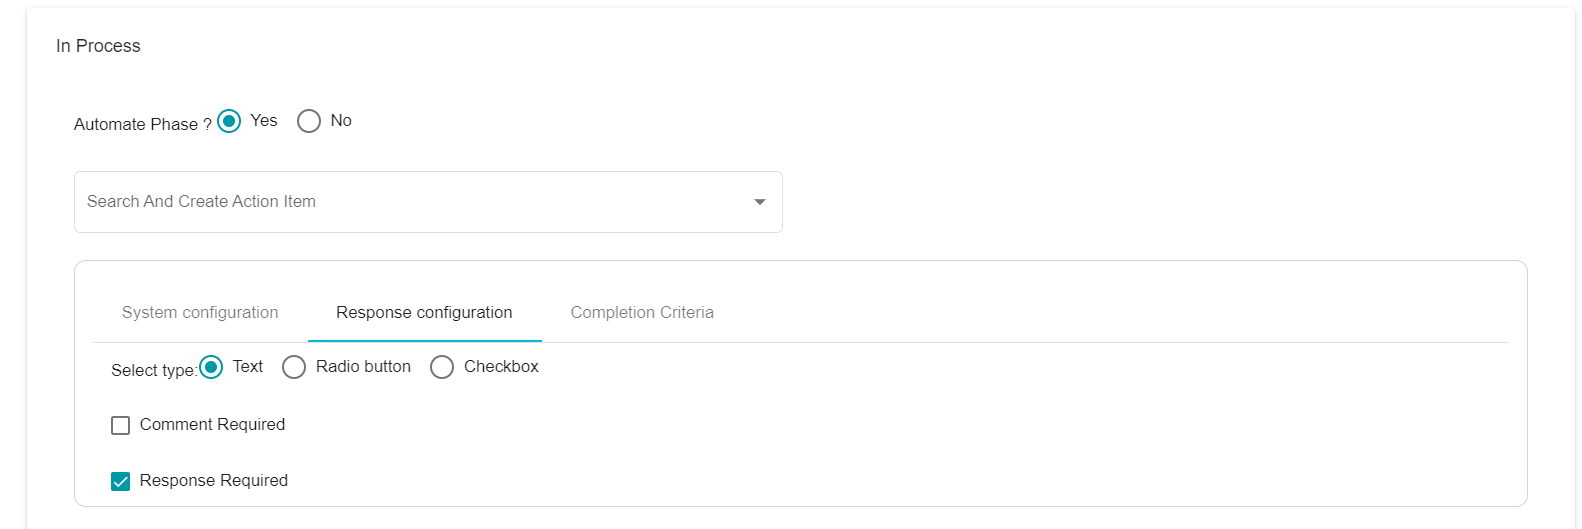
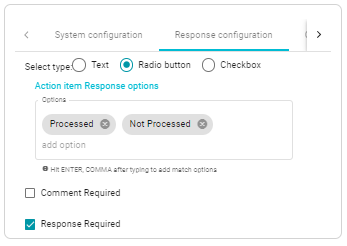
b) Response configuration:
This customization can be used to configure action items of the process stage based on the response received from the user. Each action item in the process stage will now have an additional option called 'Response Configuration' which can be used for this purpose.
- Click on the 'Response Configuration' option on the screen.
Note: The screen shows three options, Text, Radio button, and checkbox. The default selection is Text for every action item, so the existing action items aren't affected. If you want to change it, you can use the other options at requirement.
- Configure the action item response options.
These changes are reflected in the Act tab of the In Process stage in the DSA Request processing.
Note: Use comma separation to configure multiple response options for the action item.
When selecting 'Text' as the response type, you can see that there is not much change to the action items in the 'In Process' stage of the DSA Request flow. You can type the required response in this case.
Selecting 'Radio button' provides the configured action item responses in a list. In this case, you can only select any one of these responses.
Checkbox option lets you select multiple responses for a single action item.
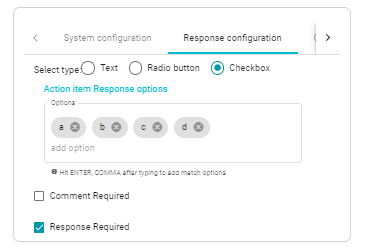
- There are two additional checkboxes present to each select when a Comment is required and when a Response is required.
Note: If the Response Configuration is used in the Pre-process stage of the DSAR - Flow, the same reflects in the Pre-Process tab of the DSA - Request processing.
c) Completion Criteria:
- This feature allows you to specify conditions that determine when an action item is considered complete.

To modify an existing system,
Click on the 'Search System' box.
Search and select the system name here.

All the systems matching the input are displayed on the screen, and modifications can be done at requirement.
Note: Multiple systems can be created on the Flow tab for processing different requests. The point of contact and system templates for each system can be different based on the request types.
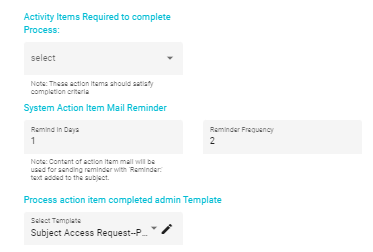
System Action Item Mail Reminder - reminder mails sent to the user in case additional information is needed for the process action items.
Remind in days: number of days after which the reminder emails should be sent to the user.
Reminder frequency: number of days after which the reminder emails should be resent to the user.

Process action item completed admin template - email format informing that the action items in this stage are processed. Use the Select Template drop-down to select the required email template.
On Process action item additional information required - email format used to ask for additional information (if needed) for the process action items.
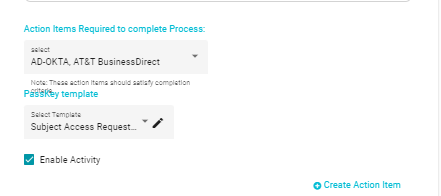
d) Enable Activity:
Previously, process action items are mapped to any of the datamap systems. The latest version supports the creation of action items without having to map them to any of the datamap systems. Moreover, you can add external user ids to the action items, unlike the previous version, where only the system users can be added.
For enabling action items without systems,
- Check the 'Enable Activity' option on the screen.
- Click on '+Create Action Item'.
You can see a new action item appearing below the pre-defined action items, if any.
Give the required name to the action item in the 'Name' dialog box.
Open the Email To drop-down menu and select the required email addresses from the list.
Click on the 'Select Keys' and select the required keys from the drop-down menu.
Note: the keys displayed in this menu are the keys configured in the 'In Validation' stage of the flow.
- Pick the necessary email template from the 'Select Template' drop-down menu.
Note: These action items that aren't mapped to the datamap systems can be found in the Process stage of the DSA Request flow.
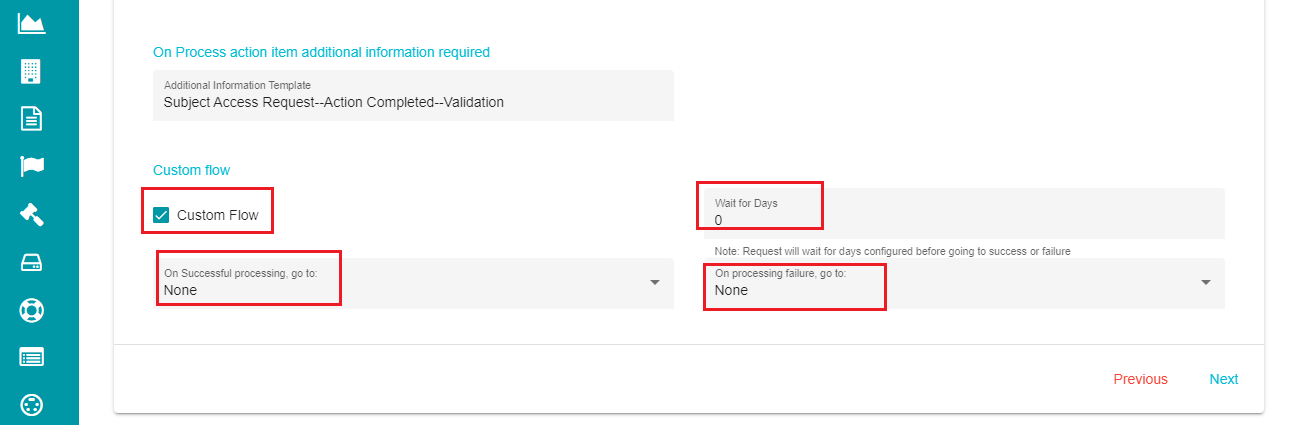
You can define the 'Custom Flow' option in the In Process stage of the request too. Checking this option pops up three selections.
On successful processing go to: drop-down menu to select the next stage of the request if the processing is complete.
Wait for Days: waiting time for the request before moving to the next stage based on its processing.
On validation failure, go to: drop-down menu to select the next stage of the request if the processing is unsuccessful.
- Enabling Activity and Creating an Action Item also provides an additional box with its own set of Action Configuration, ResponseConfiguration and Completion Criteria. They are to be filled the same way as you must for the rest of the In Process Condition Sets.
In the Completion Criteria, you are to specify Condition and Value accordingly.

The 'In Process' stage is configured completely and you can move to the next phase of the request flow.
e) Selecting Activity Items:
You must select an Activity Item from the drop-down option in the Action Item Required to complete Process.
- Acknowledge
In this stage, the email template chosen for communicating with the customer can be configured based on the user's answers/ responses in the privacy portal when submitting the request.
- Go to the 'Acknowledge' stage on the Flow screen.
The screen shows different templates configured for each stage of processing the service request placed by the user.

To customize the email templates in different stages of the request based on the user's response to the action items or selected input fields,
- Click on the
 icon present next to the template that you want to edit.
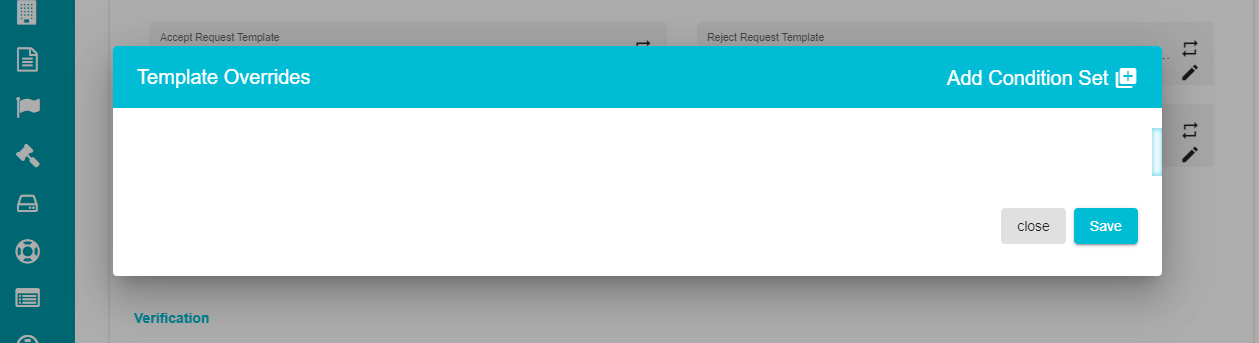
You can see a pop-up on the screen, where you can customize the templates based on the responses from the user.
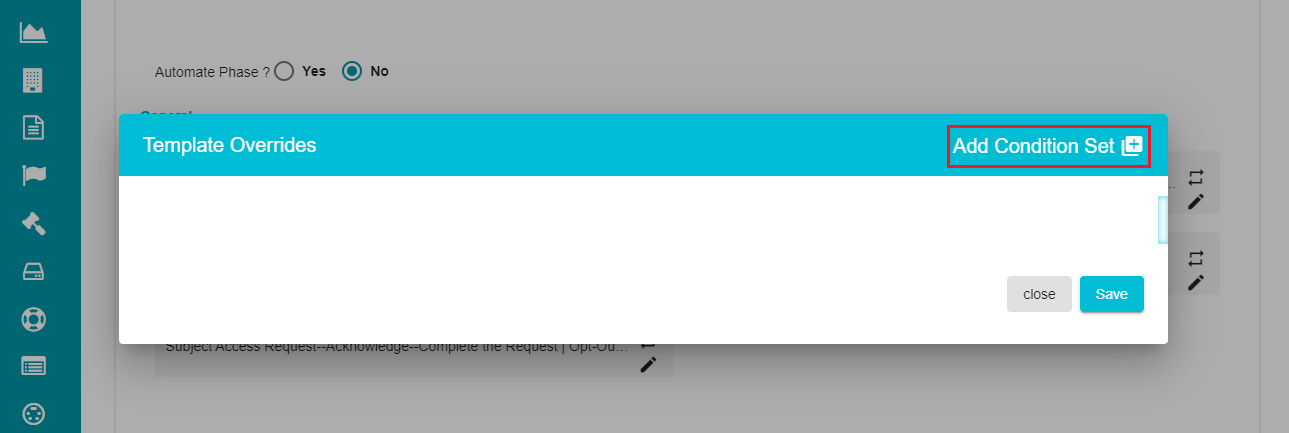
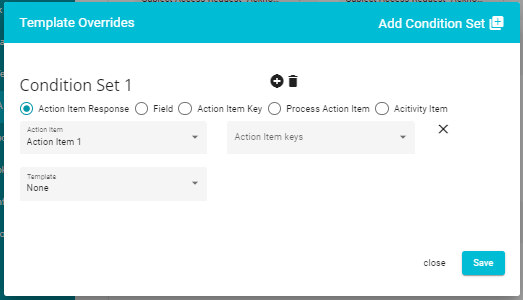
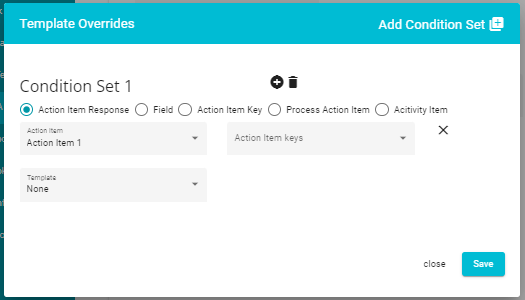
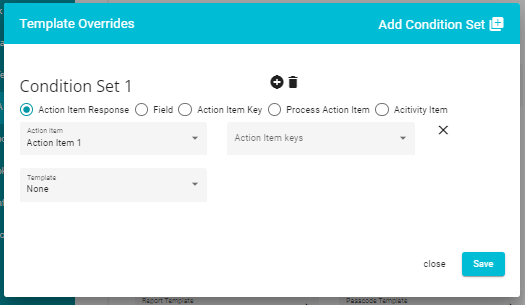
- Click on 'Add Condition Set +'.
Note: You can customize the templates in two ways - based on the action item keys and based on the field keys.
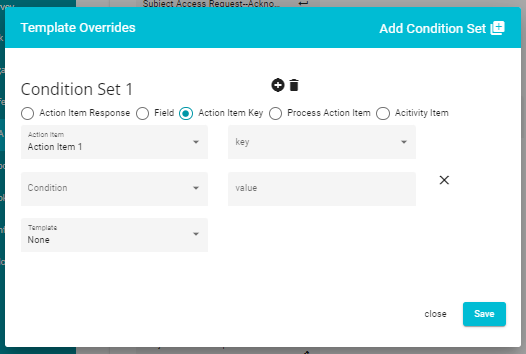
For Action item keys,
Select the 'Action Item' option on the screen.
Open the Action Item drop down menu and select the required action item from the menu.
Click on the Action Item Keys to open the drop-down menu.
Select the required option from the menu.
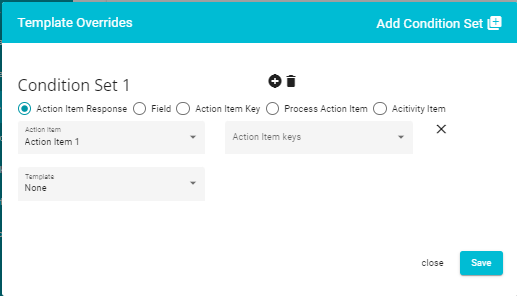
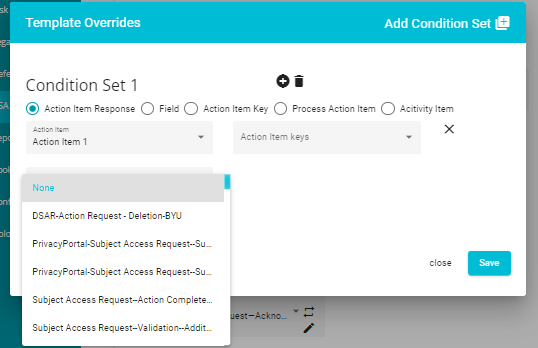
Open the 'Template' drop-down menu.
Select the required template from the menu.
Click on 'Save'.
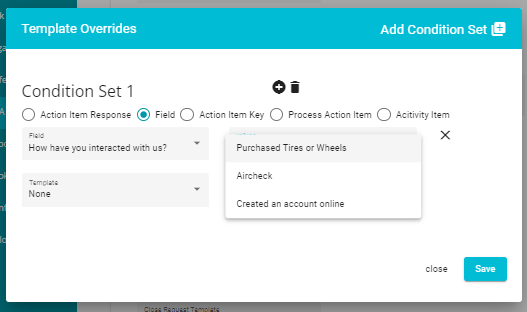
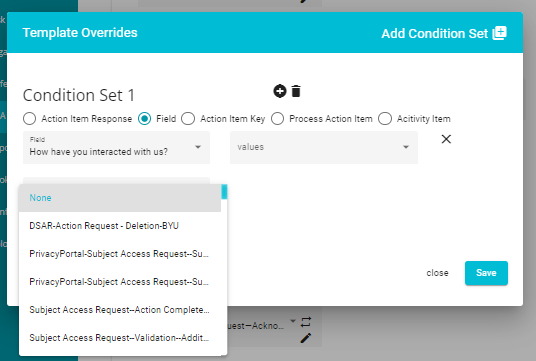
For customizing the templates based on field keys,
- Open the Field drop-down menu.

Select the required field from the menu.
Open the Values drop-down menu.
Select the required value from the menu.
Note: the values in this menu vary based on the chosen field from the Field drop-down menu.
- Click on 'Template' to open the drop-down menu.
Select the required template from the menu.
Click on 'Save'.

Note: Use the '+' icon to define multiple configurations for each event and the 'delete' icon to delete a condition. If you want to return to the main Acknowledge screen, click on 'Close'.
Usually, the General Templates are selected for communication when the user responses are not mapped to the templates in each stage. However, if the responses are mapped and are matched with the configured condition sets, the default templates are overridden with the configured templates.
To add Action Item Key,
Select Action Item Key
Select Action Item from the drop-down menu.
- Select a Key, Condition, Value and Template from the drop-down menu.
a) General Templates
- Accept Request Template - email format sent to the user stating that their request is accepted.
The Accept Request Template is overridden with the selected template if the user inputs match with the condition sets.
The email template here is not overridden as the user response doesn't match with the conditions defined.
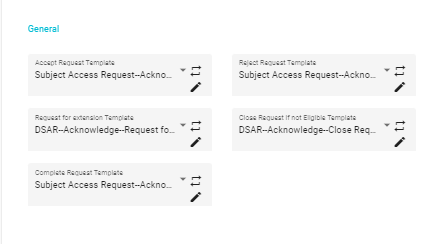
- Reject Request Template - email format sent to the user stating that their request is rejected.
The Reject Request Template gets overridden if the user enters the input 'AZ' in the State Field on the request form, as per the defined condition set.
The default template gets overridden, as the user's input matches with the configured condition.
- Request for Extension template - email format sent to the user asking for an extension to complete the processing of their request.
If the user's responses match with the condition set defined for this template, a new email template is selected based on the conditions configuration and sent to the user asking for an extension to process their service request.
- Close Request if not Eligible - email format informing the user that their request is closed as it is considered ineligible.
- Complete Request Template - email format informing the user that their request is processed.
Here, upon creating a condition set, you input all the information requested as shown before.
b) Verification Stage
- Verification Template - email format asking the user for verification to process their request.
If the user's input matches with the defined condition set, the default Verification Template is replaced with the new one, and the email in the new format is sent to the user.
Here, you must employ similar instructions as above and fulfill all the information requested.
c) New Stage
In this stage, the Additional Information Template can be overridden based on the user responses to the action items or input fields.
There is no condition set defined for this stage, so the emails sent to the user in this stage are based on the default templated selected for this, irrespective of the user's inputs.
d) In Validation Stage
This stage has two possible overrides, Accept Request and Additional Information.
- Accept Request Template
If the user response matches with the configured condition set, the default for the Accept Request Template is replaced with the template selected in the condition set.
- Additional Information Template
Likewise, if the user response matches with the configured condition set, the default for the Additional Information Template is replaced with the selected template in the condition set.
The overridden template can be seen on the Validate stage of the request flow, where the default template is replaced based on the user's response.
Here, the default Additional Information Template isn't overridden as the user's response does not match with the configured input when defining the condition set. In this case, the default template is selected, and the email is sent in the default format.
Note: the request status is changed to 'Need Additional Information' after sending the email asking the user for additional information.
e) Process Stage
- Additional Information Template - email format asking the user for additional information to process their request.
Additional Information Template in the process stage can also be overridden based on the user responses.
If the user's response matches with the configured condition sets, the default template for the Additional Information is overridden with the selected template.
The template override happens when the request is moved to Process stage and needs additional information from the user.
Here, the user's response matched with the condition set, so the default Additional Information Template is overridden to a new template.
Note: the request's status is changed to 'Need Additional Information' after an email is sent to the user based on the new template.
f) Deliver Stage
Report Template - email template used to send the relevant reports based on user requests (valid for summary and copy of data request types).
Passcode Template - email template used to send the passcode required to access the reports sent to the user.
The email templates in the Deliver stage can also be chosen based on the condition set configuration.
If the user inputs match with these defined conditions, the reports and passcodes are mailed in the format of the overridden template.
Every request flow (except for copy and summary of data requests) completes its processing in this stage. However, the summary of data and copy requests have an additional stage to be configured in the request flow.
- Deliver Stage:
This part of the 'Flow' tab comes to play only for Summary and Copy Request Types. First, the report is constructed using the 'Build Report' option and sent to the requestors during the delivery phase. The report is usually included as an attachment within the confirmation email sent to the users after processing the requests.
- Click on 'Next' to navigate to the 'Deliver' tab.
Note: You can also reach this screen by clicking on the 'Deliver' option on the screen.
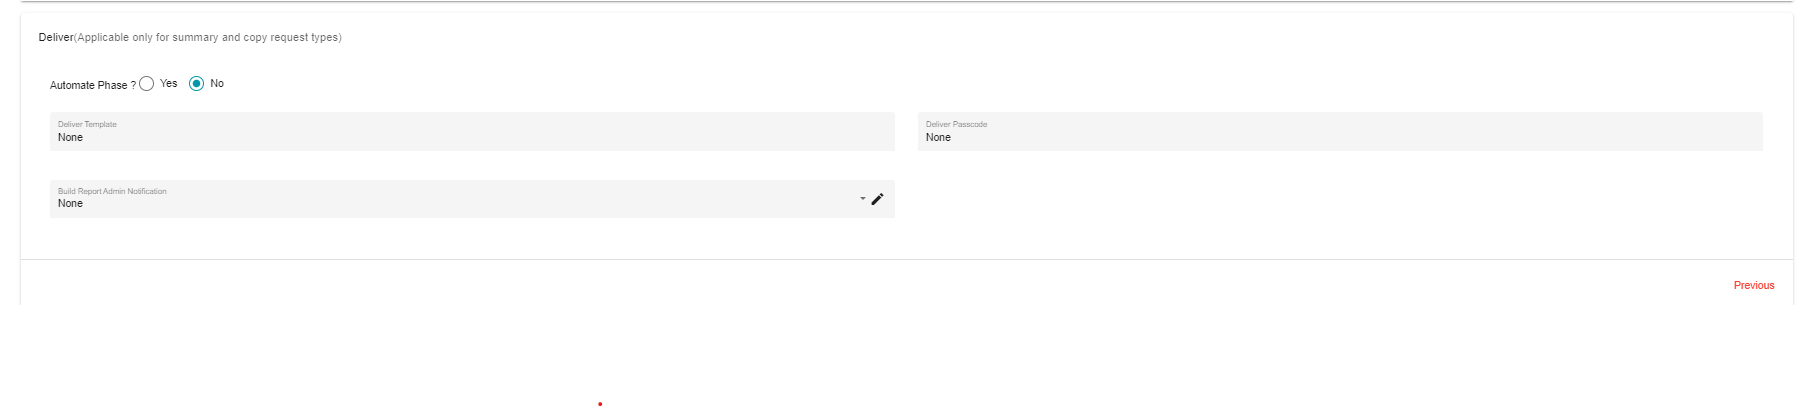
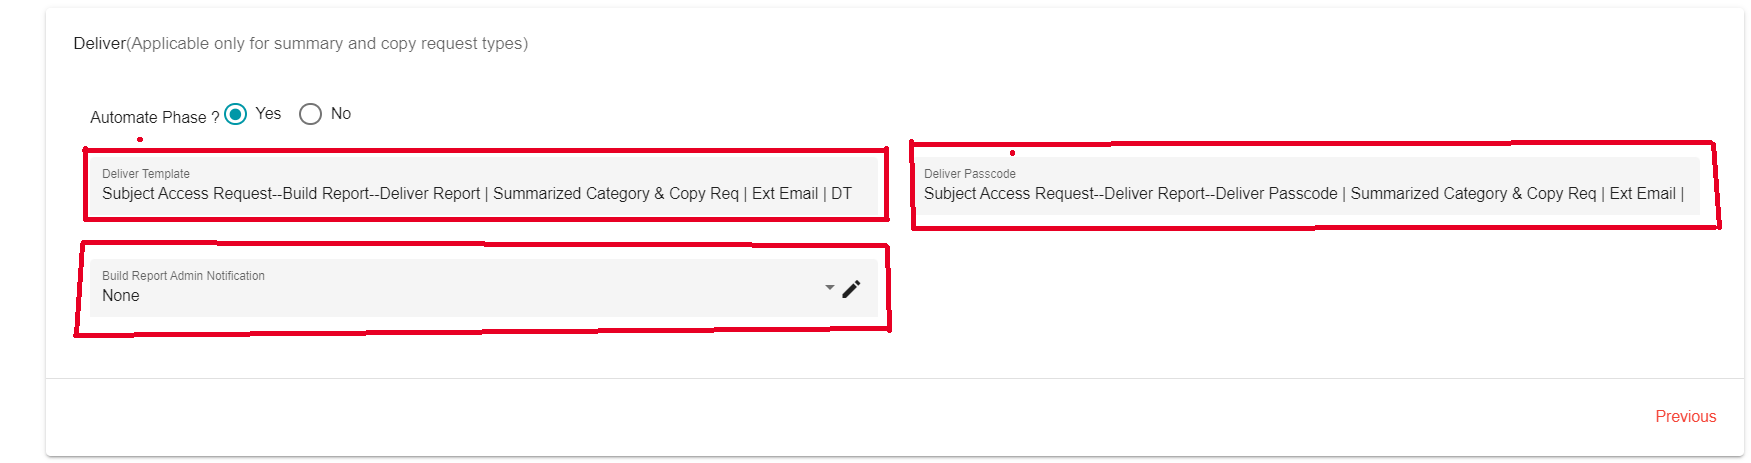
For automating the Deliver phase,
- Select Yes against the Automate Phase? option.

In this stage, the system automatically sends the Reports and Passcode emails to the user based on the configured templates.
Click on the 'Deliver Template' box.
Select the email template to be sent to the user.
Whenever an email sent to the user includes an attachment, it is encrypted with a passcode. The email with the attachment is sent first, followed by a second email containing the passcode to open the attachment. This email template can also be configured.
Click on the 'Deliver Passcode' box.
Select the email template for this option.
In the automate DSR when whenever the request has completed the Process phase the Alert Emails configured for this flow will get an notification noticing that the request is now available for the build report phase so that admins can review and build the reports
Click on the 'Build Report Admin Notification' box.
Select the email template for this option.
After configuring all these options, the flow must be saved and mapped to the tenant.
- Click on

Flow tab also provides 'Clone' option to clone an existing flow instead of configuring a new flow from scratch.
Click on the 'Flow' drop-down menu.
Select any Flow from the menu to be cloned.
Click the 'Clone' button.
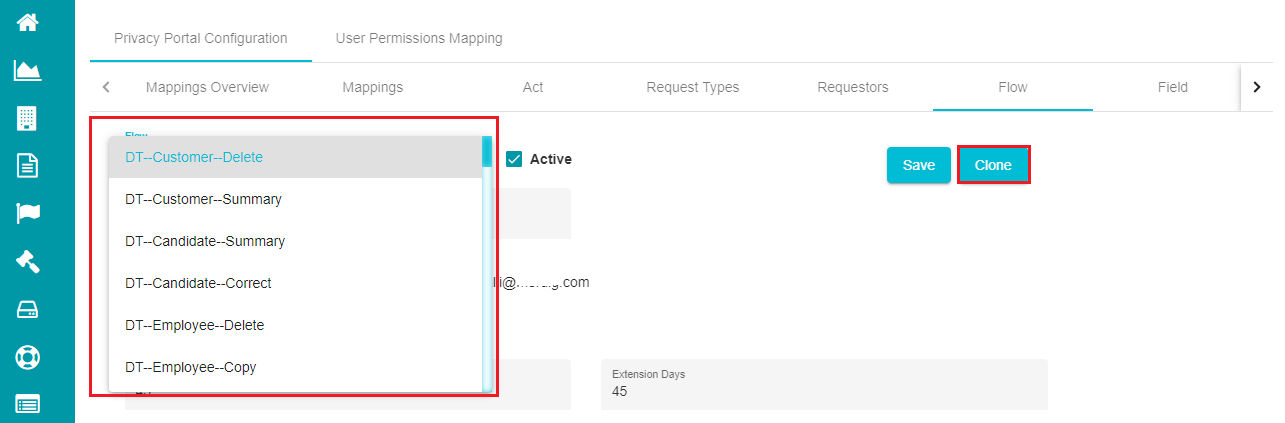
A duplicate is created for the selected form and the configurations can be modified based on requirement.
Mapping the Flow:
Any DSA Request flow created can be used only if it is mapped to the specific tenant. To map the flow,
Go to the DSAR Configuration homepage.
Click on Mappings.
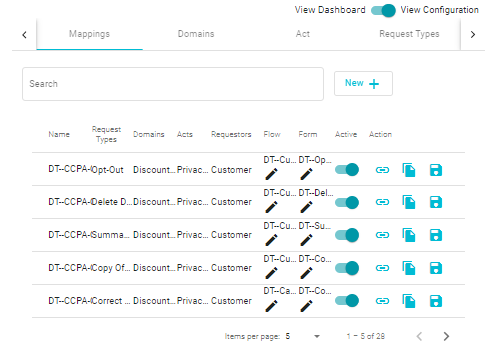
- Clicking on New will create a new Map.
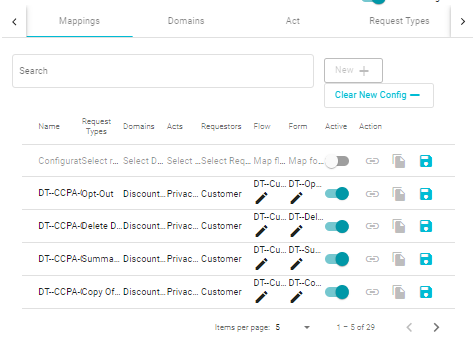
- Click on Name and type in the your choice of name.
- Click the drop-down menu under the Request Types tab titled Select Request Types.
Similarly, make sure to open Select Domains, Select Acts, Select Requestors, Map Flow and Map form and select the option of choice from the drop-down menu.
You can find the created/cloned flow in the drop-down menu along with some pre-defined flows.
Check the 'Active'
 icon after making the selection.
Tap the 'Save'
 icon.
icon.