DSAR User Guide
Overview
Privacy regulations provide the right for individuals to make Data Subject Access Requests (DSAR) to an organization to access, correct or delete their personal data being processed by the organization.
All DSA requests are submitted through the form on the website privacy portal or the IVR (toll-free number).
Data Subject Access Requests run through three stages in general -- receiving the request, validation of the request, and processing the request and in some cases, providing a report back to the requestor. DSAR Users process and validate requests as they come in depending on the configurations made by the Admin. In other words, DSAR Users respond to the requests and perform the functions depending on the requirements for the request. For example, the DSAR processor deletes the date of the validated requestor from the company database for a Delete Request.
This guide follows the steps required for the following Users: -
DSAR Validator: The user validating the requestor identity and information against the company database. In other words, checking to see if the requestor's information is in fact with the company.
DSAR Processor: The user who performs the function of the request, i.e., deleting, providing a copy, etc as per the requirements of the request.
DSAR Admin/Manager: The user overlooking all the stages of processing a request. This user manually creates action items for DSAR Validators and DSAR Processors so that they can perform their individual functions.
Note: The above three functions can be performed by 3 individual users or 1 user performing all functions or any combination of the same. It is not necessary to have 3 different users performing 3 different functions. This is left at the discretion of the company.
To Respond to a Request, follow these steps: -
Sign into your Data Governance Tool account
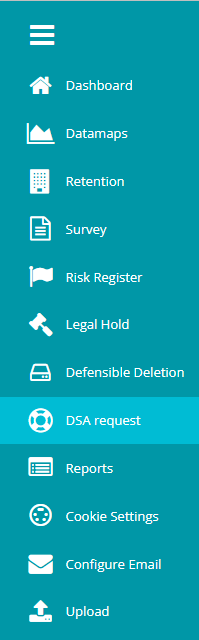
From the Main Screen of Data Governance Tool, click on DSA Request, present on the hamburger menu on the left of the screen.
On the DSA Request page, click on Active Requests
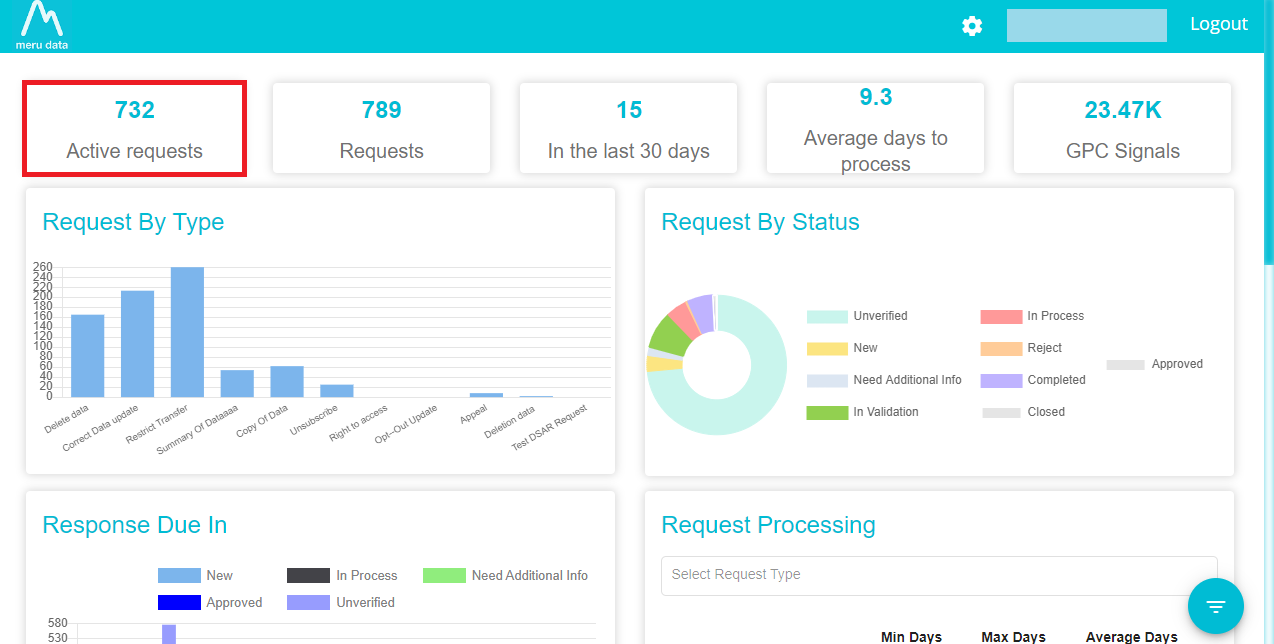
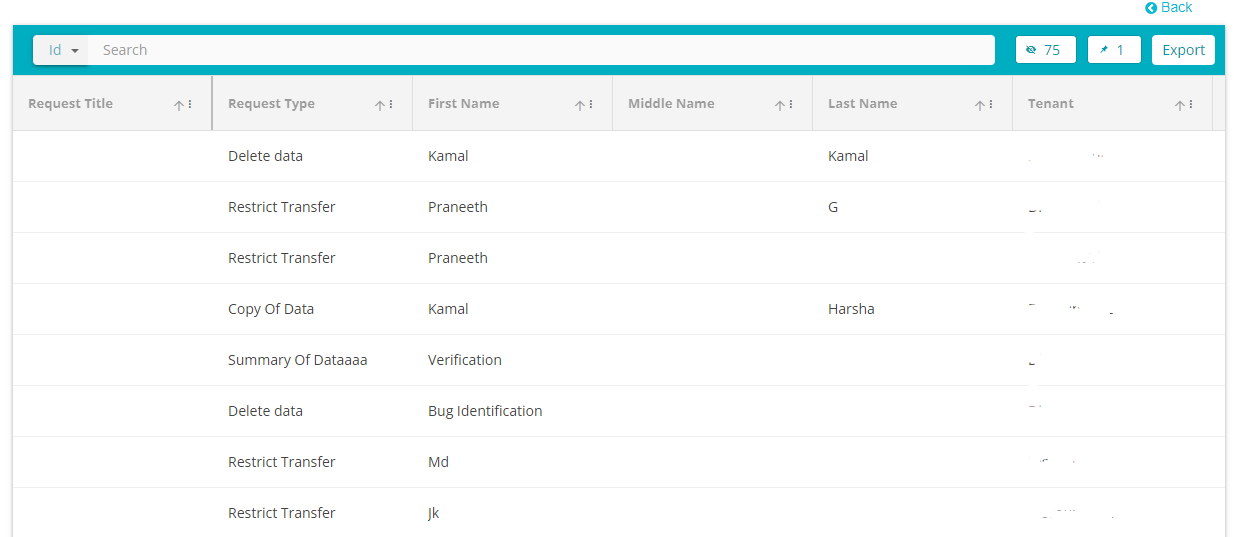
This is a list of all requests that have come in from requestors that are still active.
*Note: A guide to understanding and using the features on the grid can be found here
From this list, click on the request that you wish to respond to/process.
On this screen you can view the details of the individual request as well as configure action items to validate and process the request. In other words, this screen is where the requests are responded to/processed.
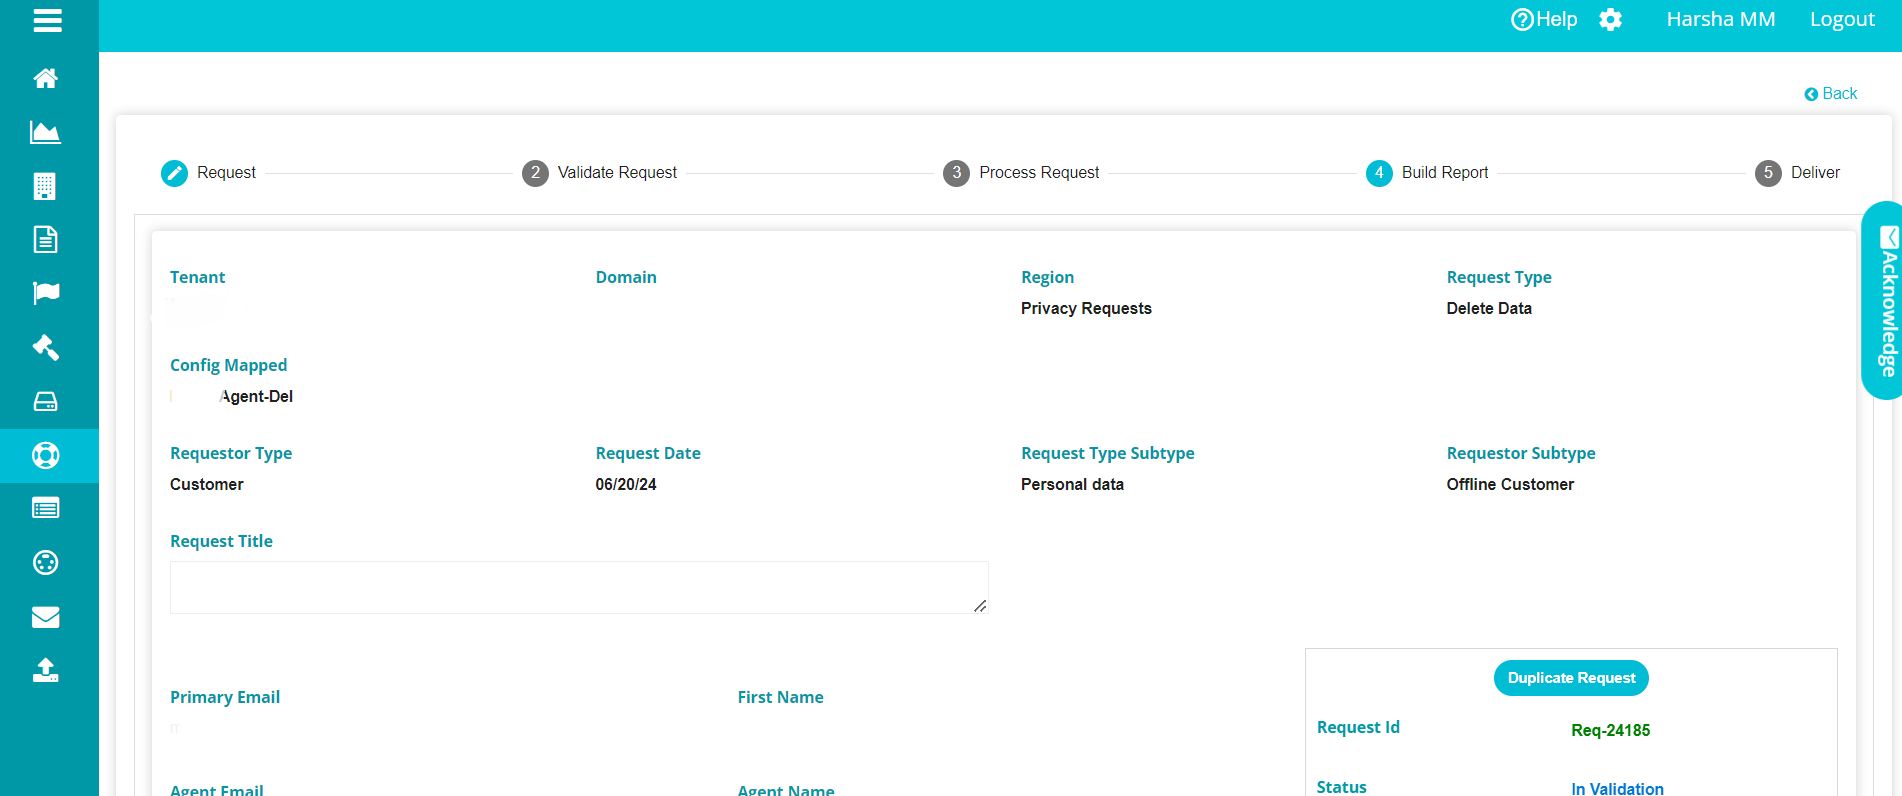
The Request Tab
Here you can view all the details of the request that was obtained from
the Privacy Portal Form
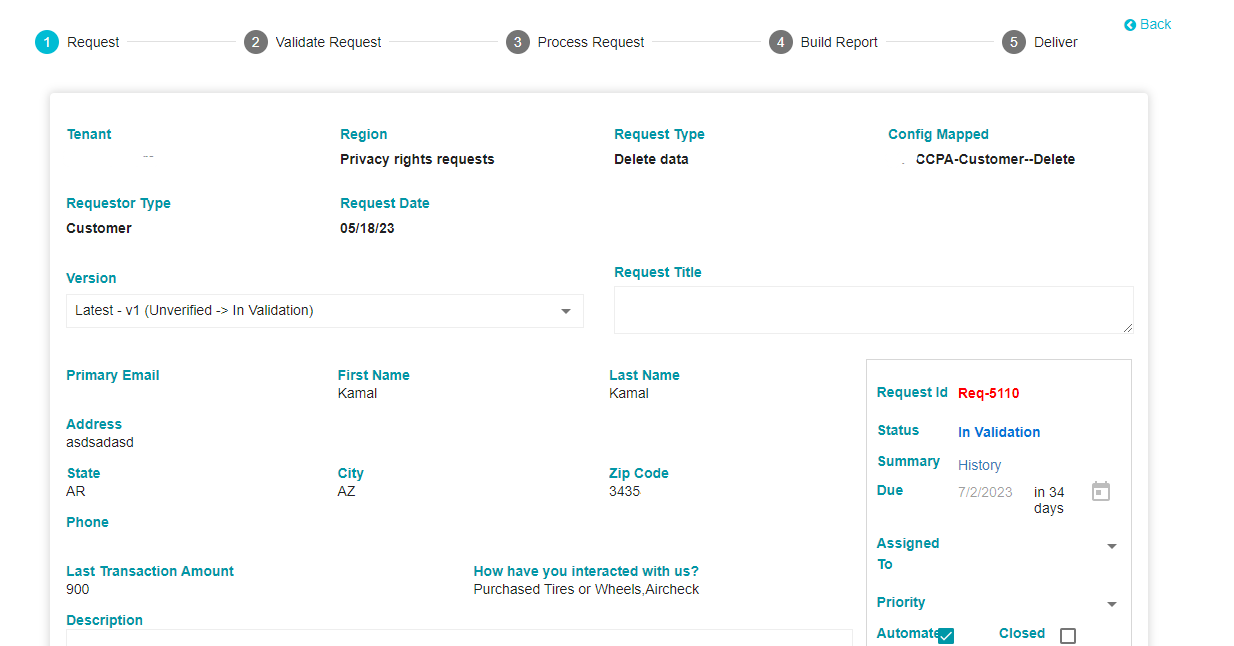
First you can view the details obtained from the requestor via the Privacy Portal Form. (The details on this Tab, which were obtained from the requestor are dependent on what was configured while creating the Privacy Portal Form) As per your requirements, certain details can be required from the customer while others won't be required.
Tenant: The name of the Tenant to which this request was submitted.
Region: The region from which this request came in. In other words, the region to which this specific request configuration is applicable.
Request Type: The function to be performed; delete data, unsubscribe etc.
Config Mapped: The configuration chosen for this kind of request. This can be created and selected from the DSAR Configuration settings.
Requestor Type: Whether the request was sent by a customer, employee, agent etc
Request Date: The date on which the request came in.
The above details are mandatory for any request as they provide key information around the context of the request. These details have been configured in the DSAR Configuration settings and accordingly the requests will be received and processed.
- Version: A new version is created with every stage. This is done to compare information between 2 stages. For example, once additional information to customer is asked from and provided by the customer, a new version will be created.
Note: Customers can, via the form, upload attachments for the following file types .csv, .doc, .docx, .gif, .jpeg, .jpg, .json, .pdf, .png, .ppt, .svg, .txt, .xls, .xlsx, .xml. The file size should be greater than 0 Kb & it should not be exceed 10 MB. If the customer has added an attachment, it will be visible on this screen.
Next you can view the details of the request.

Request ID: This is an auto generated ID by which the request can be identified
Status: The request goes through different stages. The stage that the request is will be displayed here. The different stages of the request: -
- Unverified: The customer is yet to verify the request. A verification link is sent to the customer once their request is submitted. However, verification emails can be sent to customers by clicking the Send Verification Email button below in case the customer has not yet verified their request.
- New: Once the request has been verified the status of the request changes to New
- In validation: The request is presently being validated by the DSAR Validator
- Need additional information: The information provided by the customer is insufficient and additional information is required from the customer. An email will need to be sent to the customer in this case from the Validate Request Tab
- In process: The request is presently being processed by the DSAR Processor
- Rejected: If the information provided by the customer even after seeking additional information cannot be matched with the information present in the company database, the request is rejected.
- Closed: If the email ID is not verified within given TAT (as defined by the DSAR Config) or additional information requested is not submitted within timeline, the request is closed.
- Completed: The request has been successfully completed.
Summary: Click on history to get all the information on the request to date

Due In: The due in date is configured on the Flow tab, on the DSAR Configuration page.
Assigned to: Select a user who will oversee the entire processing of the request.
Priority: Set the priority of the request
Automate: Click on automate to enable the entire processing of the request to be automated.
Closed: Tick this box if the request is to be considered closed. Provide the reason for closure in the field that appears if the box is ticked.
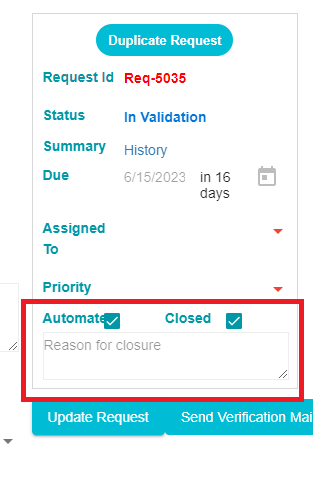
Update Request: Click this button to save any changes made above.
Send Verification Mail: A verification link is sent to the customer once their request is submitted. However, verification emails can be sent to customers by clicking this button in case the customer has not yet verified their request. Once a request has been verified, this option will disappear.
The Validate Request Tab
This is the second stage of responding to a request. Here, the request is validated. This is done by checking whether the requestor's details are in fact stored with the company, rendering the request valid. An action item is created and assigned to a DSAR Validator along with a key value (A key value is any value which can be used to identify a customer's information within the company database). The DSAR Validator uses the key value to search for customers information within the company database. If the customer's information within the database matches the information provided via the form, then the request is valid.
For example, Last transaction amount can be used as a key. On the form, the customer will be asked to fill in their last transaction amount. The DSAR Validator will receive an email asking him to check the Last Transaction Amount of the customer within the company database. If the Last Transaction Amount provided by the customer and the Last Transaction Amount obtained by the DSAR Validator from the company database are the same, then the Match Found option is selected. In this manner requests can be validated.
To validate a request, follow these steps: -
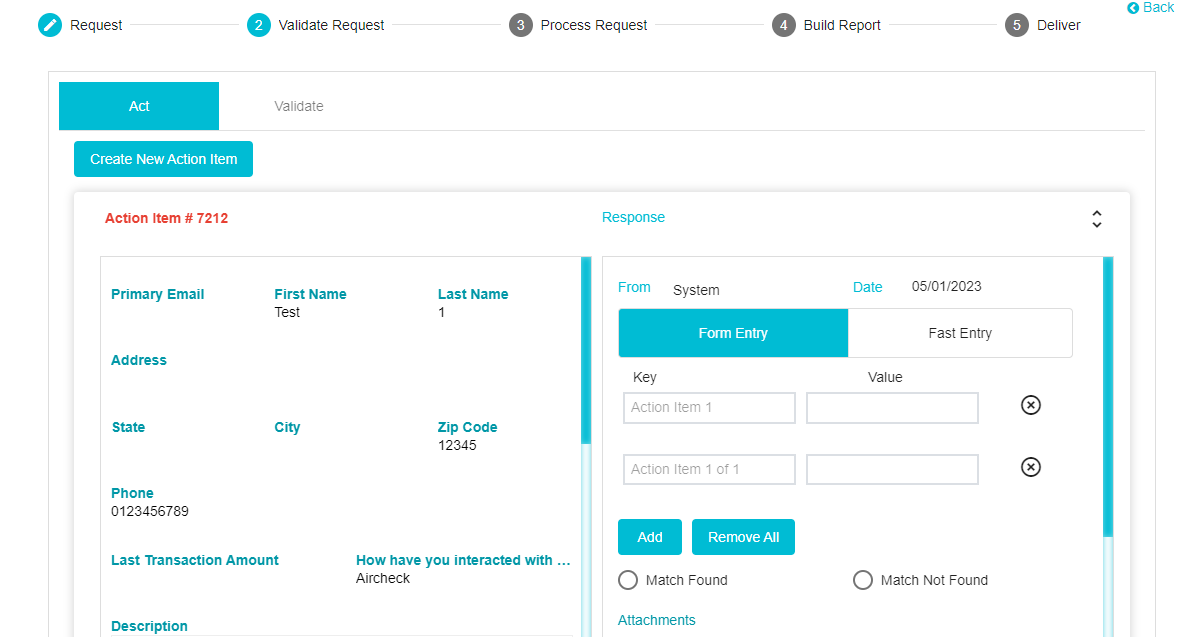
Click Create New Action Item. The action items here can be configured on the Flow tab of the DSAR Configuration page. Multiple action items can be created depending on the requirements. In some cases, requests will need to be validated from multiple systems/departments or by multiple users. Or in other cases, when requests are submitted by agents, the agents may have to be validated. In such cases, multiple action items can be configured.
Each Action Item created when the user clicks on the button can be configured differently to meet different requirements.
The requestor details can be seen on the left side pane, while the DSAR Validator response can be seen on the right-side pane.

Depending on the status of the action item, it will appear in a different colour. If the Action Item has been configured but not sent to the DSAR Validator, it will appear in red

If it has been sent to the DSAR Validator and the response is pending, it will appear in yellow. If the DSAR Validator has responded, it will appear in green

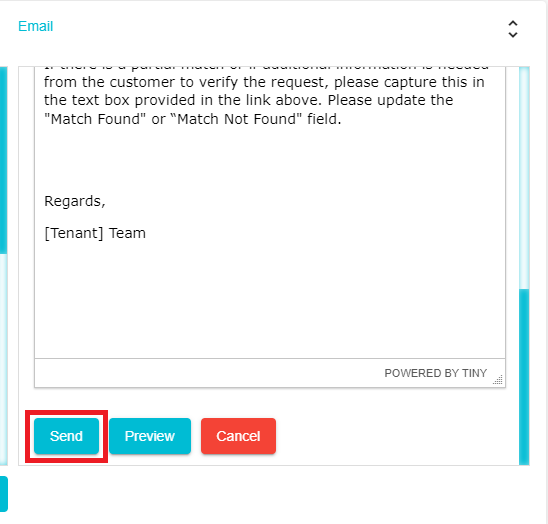
Click Send to configure the email to be sent to the DSAR Validator.
Once the Send button is clicked, the right-side pane will display the email configuration for the email to be sent to the DSAR Validator.
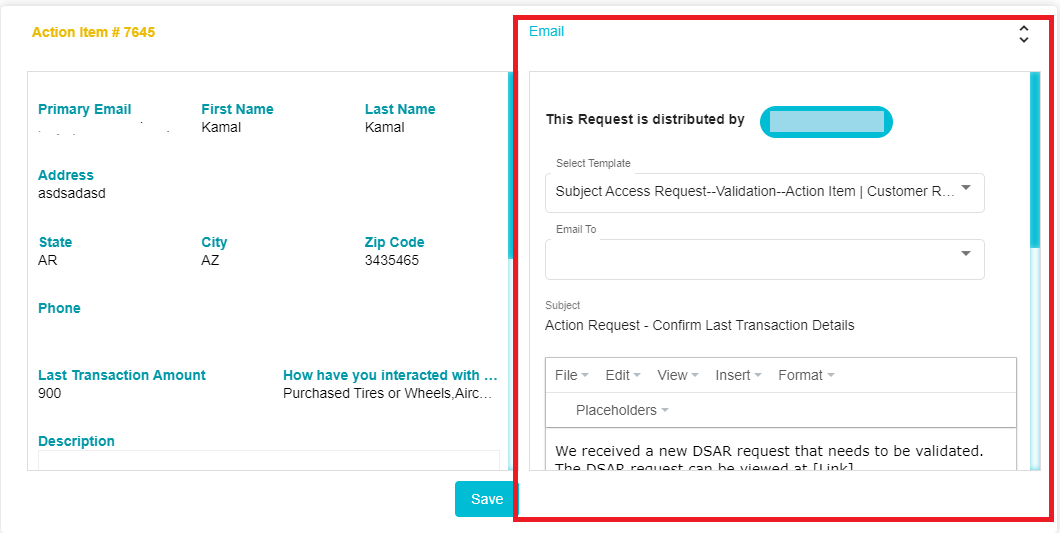 Here you can select the user/s to whom the email should be sent.
This person/s will in turn validate the request. You can also select
and edit the email to be sent to them.
Here you can select the user/s to whom the email should be sent.
This person/s will in turn validate the request. You can also select
and edit the email to be sent to them.Once the email has been configured, scroll down and click Send
The DSAR Validator will receive the email with a link to access the Action Item. Alternatively, the Action Items assigned to users can be viewed on their respective dashboards.
Once the DSAR Validator clicks on the link received on their email, they will be redirected to the Data Governance Tool where they will have to sign in if they are not currently signed in.
Once signed in, the Action Item will be visible to them
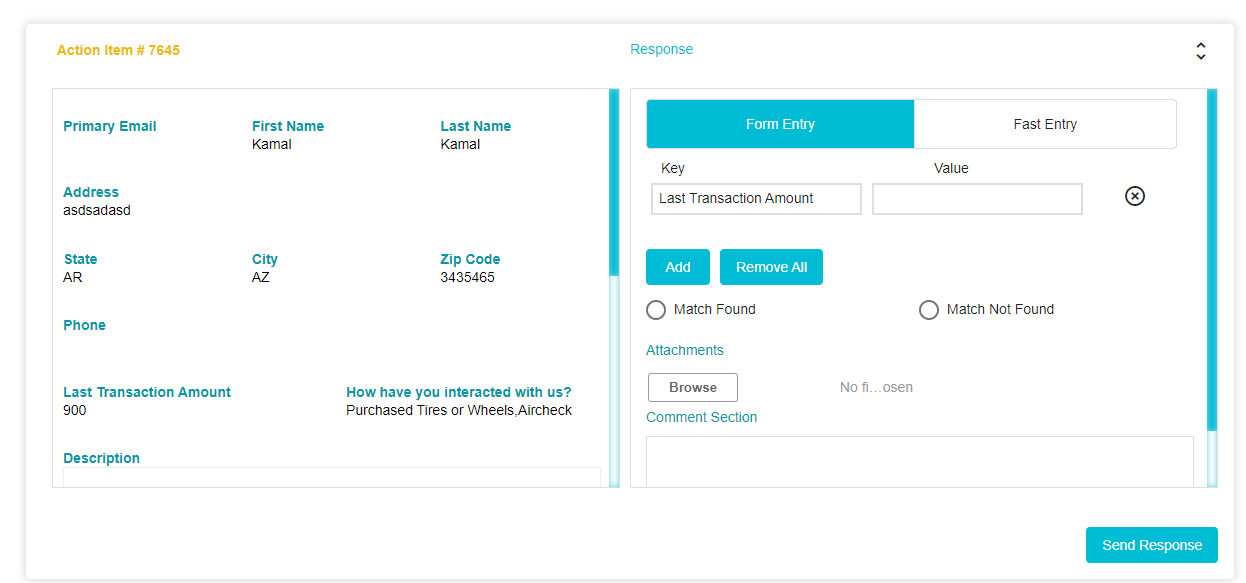
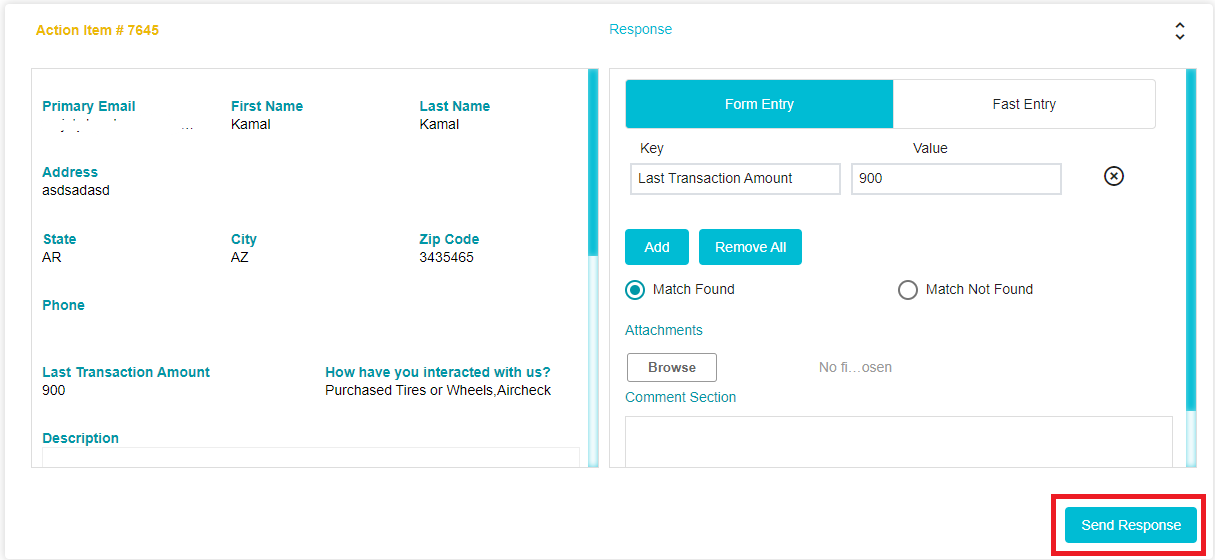
In this case, the Key Value in the email (as was specified in the selected email template) is the Last Transaction Amount.
The DSAR Validator can use this key to check the details of the customer against the company database. If the information provided by the customer and the information found in the database are a match (in this case if the last transaction amount stated by the customer and the last transaction amount of the customer found within the company database are the same) then this request can be considered valid.
The DSAR Validator will then have to enter the value found within the company database in the Value field. Multiple keys can be added for further verification if needed.
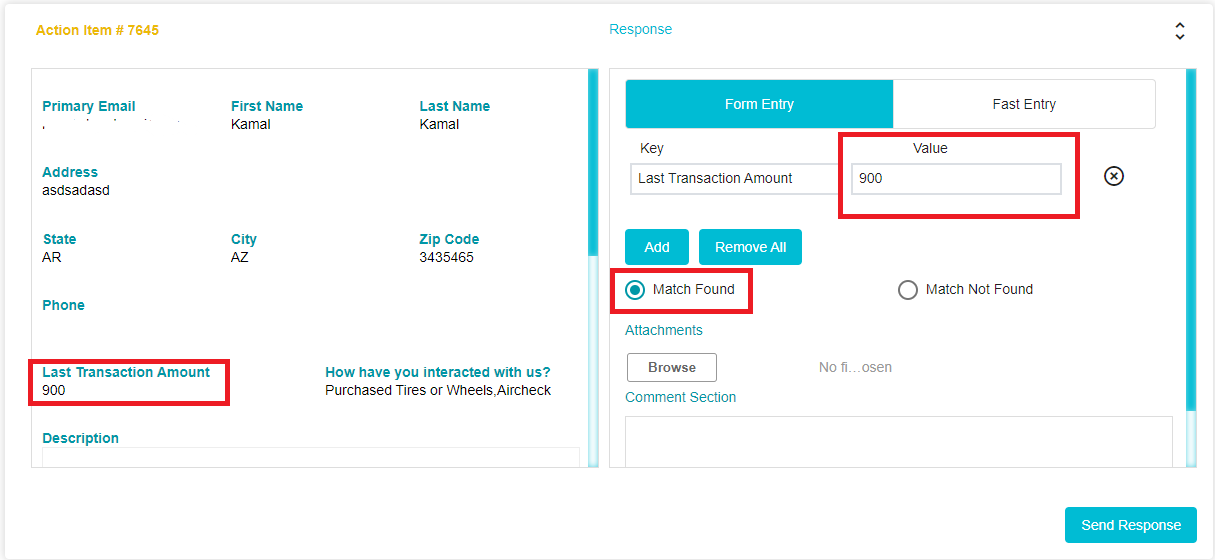
If the two values are a match, the DSAR Validator will click on Match found. In the example given below, the information provided by the customer and the information found by the DSAR Validator are a match. Hence Match Found has been selected
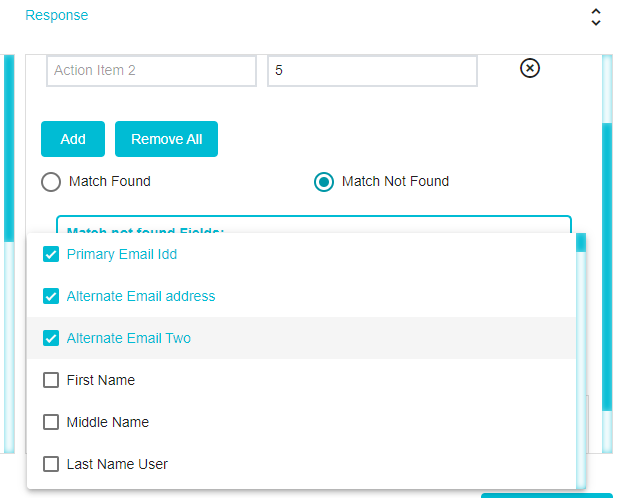
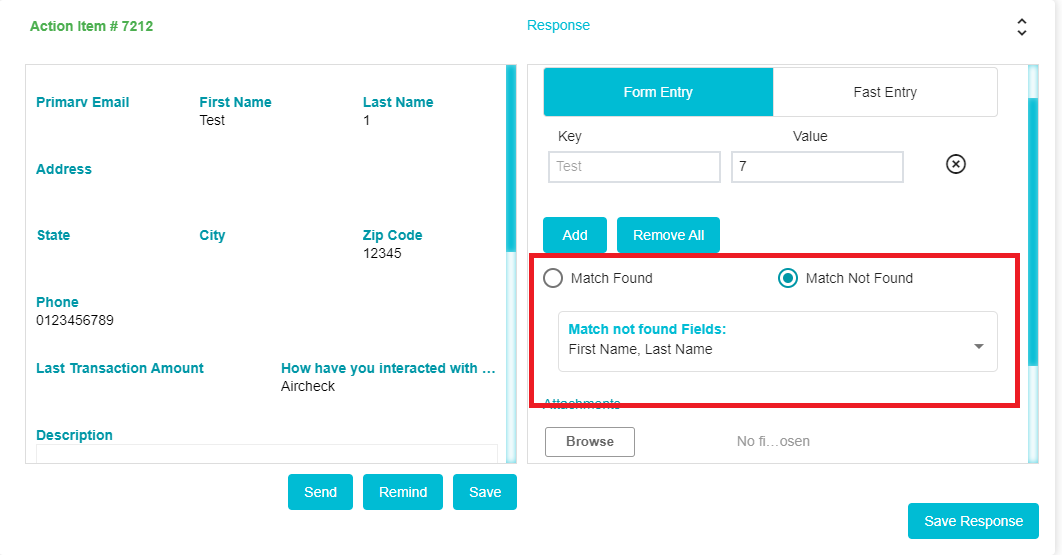
If the information was not a match or the customer's information was not found within the database, then the DSAR Validator will click on Match Not Found.
On clicking Match Not Found, a drop-down will appear. From here the DSAR Validator can select all the types of information that will be required from the customer in order to process the request.
Attachments and comments can be added if needed to provide more clarity to the Action Item.
Note: DSAR Validators can upload attachments for the following file types .csv, .doc, .docx, .gif, .jpeg, .jpg, .json, .pdf, .png, .ppt, .svg, .txt, .xls, .xlsx, .xml. The file size should be greater than 0 Kb & it should not be exceed 10 MB.
Click Fast Entry to manually type in the details of the customer. The details typed in under Fast Entry can be used as data for the Key and Value fields
Once the Validation is done, the DSAR Validator will click Send Response.
Once the Response has been sent, the following message will appear on the screen of the DSAR Validator

Once the response has been submitted. The response will be visible on the Validate Request Tab. Click Save Response to update the response to the request flow
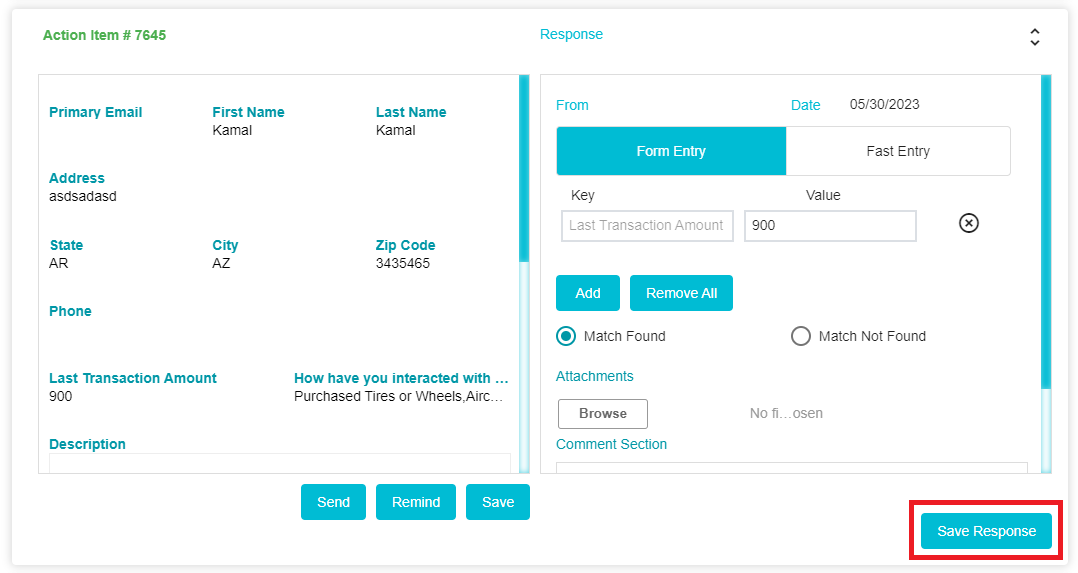
However, if Match Not Found was selected by the DSAR Validator, then additional information may be required from the customer. If the additional information required has been provided by the DSAR Validator, then the same will be visible here. An email for additional information will need to be sent to the customer.
Any communication with the customer can be done from the Validate section of the Validate Request Tab
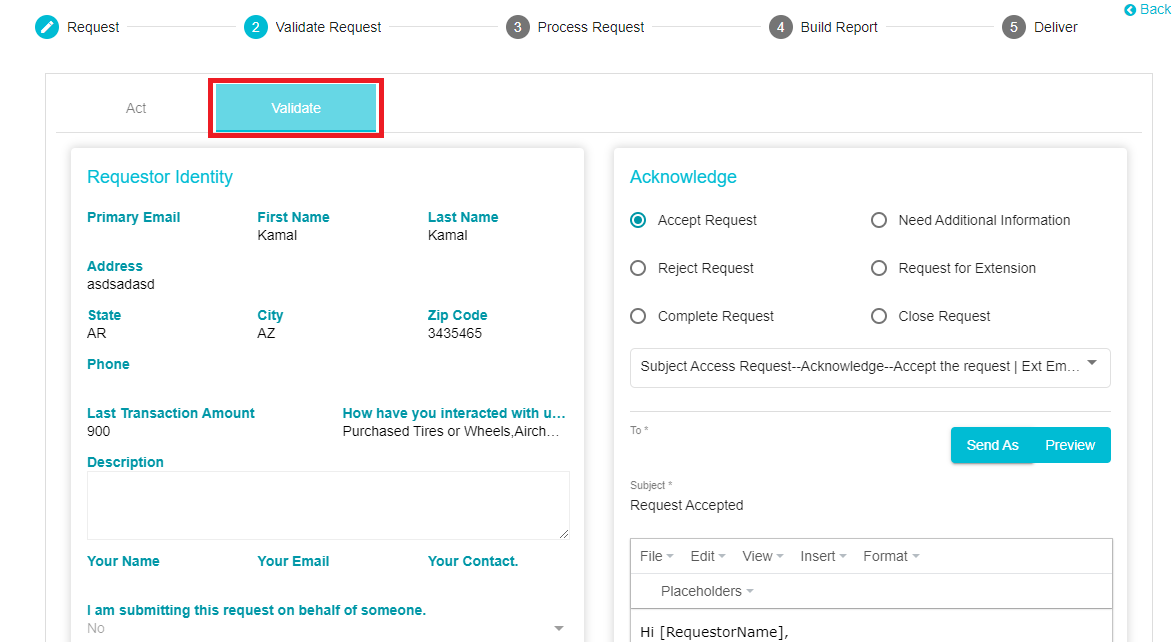
Here, you can select the purpose of your communication with the customer. On clicking a purpose type, a pre-defined email template gets selected. With this, you can email a customer asking for additional information, to inform the customer that the request has been completed and so forth.
In the example below, the purpose for communication is a Request for Extension. Accordingly, a template that conveys the same will be selected and this template can be previewed and edited.
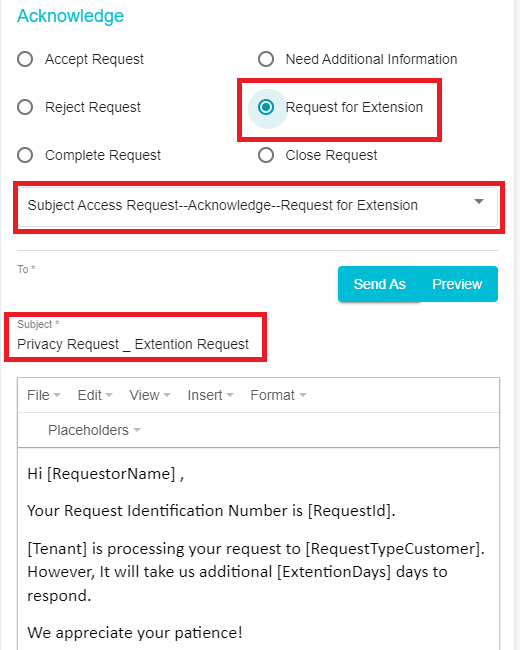
Once the email configuration is done, Click Send As
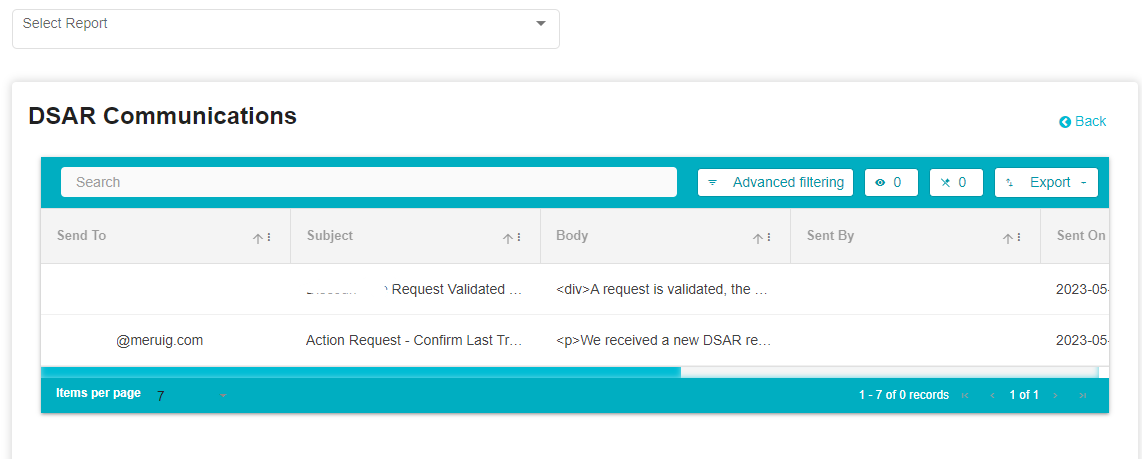
To view the past communications of this request, scroll down to Communications and click on the link. You will be redirected to the Reports module where you can access all the past communications of this request.
The Process Request Tab
This is the third stage of responding to a request. Here, action items are created against Systems which will be affected by the request. For example, if a request comes in to delete data. The date to be deleted is stored in the System -- TestSystem001. Then action item will be created against this system and assigned to a user (DSAR Processor) associated with that System. The user, on receiving the Action Item, the user will then perform the function according to the requirements of the request.
To process a request, follow these steps: -
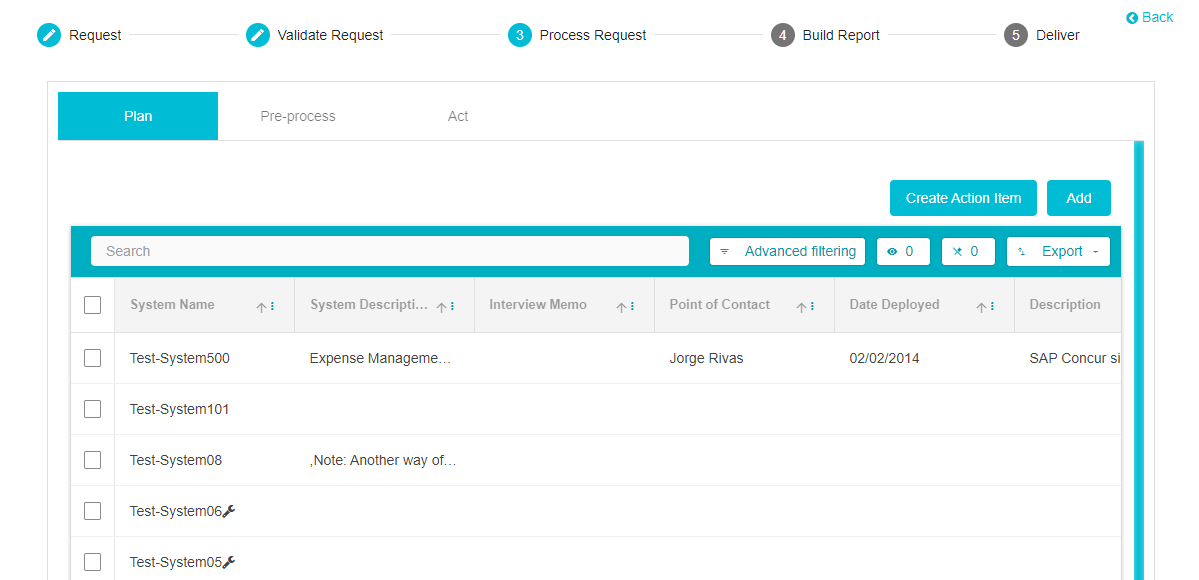
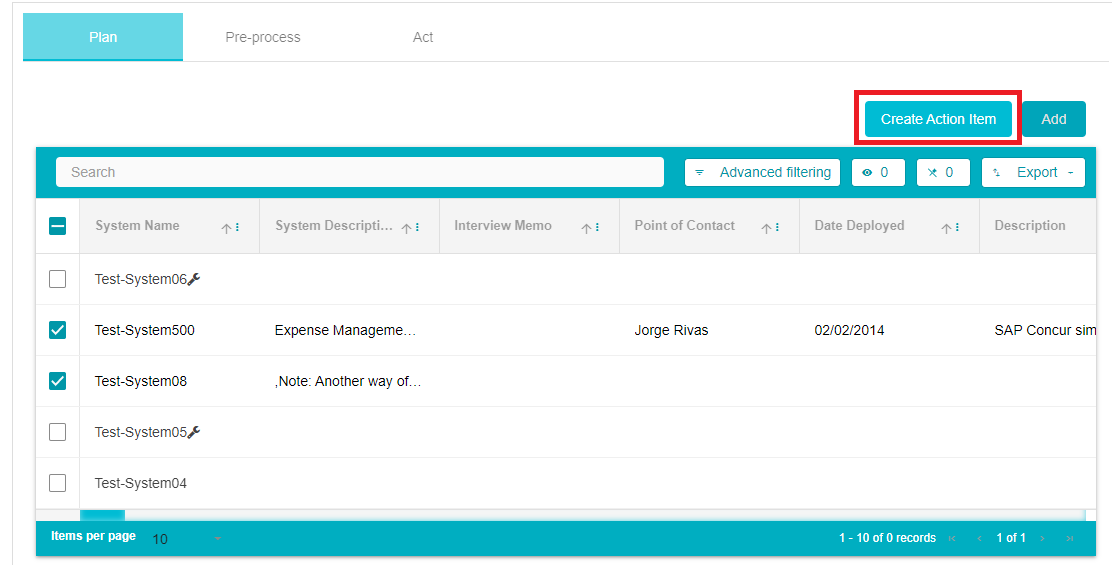
From the Plan Section, select the Systems associated with the request. Here, depending on the configuration made on the DSAR Configuration page, a list of systems will be provided here. Click on the System/s associated with this particular response and then click Create Action Item.
On clicking Create Action Item, you will be redirected to the Act Section. Here you can configure the Action Item to be sent to the DSAR Processor. An email will be sent to the DSAR Processor with a link to the Action Item. The template of the email and the users to whom the email should be sent can be selected here. You can choose to attach the request details if needed.
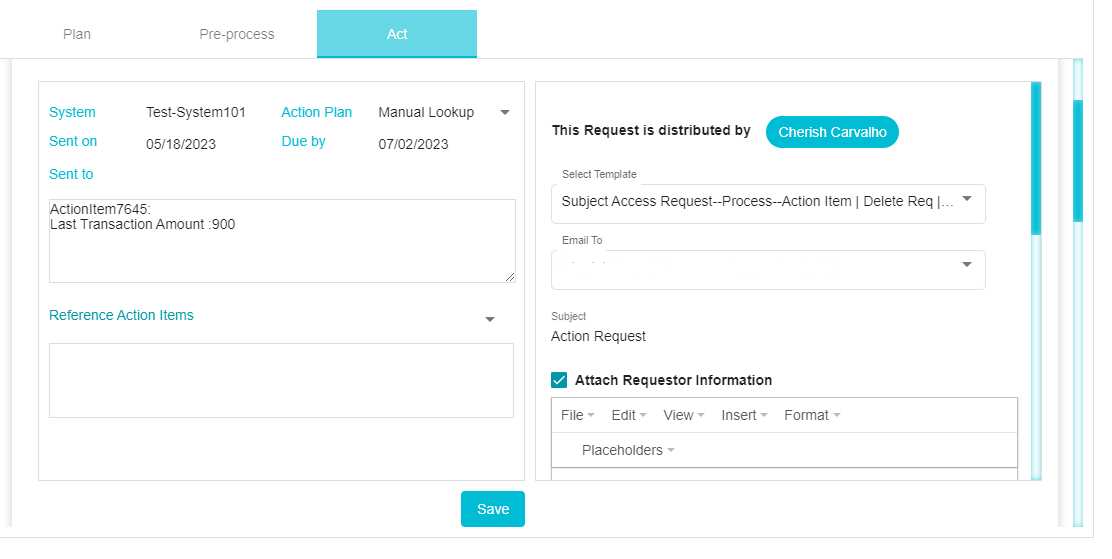
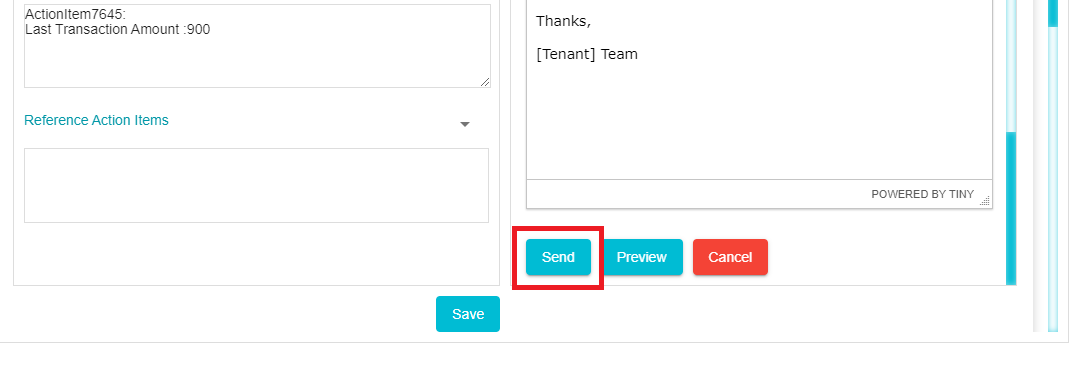
Once the email configuration is done, scroll down to click on Send
The DSAR Processor will then complete the function stated in the Action Item. The email will also provide a link wherein the DSAR Processor can attach reports (in the same of Summarized Categories of Information and Copy of Information) and provide comments as required.
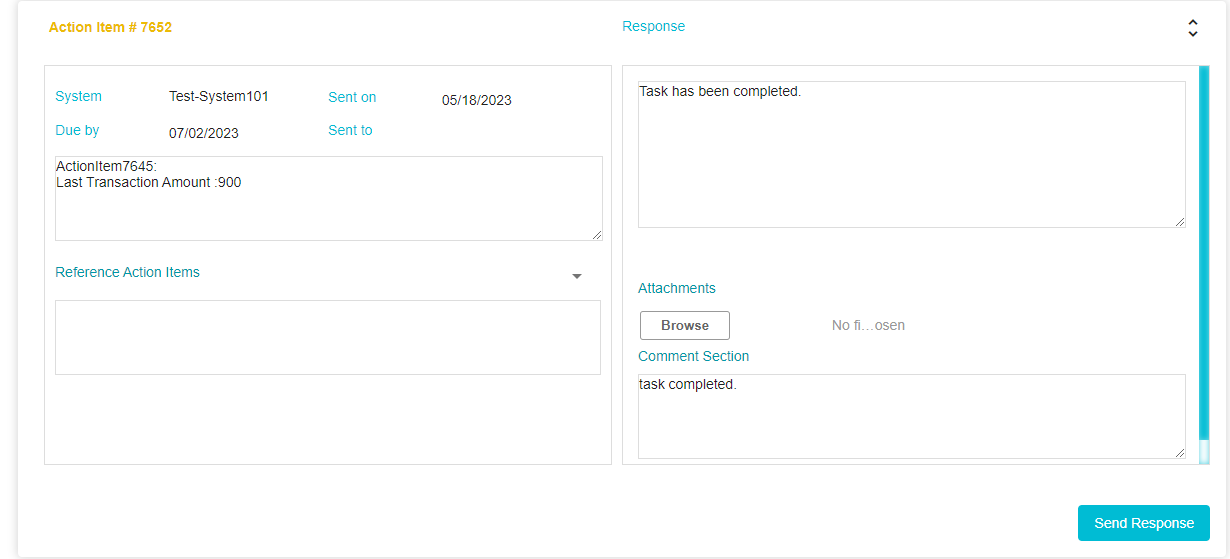
Note: DSAR Processors can, upload attachments for the following file types .csv, .doc, .docx, .gif, .jpeg, .jpg, .json, .pdf, .png, .ppt, .svg, .txt, .xls, .xlsx, .xml. The file size should be greater than 0 Kb & it should not be exceed 10 MB.
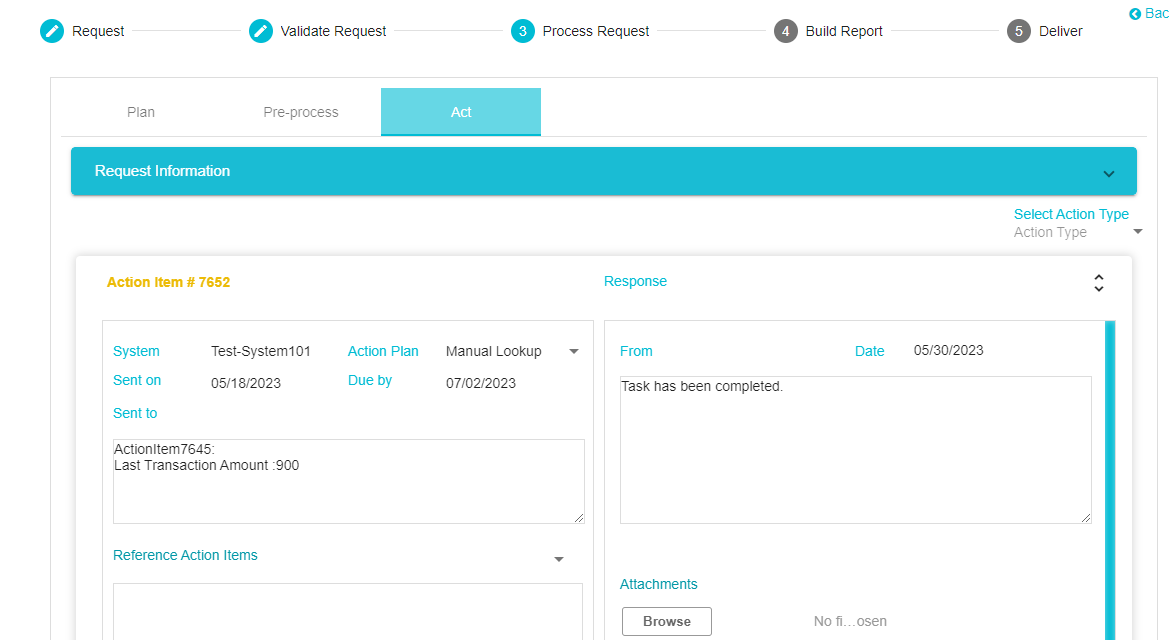
Once the DSAR Processor has created the response, they can click Send Response
The response will be visible on the Process Request Tab. If the DSAR Processor has attached a report, download the file so that it can be attached to the final report to be sent to the customer.
Now that the request has been processed, intimation of the same can be sent to the customer from the Validate Section of the Validate Request Tab.
Note: AutoSave applies to both DSAR Validators and DSAR Processors when responding to Action Items. In other words, If a Validator and/or Processor is responding to an action Item and have not hit the Send Response button, their response is stored as a draft until they submit it. If they leave the page and then later open the same Action Item, they can see the old values previously entered.
The Build Report Tab
Reports can be sent to the customers in 2 cases; if the request was Summarized Categories of Information or Copy of Information. In both these cases, the attachments would have been provided in the previous stage by the DSAR Processor. These attachments can be downloaded and uploaded here as part of the complete report to be sent to the customer.
To build a report, follow these steps: -
On the Build Report tab, scroll down to Report Attachments
Here, click on Choose Files

From your device, select the file provided by the DSAR Processor. If this file has not been downloaded to your device, you can access and download the same from the Process Request Tab. Multiple files can be selected here.
If the following file types are added - excel, csv, json, xml, they can be edited and configured on the tool as per the requirements of the user. To do this, select the file from the device.
When you click on the Pull Action Item Attachments it will be bringing all the action item attachments associated with the request.
If the following file types are added - excel, csv, json, xml, they can be edited and configured on the tool as per the requirements of the user. To do this, select the file from the device and then click Build Report. Once the file has been saved, click on the settings button next to that file which should now be available under attachments

A screen will open allowing you to configure how you want the excel to appear in your final report. You can select which columns you want to exclude, change the display name of columns and map the sheet to an existing configuration if the two are of the same file format

Once the configuration has been done, click Save.
Once the report is ready you can click on the Approve button then only you can be able to zip and deliver it to the customer.

To deliver the report, click on the Deliver tab
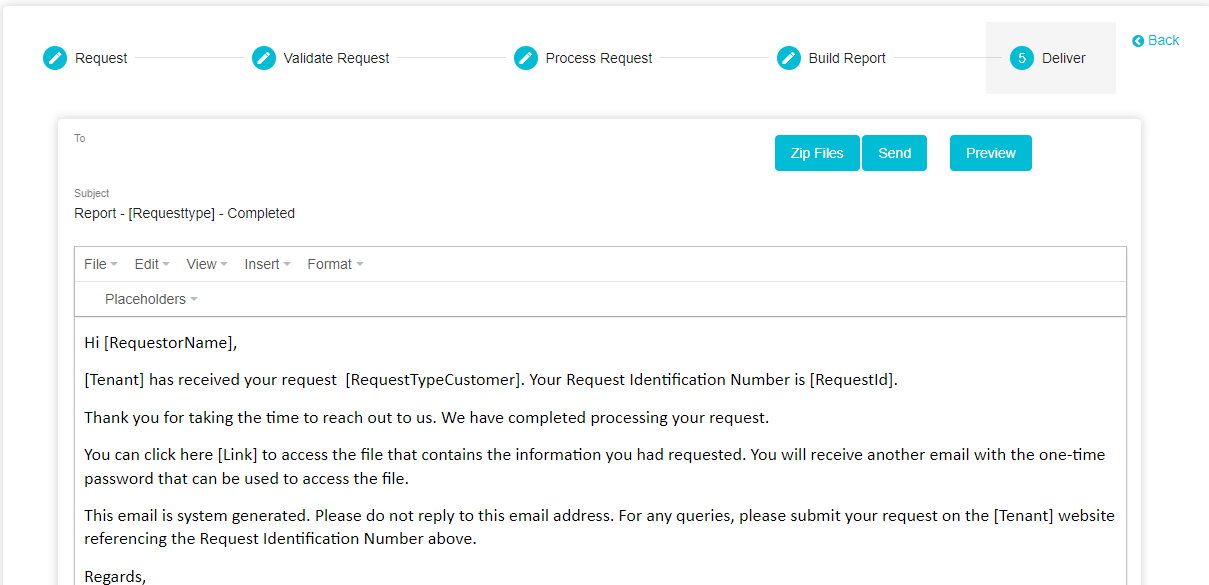
The Deliver Tab
In the final stage of the request, you can configure the email to be
sent to the customer with the attachment of their data that they
requested. The customer will receive two emails. One with a link to the
Data Governance Tool from where they can download their data and the
other with the password required to download their data from the Tool.
To deliver the report, follow these steps: -
Ensure the files have been attached and saved on the Build Report Tab
On the Deliver Tab, you can view the email to be sent to the customer. You can edit the email if needed.
Click on Zip Files to create a single, password protected zip file containing the different files to be sent to the customer.
The complete zip file can be viewed at the bottom of the screen along with the password required to access the files.

The contents of the zip file can be viewed under attachments. Here the User can get an overview of all the files that will be included in the final zip file.

You can view the final zip file by clicking on Report.zip
The final zip file will be downloaded to your device. Here you can make edits if necessary. Once an edit has been made, the file will need to be encrypted again with the same password and then uploaded by clicking on Choose File.
If edits have been made, choose the edited and the encrypted zip file from your device and then click on Replace Final Report.
 The edited zip file will now be attached to the email instead of the
previous unedited version.
The edited zip file will now be attached to the email instead of the
previous unedited version.Once the final report has been configured, click Send to send the email to the customer.