BulkExport
Overview
The Bulk Export feature for Remote Grid data streamlines the process of exporting large datasets by enabling users to download multiple records in a single action. This eliminates the need for repetitive, manual downloads of individual entries, significantly improving efficiency, and user experience.
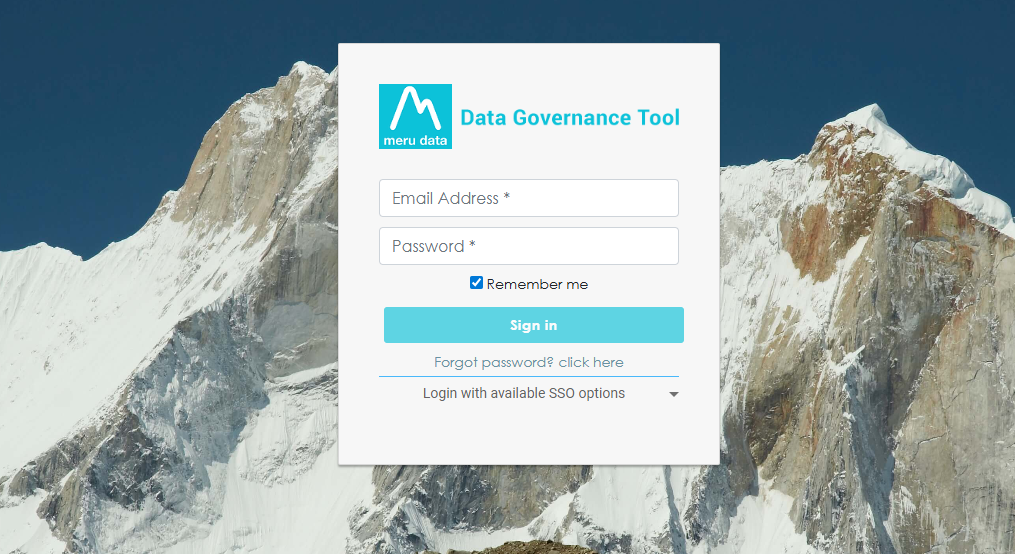
1. Logging In
Login to the Data Governance Tool by entering your credentials.
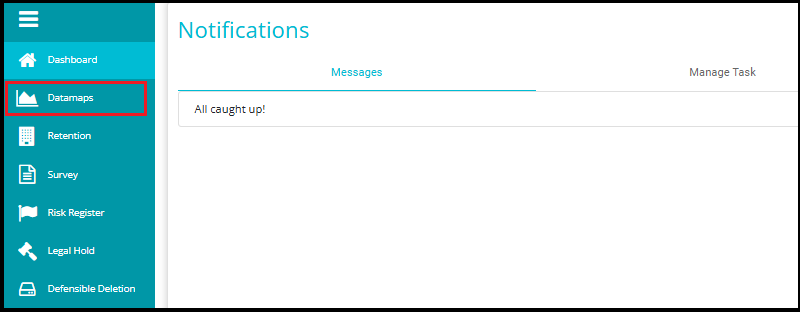
2. Navigating to Datamap Module
Click on the hamburger icon
 on the top left corner.
 Click on 'Datamap module' from the menu.
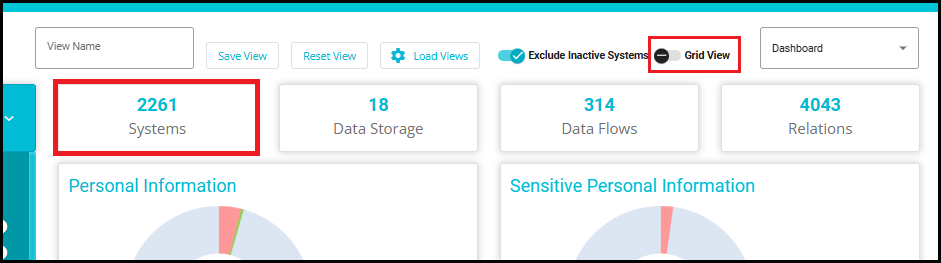
3. Navigating to Grid View
Click the "Grid View" toggle to switch from the current view to the grid layout.
Or simply click on "Systems", which will directly take you to the same Grid View layout.
4. Select Systems
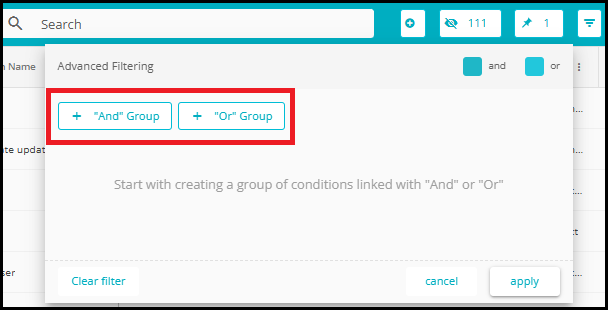
- Use the search bar or advanced filter icon to apply filters.
This step is essential because:
Gives users more control over what data is exported.
Reduces unnecessary data in export files.
Supports custom export needs for different workflows.
Generate a refined list of systems matching your criteria.

- From the pop-up box that opens, enter your filter configuration.
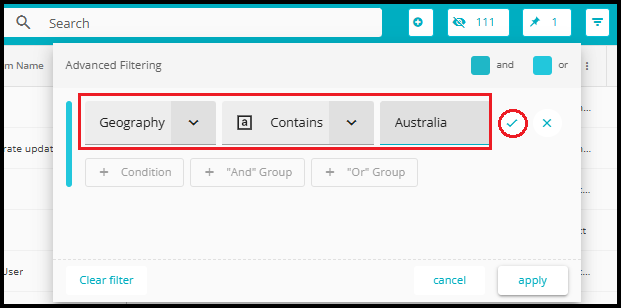
The above filter has been configured to obtain all the systems that have Australia as the value in the geography field.
Click "Apply" to apply just the current filter condition.
Click the tick symbol (✔) to add more filters or groups before applying them all together.
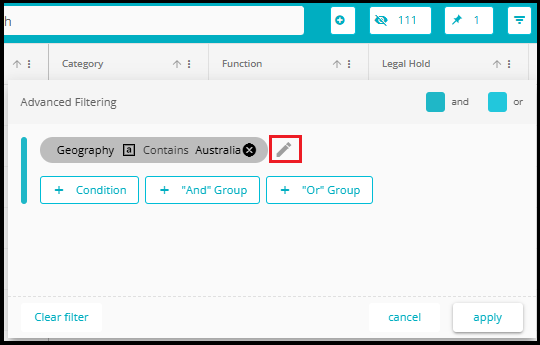
- In the Advanced Filtering interface, if you want to change or modify an existing condition (e.g., Geography Contains Australia), you can do so by clicking the edit symbol next to the condition. This allows you to update the column, filter, or value as needed.
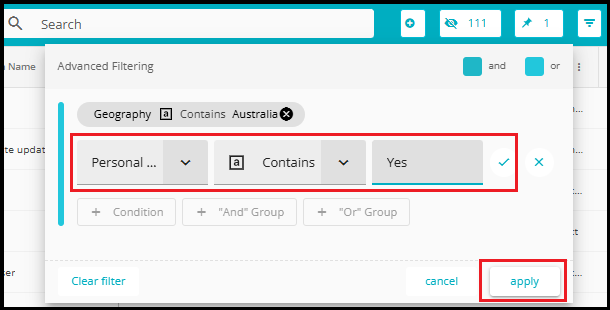
- Now the configuration will filter the results further and only provide the systems with Australia as the value in the geography field and which have the value Yes in the Personal Information field. In a similar way, the systems can be filtered to bring the desired results.

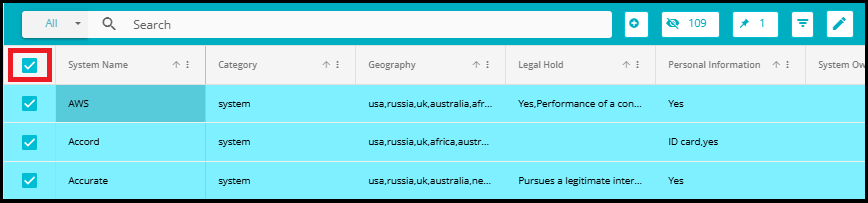
- To select all filtered systems at once, click the checkbox in the header row next to the System Name column---this selects all visible entries without needing to click each one individually.
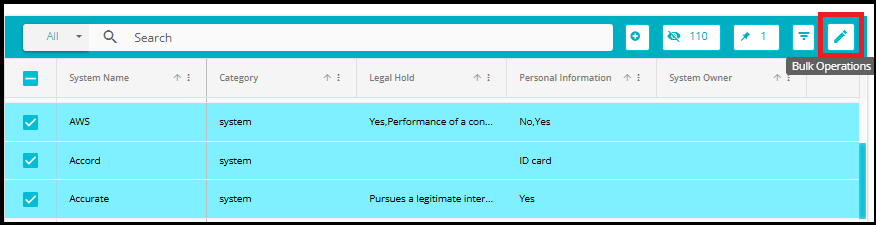
5. Click "Bulk Operations"
- After selecting the systems, locate and click the Bulk Operations button.
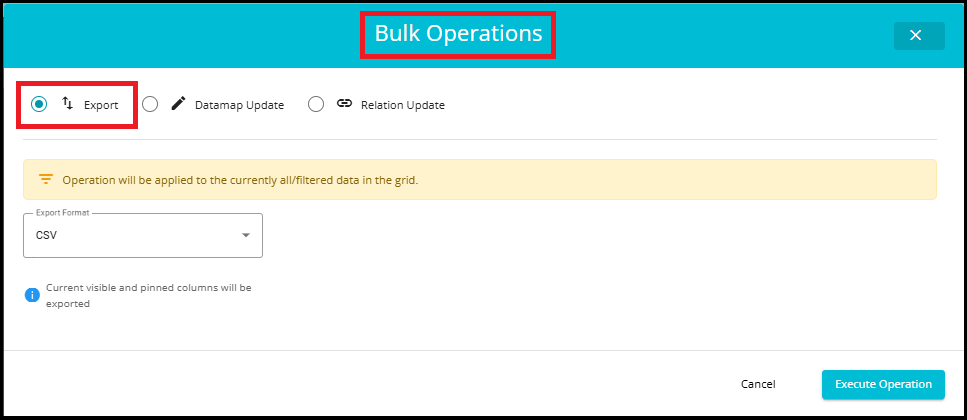
6. Select "Export"
A pop‑up window will appear with multiple operation types.
Select the Export option.
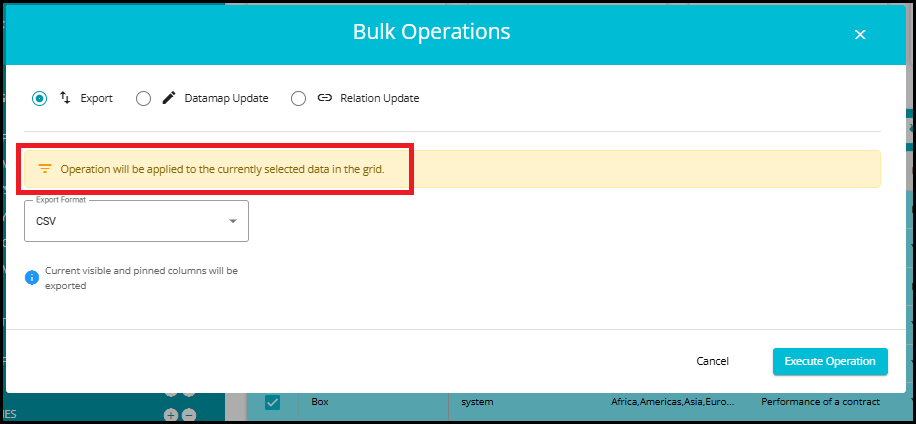
- When opening Bulk Operations, the system displays different messages depending on whether you have selected any systems in the grid.
1. When some systems are selected
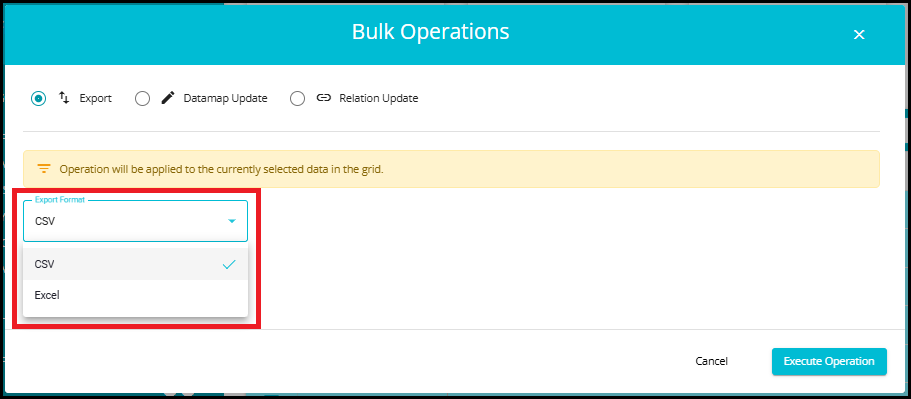
- If you select specific systems and then click Bulk Operations, you will see the message: "Operation will be applied to the currently selected data in the grid."
This means:
Only the systems you manually selected will be exported.
Ideal when you want to export/update only targeted entries.
2. When NO systems are selected
If you directly click on Bulk Operations without selecting any systems, you will see the message: "Operation will be applied to the currently all/filtered data in the grid."
This means:
All data currently visible after applying filters will be included.
It does not depend on manual selection.
Useful when exporting large sets of filtered data at once.
3. If NO filters are applied
If you do not apply any filters and directly click Bulk Operations → Select Export Format → Execute Operation, then:
All systems in the grid will be exported.
For example, if the grid contains 2319 systems, then all 2319 systems will be included in the export file.
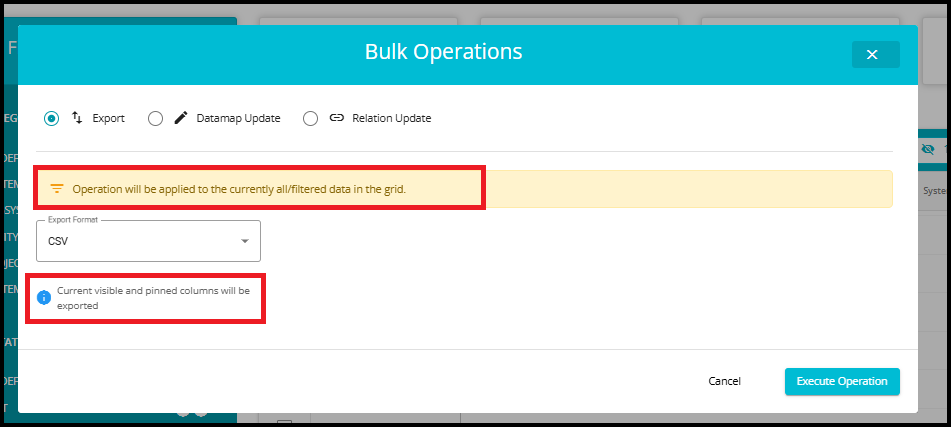
7. Choose File Format
A dropdown menu will appear with options such as Excel and CSV.
Click on your preferred format.
- Click on Execute Operation to start the export process.
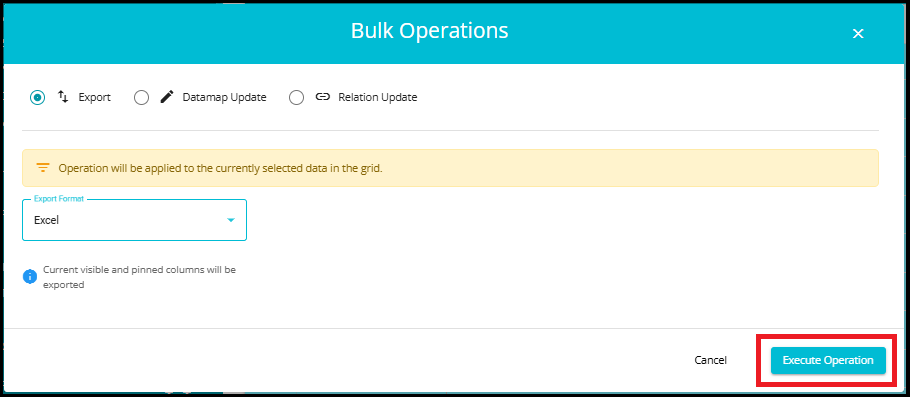
- After clicking Execute Operation, a confirmation message will appear at the bottom of the page: "Request Queued Successfully, you will be notified shortly."

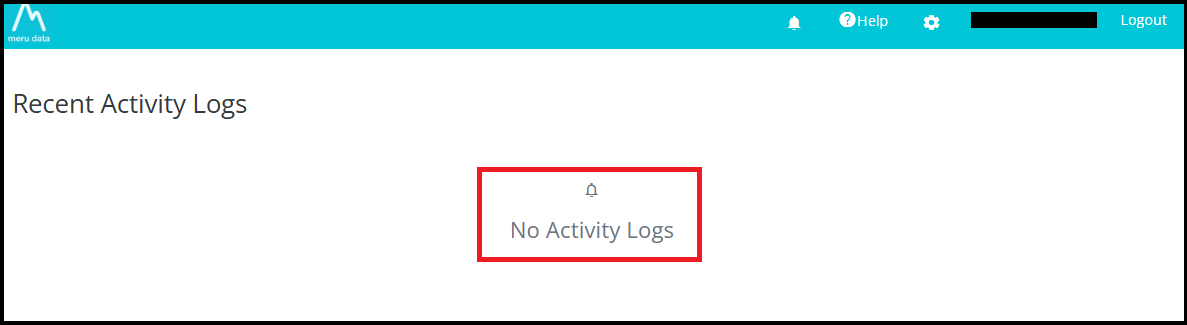
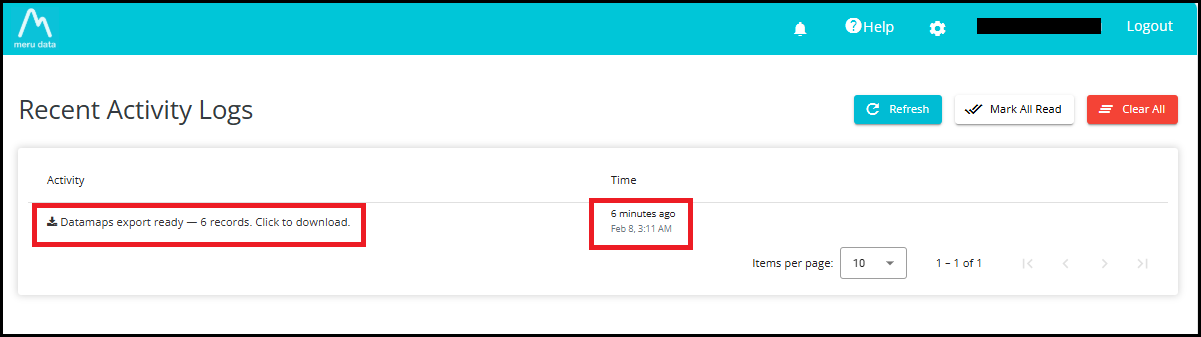
8. Click on "Activity Logs"
Once the export request is queued, you will receive a notification in the Activity Logs section.
A red indicator with a number inside it, appears on the notification bell icon at the top of the screen, showing that a new activity update is available.

9. Downloading the Exported File
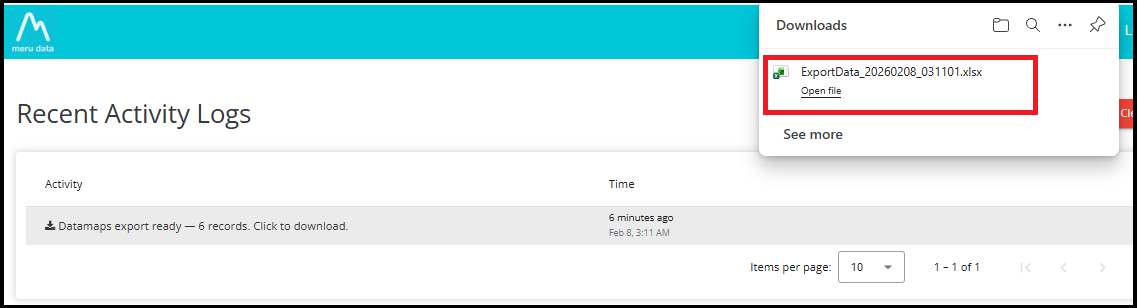
In the Activity Logs section, you will see an entry showing that the export is ready.
Click on "Datamaps export ready --- x records. Click to download." To download your file.
The Time column displays exactly when your export or bulk relation update was completed.
- Once clicked, the file will begin downloading automatically to your system. The downloaded file will appear in your browser's Downloads panel, saved in the file format you selected earlier (Excel or CSV).
The Activity Logs page provides three important control buttons---Refresh, Mark All Read, and Clear All---to help you manage your notifications efficiently.
1. Refresh
The Refresh button reloads the Activity Logs list. Use this when:
You have recently performed an operation (like Export)
You want to check if a new log entry has arrived
You want to ensure the latest status is displayed without leaving the page
Example: If you have just triggered a bulk export, the Activity Logs page may not immediately show the new entry. By clicking the Refresh button, the list updates to display the latest status---for instance:
"Datamaps export ready --- 6 records. Click to download."
2. Mark All Read
The Mark All Read button changes the status of all notifications from Unread to Read.
Unread notifications normally show a red indicator on the bell icon
After clicking Mark All Read, the indicator disappears
This helps you keep track of which updates you have already reviewed
Example: If the bell icon shows 1 new notification, clicking Mark All Read will remove the red badge, indicating there are no pending unread messages.
3. Clear All
The Clear All button deletes all activity log entries from the list.
Use this when you want to clean up old notifications
It removes every log entry displayed on the Activity Logs page
Be cautious---this action cannot be undone
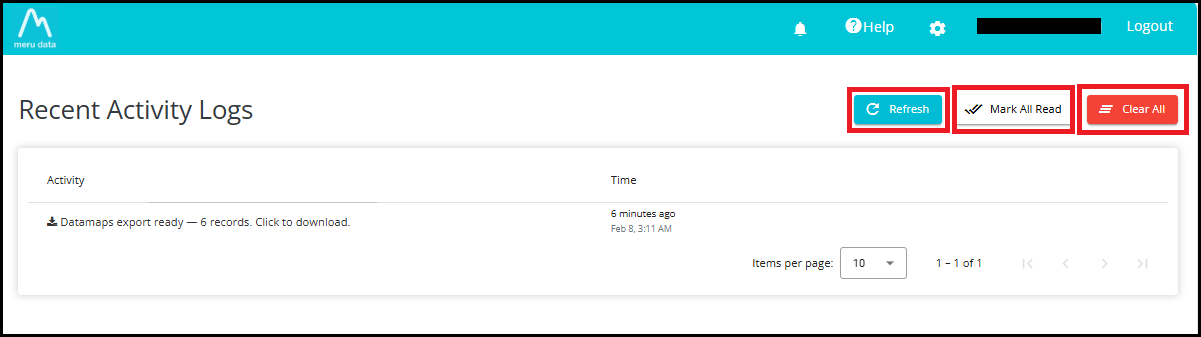
Example: If your list shows older entries like multiple "processing completed successfully" logs, clicking Clear All will wipe the entire history, leaving the page empty.