Defensible Deletion
This article will acquaint you with the process of Defensible Deletion, which is the monitoring and management of files saved across various document stores such as OneDrive, SharePoint, hard drives, etc. With Data Governance Tool, the files saved on document stores can be labeled, deleted, copied, managed, and categorized.
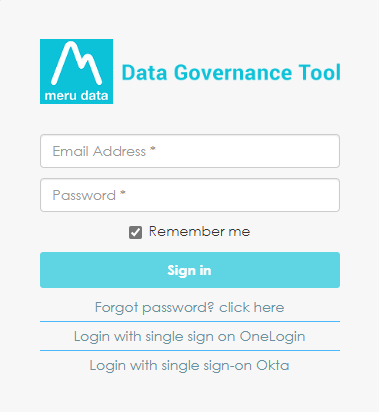
Log in to the Data Governance Tool with your user ID and password
Once logged in, you will be viewing the Home Page of the Data Governance Tool
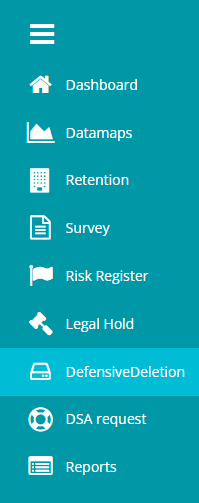
Click on the hamburger button
 on the top left corner of the screen to view the Data Governance Tool Main Menu
From the Main Menu, select Defensive Deletion
The Defensive Deletion page will display all existing Defensive Deletion plans

To create a new Plan, click on the Add icon
 on the blue bar at the top of the screen
The Defensible Deletion Plan Creation page will appear
Type in the name of the Plan as required
Then select the System Name from the drop-down menu that appears. This list includes the names of document stores which hold various documents and folders. You can select more than one System Name.
Within the selected system, click on the
 to select the Sub Systems. You can select more than one sub system.
Next, under ‘Search Location’ type in the location within the specified System that you want to search. For example, within the System Hard Drive, if you want to locate a file in C Drive, type in ‘C Drive’ in the dialogue box.

Similarly, type in the name of the location you want excluded from the search in the ‘Exclude Location’ dialogue box

To further filter the search, you can add a Boolean ‘And’or ‘Or’ condition. The ‘And’ condition filters the information by considering each filter condition at a time, while the ‘Or’ condition satisfies all filter conditions at once.

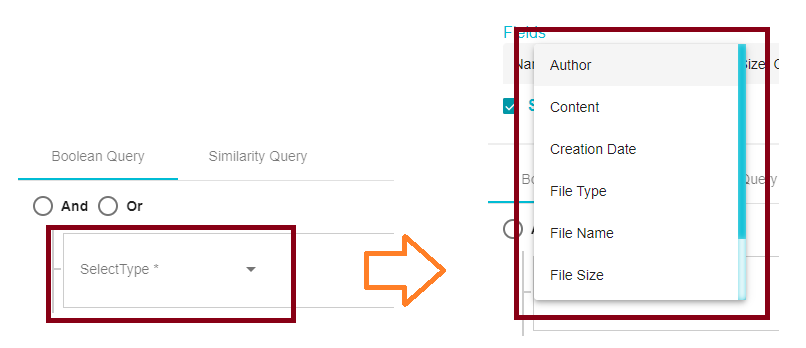
Under ‘Select Type’, you can select the attribute of a file based on which you want to conduct the search, like the content, author, file size, etc.
Here, you can specify the conditions for applying the filters

Another method to filter the search is with the ‘Similarity Query’. Here, you can type in keywords or the names of the files with similar titles

With the help of the ‘Relevance Score Cut-Off', you can select the extent to which the file that you’re searching for should match the name of the Class Type entered above. If a higher score is selected on the scale, the match to the Class type title will be stronger, a lower score will result in a weaker match to the Class Type.

Next, you can select the action you want to take on the selected file.
Click on select under ‘Act on’ and choose the action you want to take from the drop-down menu. For example, if the action you want to take on the selected file is to label it as Sensitive, select ‘Sensitivity Label’ from the menu.

Once the action has been selected, click on ‘Save’
 at the bottom right of the screen.
To view graphs of the details of the Plan created, click on the required file from the Plan List.

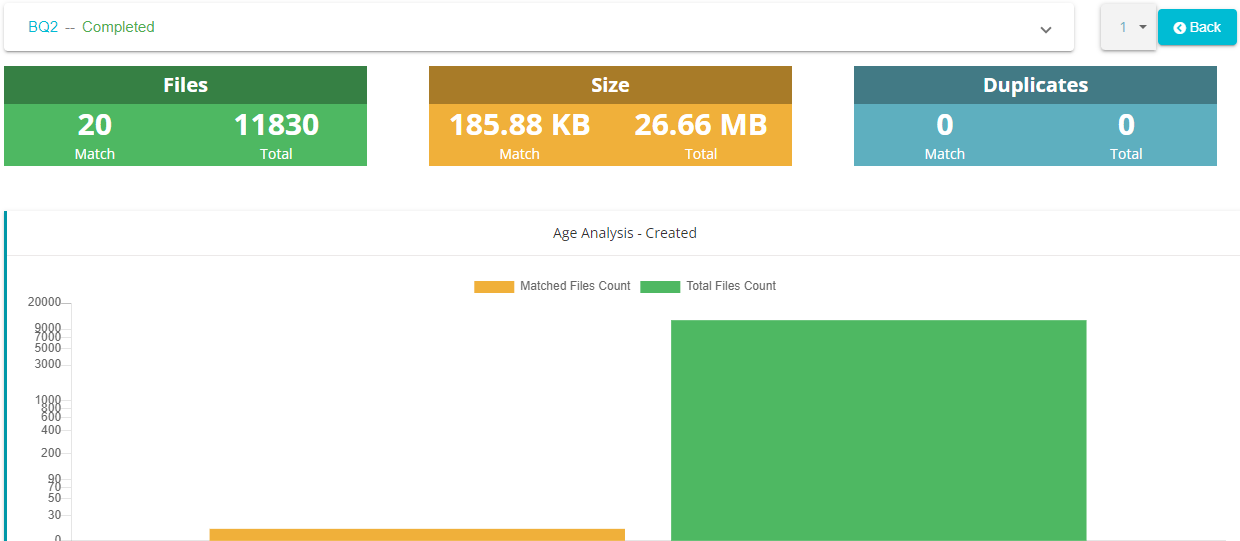
The graphs of the Plan are displayed here